Hyppää sisältöön

Opastusta alkuun pääsemiseksi

Help

Meillä on yhteisön keskustelualusta keskustellaksemme kysymyksistäsi, epäilyistäsi ja ideoistasi. Älä epäröi tarkistaa sitä.

Tee itsellesi QFieldCloud tili

Työaseman valmistelu

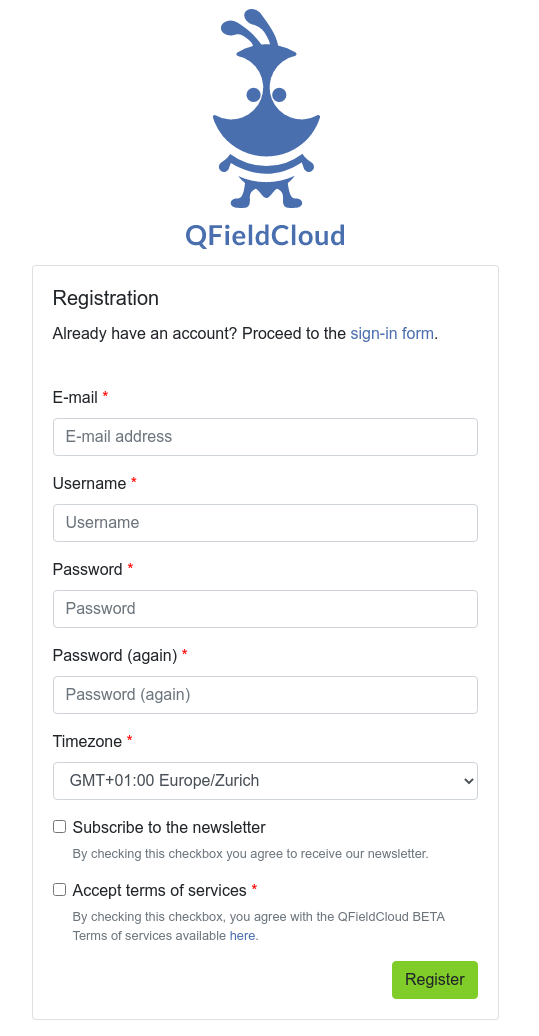
Siirry rekisteröintisivulle, anna tietosi ja luo uusi QFieldCloud-tili.

Rekisteröintilomake
Rekisteröintilomake

Muokkaa profiilia

Muuta henkilökohtaisia asetuksiasi. Lisää profiilikuva tai hanki yleiskatsaus omistajuksistasi ja jäsenyyksistäsi organisaatioissa.

Laskutus

Adding billing information to the account is needed to use QFieldCloud Pro plan or Organization plan.

For a Pro plan, follow these steps :

  1. Click on the username up-right the page
  2. Click on "Upgrade to pro"
  3. In the "Subscription" section, click on "Upgrade"
  4. In Pro section, click on "Activate"
  5. Carefully read the "Terms of Service" and agree to the terms of service, then "Proceed"
  6. In the "Billing Address" section, fill up the form, and then click on "Proceed to payment"

For an Organization plan, follow these steps :

  1. Click on the username up-right the page
  2. Click on "Create organization"
  3. Klikkaa "Create"
  4. Choose a name for your organization with only 150 characters or fewer, letters, digits, and @/./+/-/_
  5. Klikkaa "Create"
  6. Choose how much storage is needed
  7. Carefully read the "Terms of Service"and agree to the terms of service, then "Proceed"
  8. In the "Billing Address" section, fill up the form, and then click on "Proceed to payment"

If the billing information is incomplete, at any time it is possible to finish filling up the form by going to Billing > Subscription > Finish checkout

All pricing information is available on the Pricing page.

Discontinuing Services in QFieldCloud

  1. If you need to cancel your subscription on QFieldCloud: 1.1. For Pro plan accounts, click on your username, choose "Settings." 1.2. For Organization plan account, click on the name of your Organization, click on "Edit Organization". Note you need to be owner of that Organization.

    Enter to setting

  2. Proceed to the "Billing" section, click on "Change".

    Enter to billing section

  3. Valitse "Cancel Subscription"

    Peruuta tilaus

  4. Confirm the cancellation in the subsequent pop-up window.

    Confirm Cancel subscription

  5. A Nyuki message will then appear, indicating that the subscription will conclude at the end of the current billing period.

    Peruutus viesti

Organisaatiot

Organisaatiosi on lueteltu tässä. Lue lisää tiimeistä, jäsenistä ja heidän rooleistaan [QField ekosysteemin käsitteet] -artikkelista (https://docs.qfield.org/reference/qfieldcloud/concepts/).

Projektit

Etsi ja valitse projekti luettelosta tai aloita uuden projektin luominen.
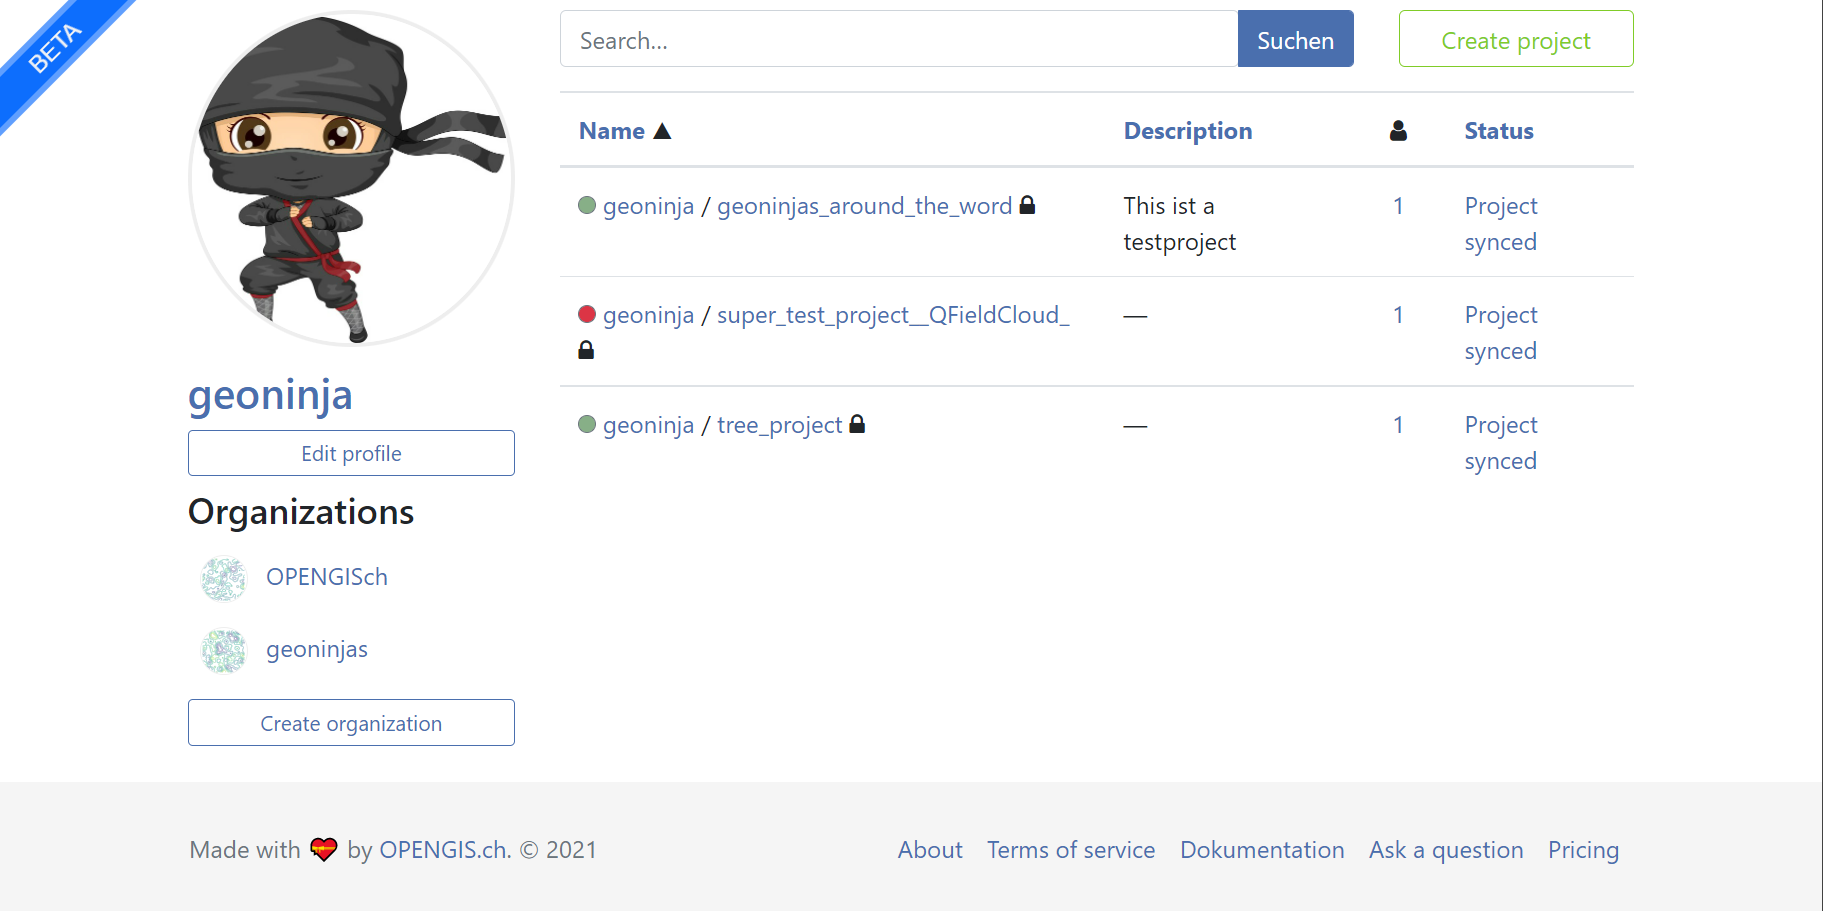
QFieldCloud-projektien yleiskatsaus

Yhteys QFieldCloudiin QGIS työasemassa

Työaseman valmistelu

Jotta voit muodostaa yhteyden QFieldCloudiin, tarvitset QGIS:n QFieldSync-laajennuksen. Seuraavat vaiheet osoittavat, kuinka voit asentaa ja synkronoida tietosi QFieldCloudiin ja siitä.

Asenna QFieldSync

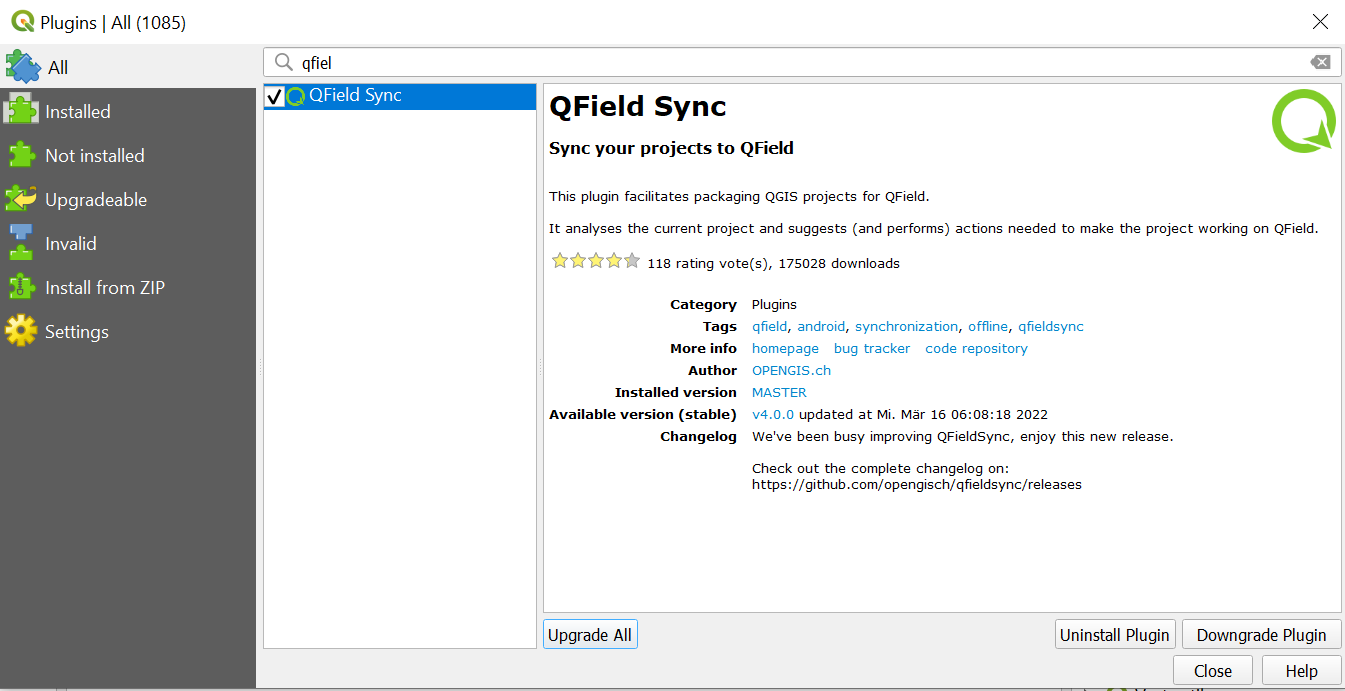
Avaa QGIS-laajennusten hallinta menemällä Plugins -> Hallitse ja asenna laajennuksia... -valikosta.

Etsi QFieldSync liitännäisluettelosta ja asenna uusin versio napsauttamalla Asenna lisäosa -painiketta.

Note

Koska QFieldCloud on vielä beta-vaiheessa, päivityksiä ja korjauksia tehdään usein. Päivitä QFieldSync-lisäosa usein. Jos sinulla on ongelmia, yritä päivittää uusimpaan versioon ennen raportoimista.

Onnistunut asennus
Onnistunut asennus

Onnistuneen asennuksen jälkeen ilmestyy uusi työkalupalkki:

Työkalupalkki

Sisäänkirjoitus QFieldCloudiin

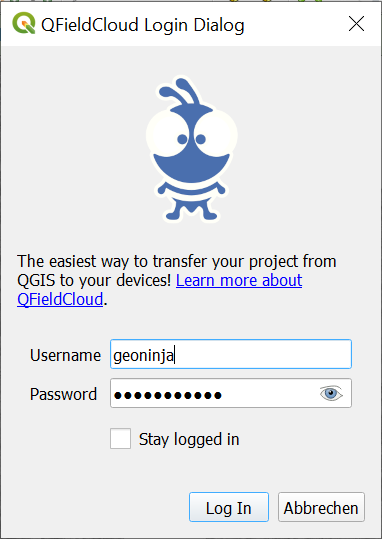
Napsauta pilvikuvaketta QFieldSync-työkalupalkissa. Uusi kirjautumisnäyttö tulee näkyviin:

Sisäänkirjoitus näyttö

Anna aiemmin tilin rekisteröinnin yhteydessä luomasi tunnistetietosi.

Note

Jos käytät salasanaa QGIS:ssä ensimmäistä kertaa, se pyytää sinua asettamaan pääsalasanan, joka hallitsee kaikkia muita QGIS:ssä käytettyjä salasanoja. Lisätietoja pääsalasanasta täällä: QGIS-dokumentaatio

Tutustu projektien yleiskuvausnäyttöön: nykyinen käyttäjäsi alleviivattu ja sininen, uloskirjautumispainike alhaalla vasemmalla, pilvipainike uuden projektin luomiseen ja oikealla päivityspainike tuoreimman projektiluettelon nappaamiseksi. Uudet rekisteröityneet käyttäjät näkevät tyhjän taulukon ja heti kun he luovat uusia projekteja, lista kasvaa. Projektien yleiskatsausnäyttö näyttää tältä:
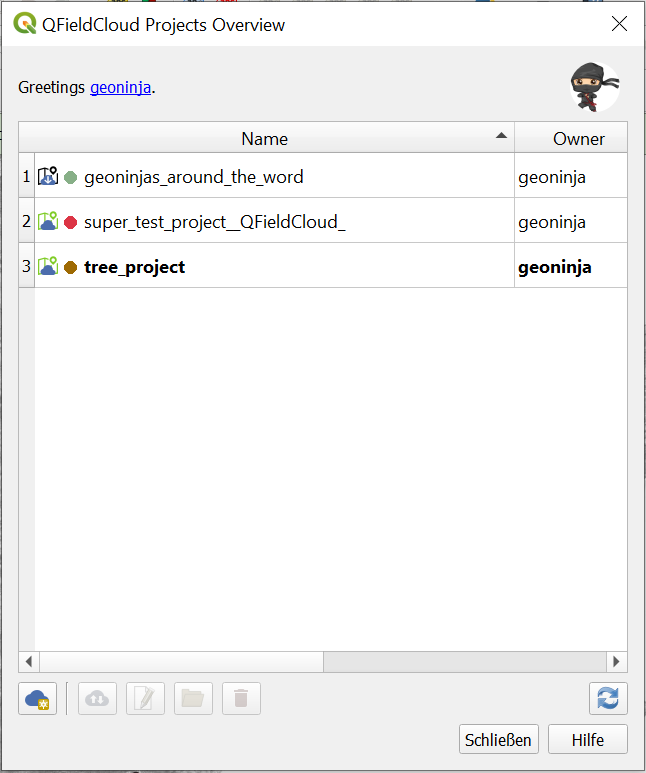
Projektien yleiskatsaus QFieldSyncissä

Kuvakkeet osoittavat eri projektien pilven ja paikallisen tilan.

Paikallinen tila:

Tila osoittaa, että olemassa on vain etäpilviprojekti. Tila osoittaa, että pilviprojekti on myös tallennettu paikallisesti.

Pilven tila:

Punainen: tila epäonnistui —> projekti on virheellinen eikä pilvi ymmärrä sitä. Käyttäjän täytyy korjata/ladata .qgs/.qgz-projektinsa. Ruskea: tila varattu —> työskentelemme projektisi parissa, ole kärsivällinen. Sillä välin et voi tehdä paljon projektin kanssa. Vihreä: tila ok —> pilvi on onnistunut ymmärtämään projektin. Voit yrittää ladata QFieldistä, mutta onnistumista ei taata.

Kunkin projektin tila näytetään työkaluvihjeellä.

Kaksoisnapsauttamalla projektia luettelossa voit tarkastella ja muokata projektin tiettyjä ominaisuuksia.
Projektin ominaisuudet QFieldCloudissa

Change the default QFieldCloud server in QField and QField Sync

QField and QFieldSync connect to the QFieldCloud service on app.qfield.cloud by default.

You can modify the default QFieldCloud server QField and QFieldSync connect to:

  1. Open the login screen in QField or QFieldSync.
  2. Double-tap on the Nyuki icon (the blue bee QFieldCloud logo).
  3. This action will reveal a field where you can enter the preferred QFieldCloud server address.
  4. Enter the details of the desired server in the provided field. (Leaving the field empty will connect to the default QFieldCloud server at app.qfield.cloud.)

Reveling server in QField Sync

Reveling server in QField

Note

It's important to note that QFieldSync does not support the same cloud project in multiple QGIS profiles. As a recommendation use a single QGIS profile for your QFieldCloud projects to avoid synchronization issues.

Luo ja määritä pilviprojektisi

Luo uusi projekti napsauttamalla pilvipainiketta alhaalla vasemmalla. Ensin sinun on valittava, miten uusi projekti luodaan välillä

  • "Muunna tällä hetkellä avoinna oleva projekti pilviprojektiksi" Nyt avatusta QGIS-projektista luodaan uusi QFieldCloud-yhteensopiva projekti. Tätä varten tietojoukot kopioidaan vientihakemistoon, joka toimii paikallisena peilinä. Vektoritietojoukot muunnetaan geopakettimuotoon tietojen synkronoinnin helpottamiseksi useilta laitteilta, kun taas muut tietojoukot kopioidaan uuteen projektipaikkaan.

Nykyisen projektin muuntamiseksi tyhjä hakemisto on pakollinen.

  • "Luo uusi tyhjä QFieldCloud-projekti" Uusi tyhjä QFieldCloud-projekti luodaan. Olet vastuussa kaikkien projektiin liittyvien tiedostojen siirtämisestä valitussa paikallishakemistossa niin, että projektitiedosto on juuressa. Projektitiedostot ladataan vain, kun napsautat synkronointipainiketta. Varmista, että valitut sisältävät enintään yhden QGIS-projektitiedoston.

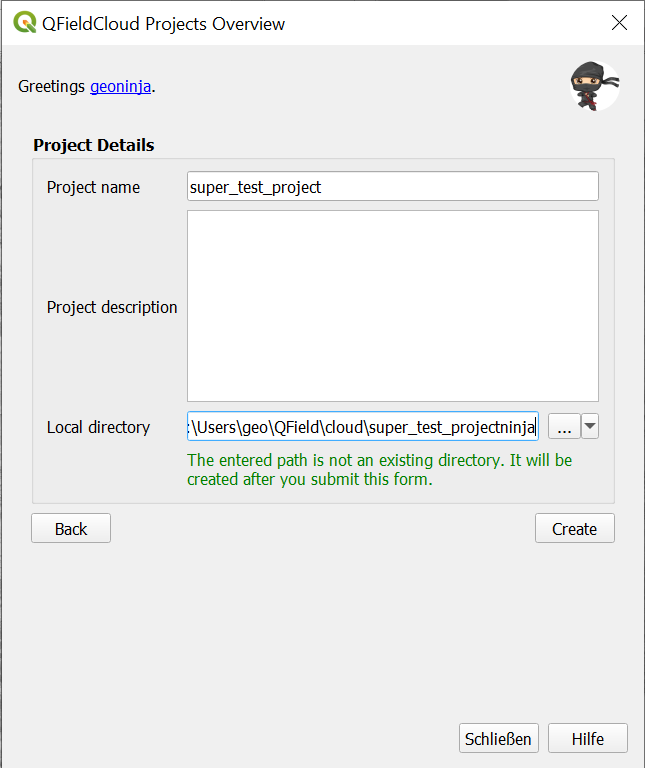
Projektin yksityiskohdat

Lomake kysyy projektin nimeä, kuvausta ja paikallista hakemistoa. Paikallisessa hakemistossa voit saada erilaisia tilanteita:

  • Syötetty polku ei sisällä vielä QGIS-projektitiedostoa.
  • Syötetty polku sisältää yhden QGIS-projektitiedoston.
  • Valitse paikallinen hakemisto, johon projekti tallennetaan.
  • Syötetty polku on suhteellinen polku. Anna absoluuttinen hakemistopolku.
  • Annettu polku ei ole hakemisto. Anna kelvollinen hakemistopolku.
  • Syötetty polku ei ole olemassa oleva hakemisto. Se luodaan tämän lomakkeen lähettämisen jälkeen.
  • Hakemistosta on löydetty useita projektitiedostoja. Jätä täsmälleen yksi QGIS-projekti juurihakemistoon.

Create a project in an Organization

How to create a project in an organization:

Option 1: Directly convert your local project to an Organization QFieldCloud project:

  1. Follow the steps configure your cloud project, ultil you get the "Project details".

  2. Change the owner of the project to your Organization.

    Project files over view in QFieldCloud

  3. Click on "Create" to start the conversion and synchronization. When finish you will see the project is in your Organization in QFieldCloud.

    Project files over view in QFieldCloud

Note

QField Sync 4.6 or newer is required for this functionality

Option 2: Uploading directly to the organization:

  1. Select your organization.

    Entering into Organization

  2. Once you get into the organization, click on "Create a project".

    Creating Project

  3. Select "Create a new empty project".

    New empty project

  4. You can see the new project in the overview.

    New project created

  5. On QGIS in QFieldSync, you will see the new project listed, click on "Edit Selected Cloud Project".

    QFieldSync

  6. Choose the folder where you want to save the project.

    Selecting folder

  7. In the selected folder, you can either paste an already worked-on project or save a new one.

    Copy to project folder

  8. Once the folder contains the project, you can synchronize it.

    QFieldSync Overview

  9. Finally, push the changes to the cloud.

    Pushing changes to QFieldCloud

  10. You can verify that the files are present in the Organization project.

    Project files over view in QFieldCloud

Option 3: Moving the project from your own account to the Organizations:

  1. If you already have a project in QFieldCloud (refer to configure your cloud project). In the project, click on "Settings" and select "Transfer ownership of this project" to choose the desired Organization for the transfer.

    Transferring to Organization

  2. A pop-up window will appear to confirm the transfer. To proceed, you will need to type "Here be dragons" and click "Transfer project".

    Confirm transfer

Määritä projektin tasot QFieldille

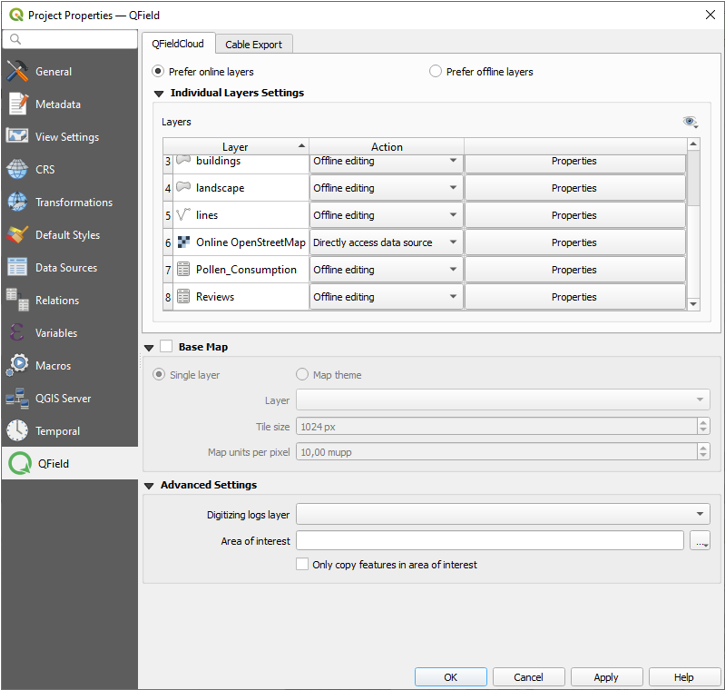
Configure the project layers by clicking the fifth icon in the QFieldSync toolbar . Here you can configure QFieldCloud layer actions. Most of the time you need to configure a preference either to online or offline layers. For more fine grained control, in the advanced settings you can configure the action layer by layer. Get more information about how to configure your layers in the Get Started guide for QFieldSync!.

Yhteismuokkaukseen suositellaan GeoPackage-tasojen käyttöä. Katso [lisäasetus oppaasta] (advanced-setup-qfc.md) lisätietoja vektorimuotojen tuesta.

Note

Jos käytät kokeellisia tietolähteitä ilman primääriavain kenttää (esim. Shapefiles, GeoJSON jne.), sinulla on oltava pieninmerkein fid-kenttä, jota käytetään ensisijaisena avaimena, joka yksilöi jokaisen ominaisuuden.

Mitä tahansa QFieldin tukemaa rasteri- ja vektoritason muotoa voidaan käyttää vain luku -tietona.

Projektin ominaisuudet

Enabling Automatic Pushing of Changes to QFieldCloud

With this functionality, users and managers of QFieldCloud projects can enforce automatic pushing of pending changes to QField devices in the field, as well as specify the interval in between automated pushes. The functionality is activated through a project setting, allowing remote activation.

  1. Access Project Settings: Navigate to the QField panel in the Project Settings dialog provided by the QFieldSync plugin.

  2. Enable Auto-Push: Toggle the "Automatically push pending changes on the following interval" option and establish your preferred interval.

Auto push QFieldSync

Auto push QField
Auto push QField

Note

Benefits:

  • Real-Time Updates: Ensures prompt synchronization of field data with the QFieldCloud project.
  • Streamlined Workflow: Minimizes manual intervention and ensures surveyors do not need to worry about synchronization, helping them focus on data quality.

Considerations:

  • Network Stability: Ensure stable internet connectivity for auto-push functionality.
  • Battery Optimization: Implement strategies to mitigate battery consumption on QField devices during prolonged fieldwork.

Lataa projekti

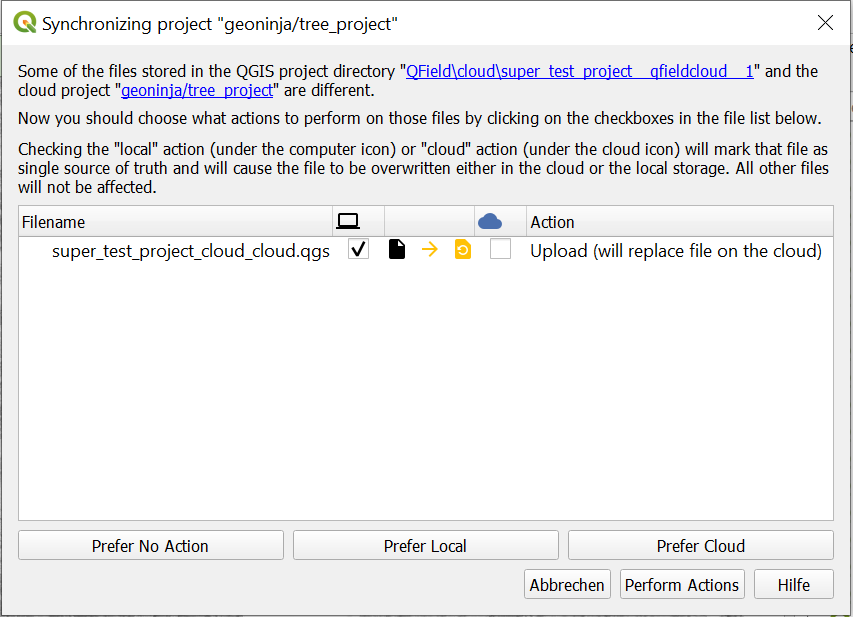
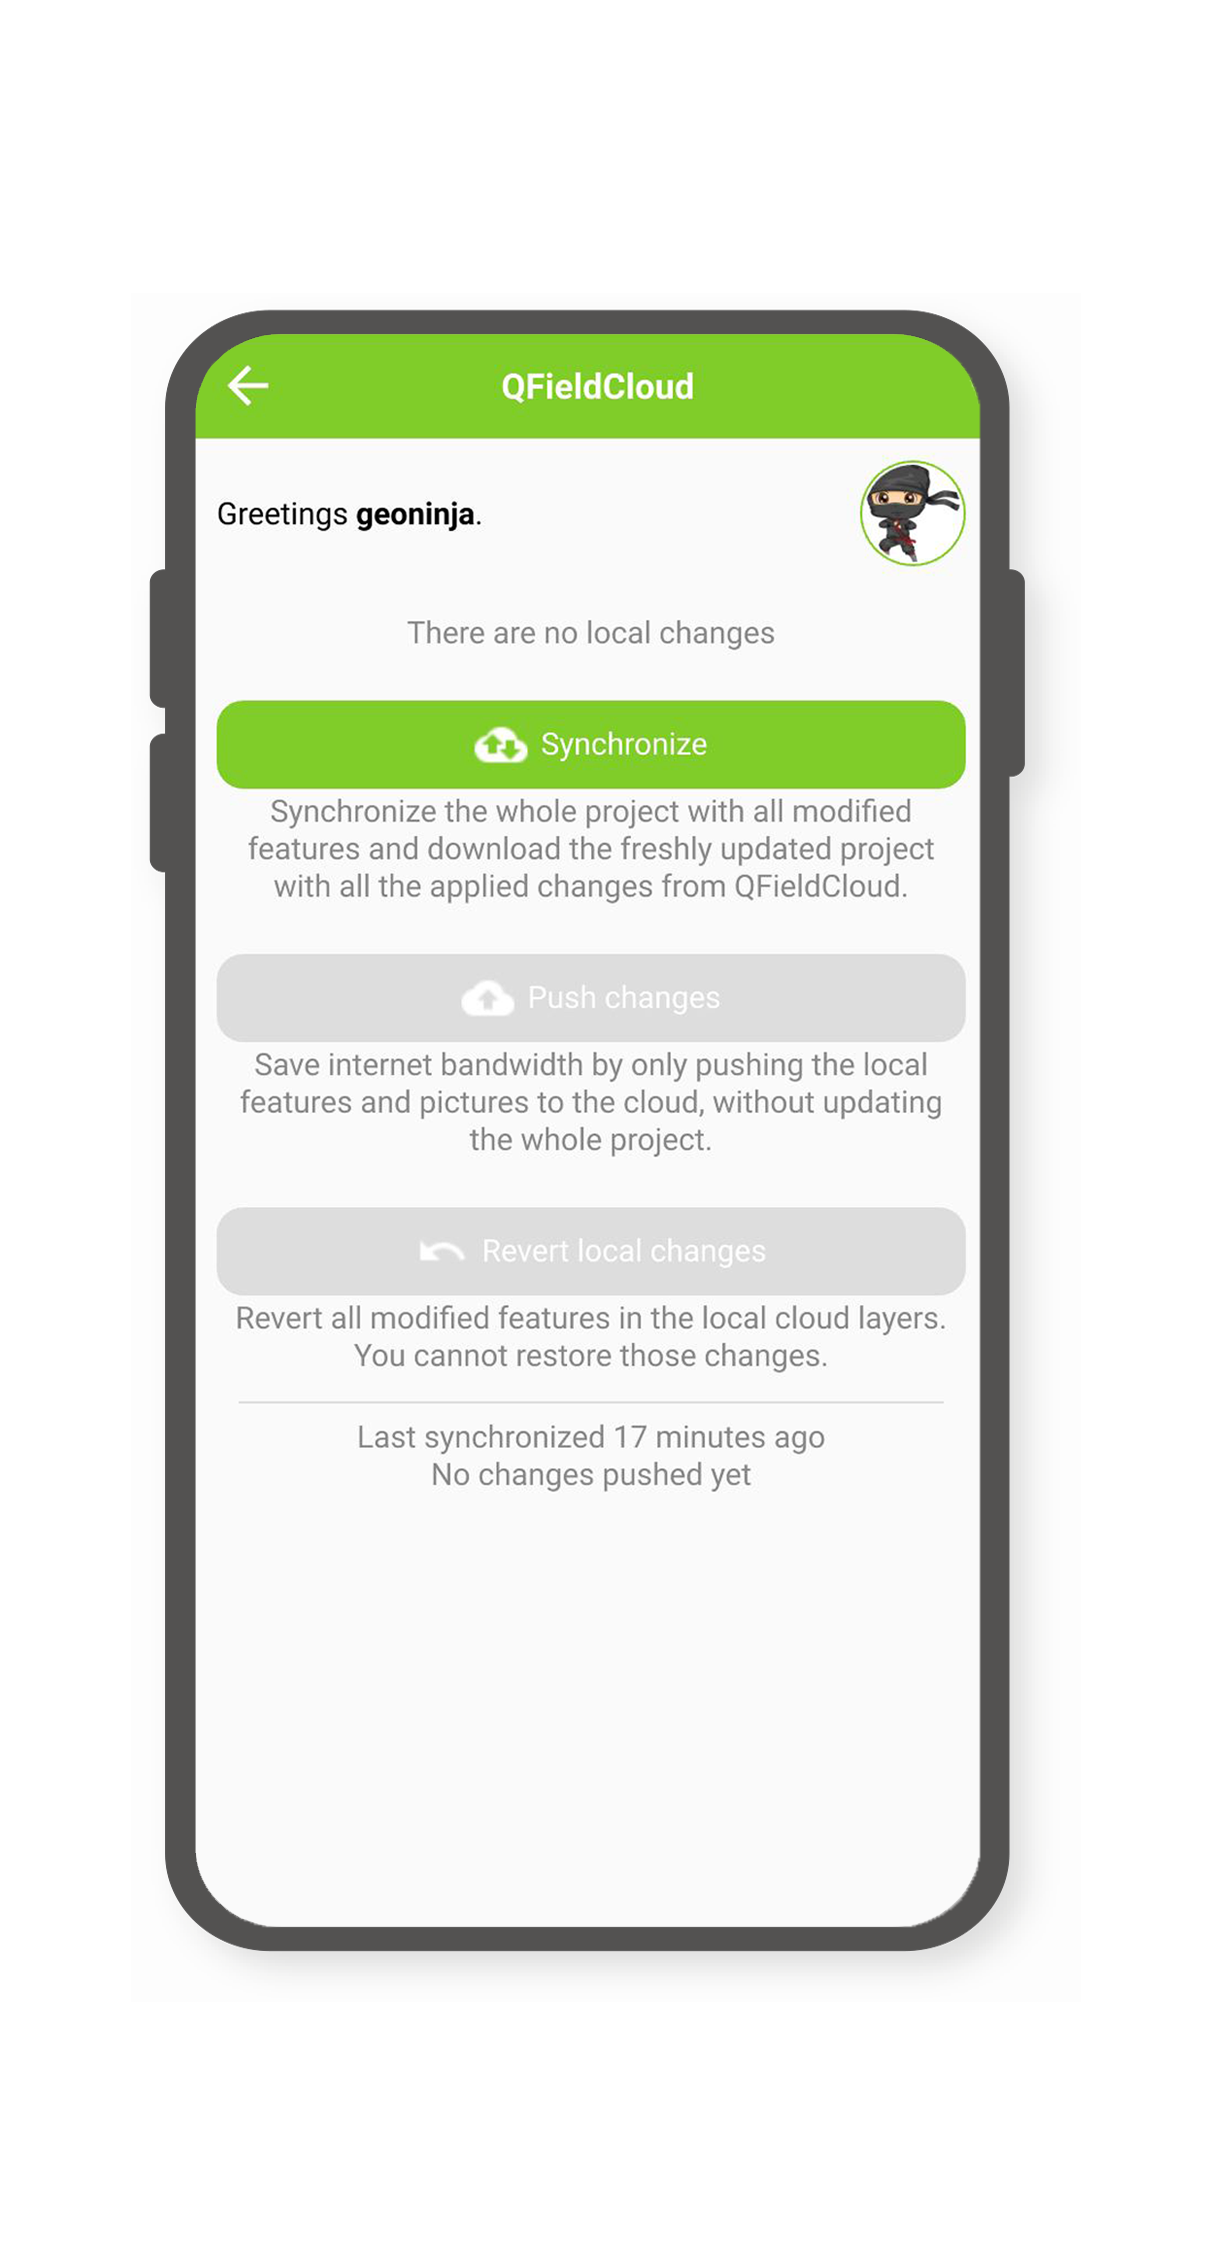
Kun olet määrittänyt, voit avata synkronoinnin valintaikkunan painamalla pilvipainiketta. Täällä sinun on päätettävä, mitä haluat: paikallista tiedostoa vai pilvessä olevaa tiedostoa.

Synkronoi
Synkronoi

Nyt sinun pitäisi nähdä projektisi ja tiedostosi QFieldCloudissa

Activate Notifications for QFieldCloud changes

  1. Access the Settings of your account.
  2. Navigate to the Notifications section. Here, you can customize the frequency of notifications you wish to receive at the email address registered with your account.Synchronize

    The events you get notified about are: - Käyttäjä luotu - Organisaatio luotu - Organisaatio poistettu - Organization membership created - Organization membership deleted - Tiimi luotu - Tiimi poistettu - Team membership created - Team membership deleted - Projekti luotu - Projekti poistettu - Project membership created - Project membership deleted

You will receive notifications for events in which you are not the actor. These notifications are specifically for events that are initiated by other members of your organization or collaborators on your projects.

Enhance your project with the "Optimized Packager"

We recommend to use the new "Optimized Packager" over the deprecated "QGIS Core Offline Editing" for all your projects. Set the packager under "Packaging Offliner" in the "Settings" tab of your project.

The "Optimized Packager" supports consolidating filtered layers of same datasource into a single oflline layer, respecting distinct symbology but also using less storage. Here is an example to illustrate this feature:

Example Configuration:

  • Layer 1.1:
  • Data Source: layers.gpkg
  • Table: layer1
  • Filter: id % 2 = 1

  • Layer 1.2:

  • Data Source: layers.gpkg
  • Table: layer1
  • Filter: id % 2 = 0

Result:

For the new offliner: - A single layer is generated in the offline geopackage, combining data from layer1 with the specified filters.

For the old (QGIS) offliner: - Two separate layers are created, each representing the filtered datasets: - Layer 1: Filtered with id % 2 = 1 - Layer 2: Filtered with id % 2 = 0

Maastolaite

Maastotyö

Asenna QField

Lataa ja asenna QFieldin uusin versio Google Play shopista. Vieritä alas ja ota betatestaus käyttöön. Älä käytä tätä versiota tuotannossa!

Note

Koska QField 2.0 on vielä beta-vaiheessa, päivityksiä ja korjauksia tehdään säännöllisesti vähintään viikoittain. Päivitä kokeellinen QField vähintään kerran viikossa. Ongelmatapauksissa yritä toistaa uusin versio ennen raportoimista.

Aloita työskentely projektisi kanssa

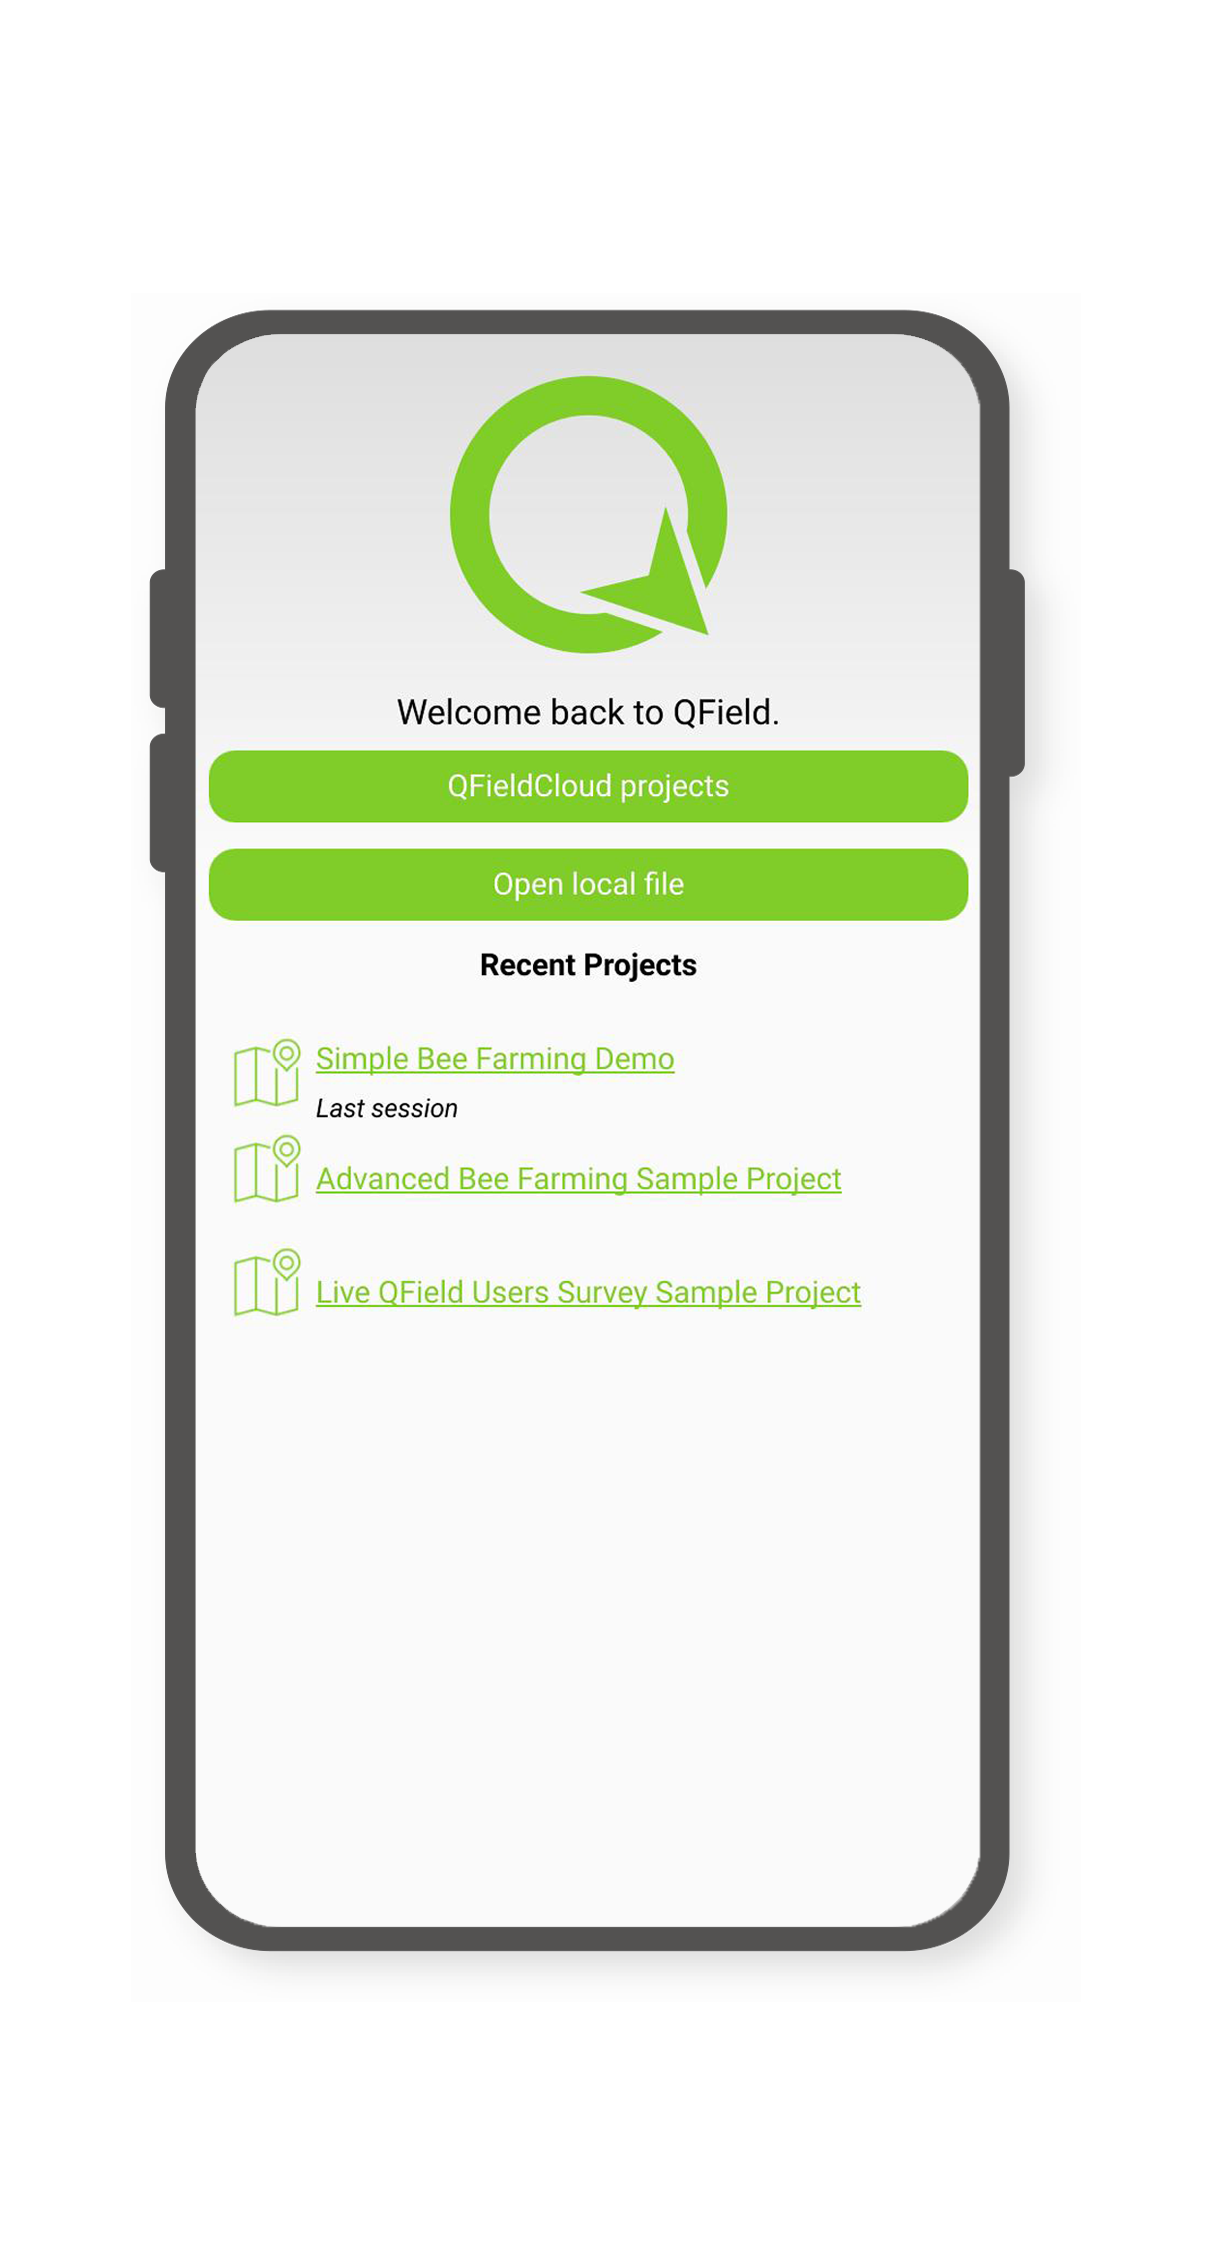
Tervetuloa
Tervetuloa

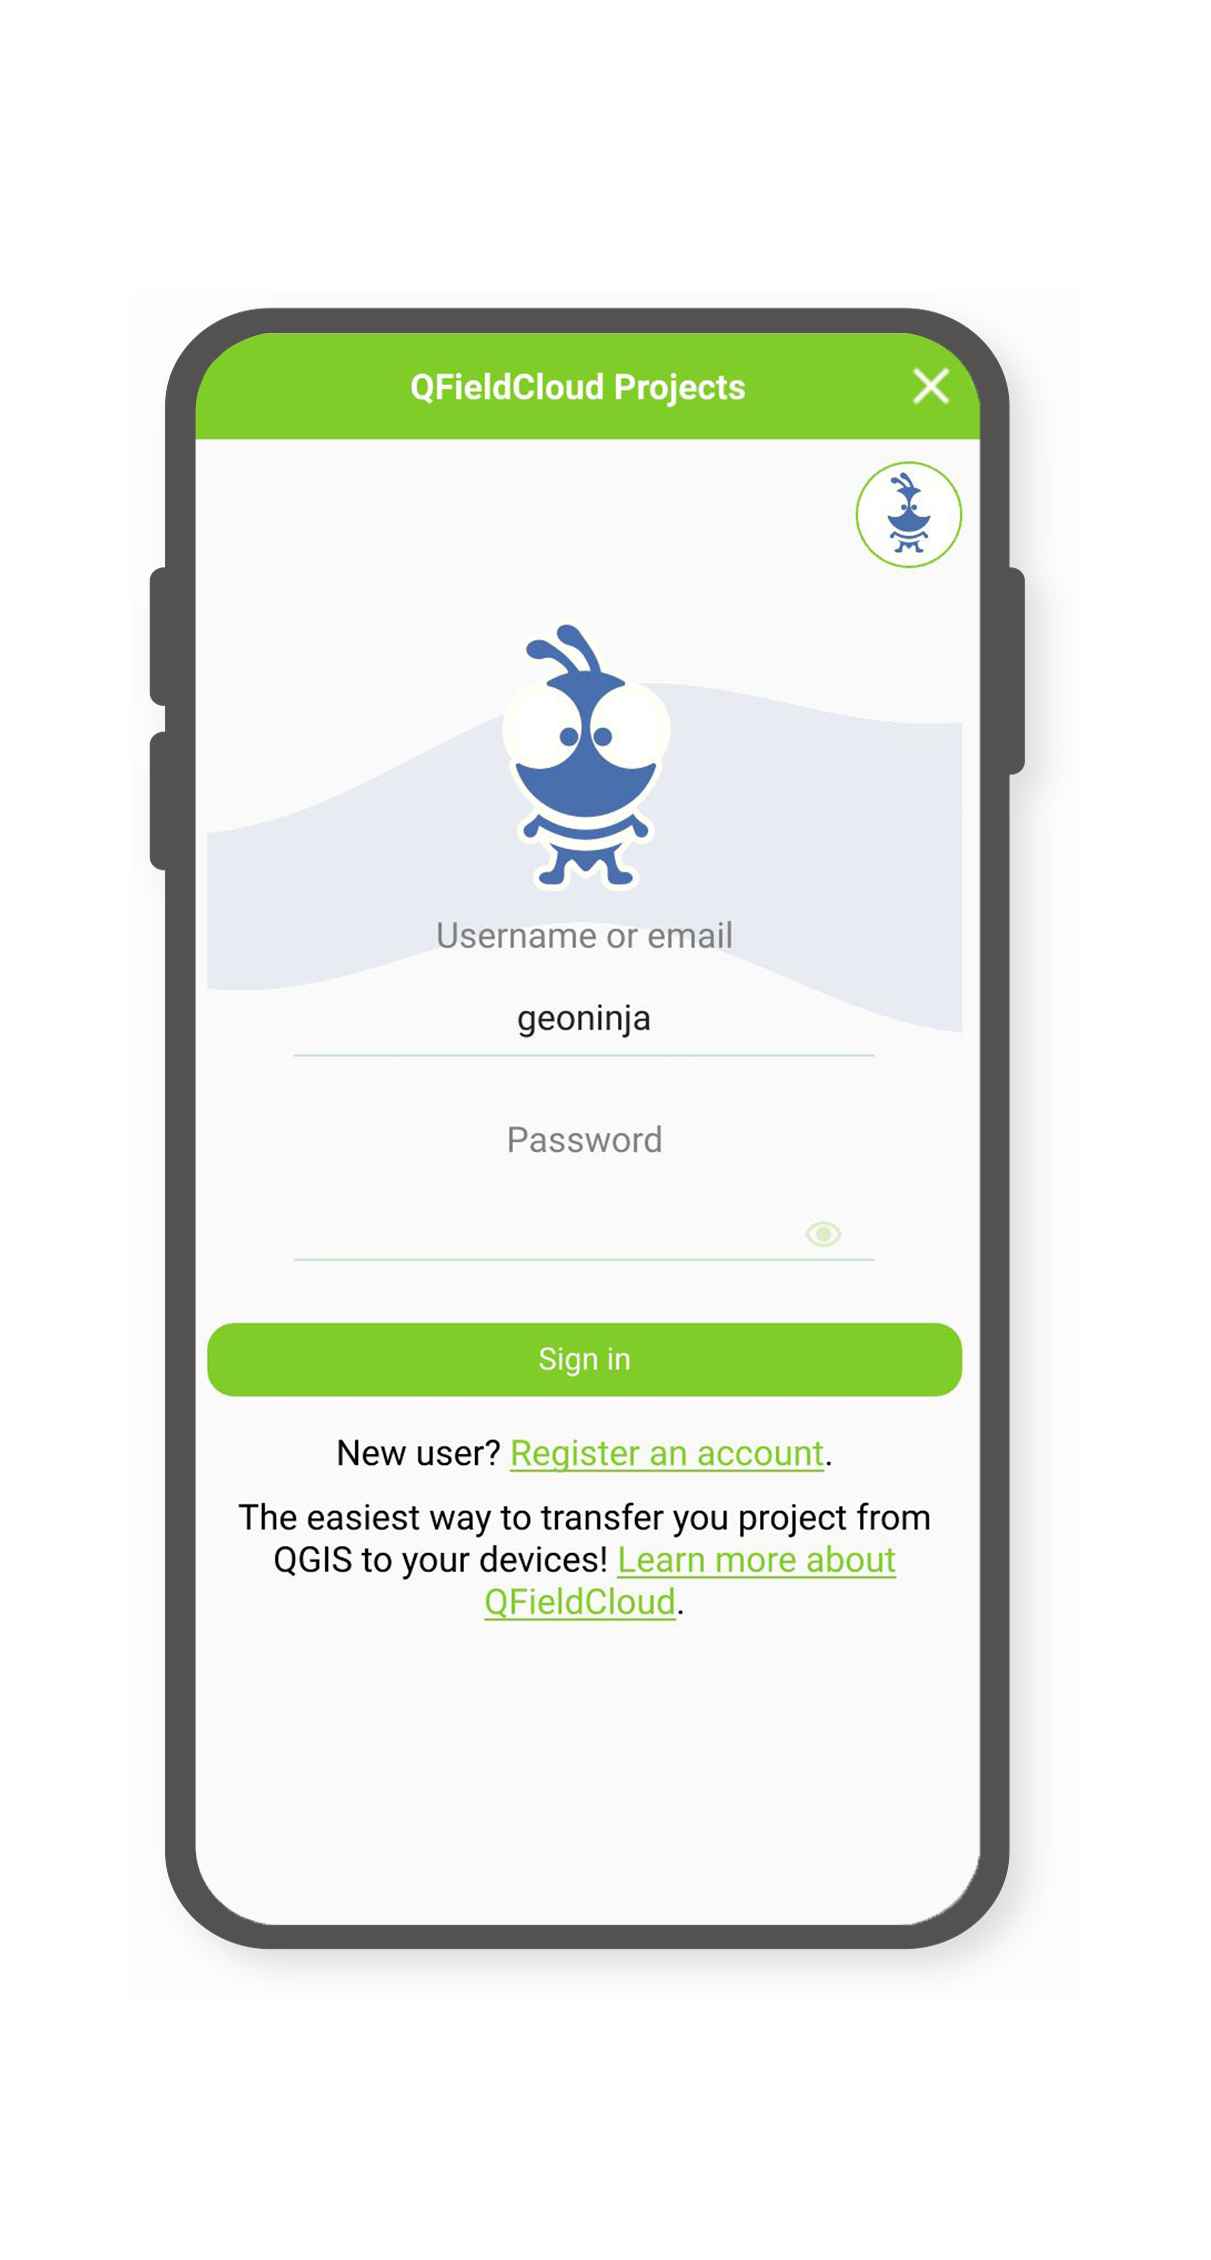
Kirjaudu sisään käyttäjätunnuksellasi ja salasanallasi

Sisäänkirjoitus
Sisäänkirjoitus

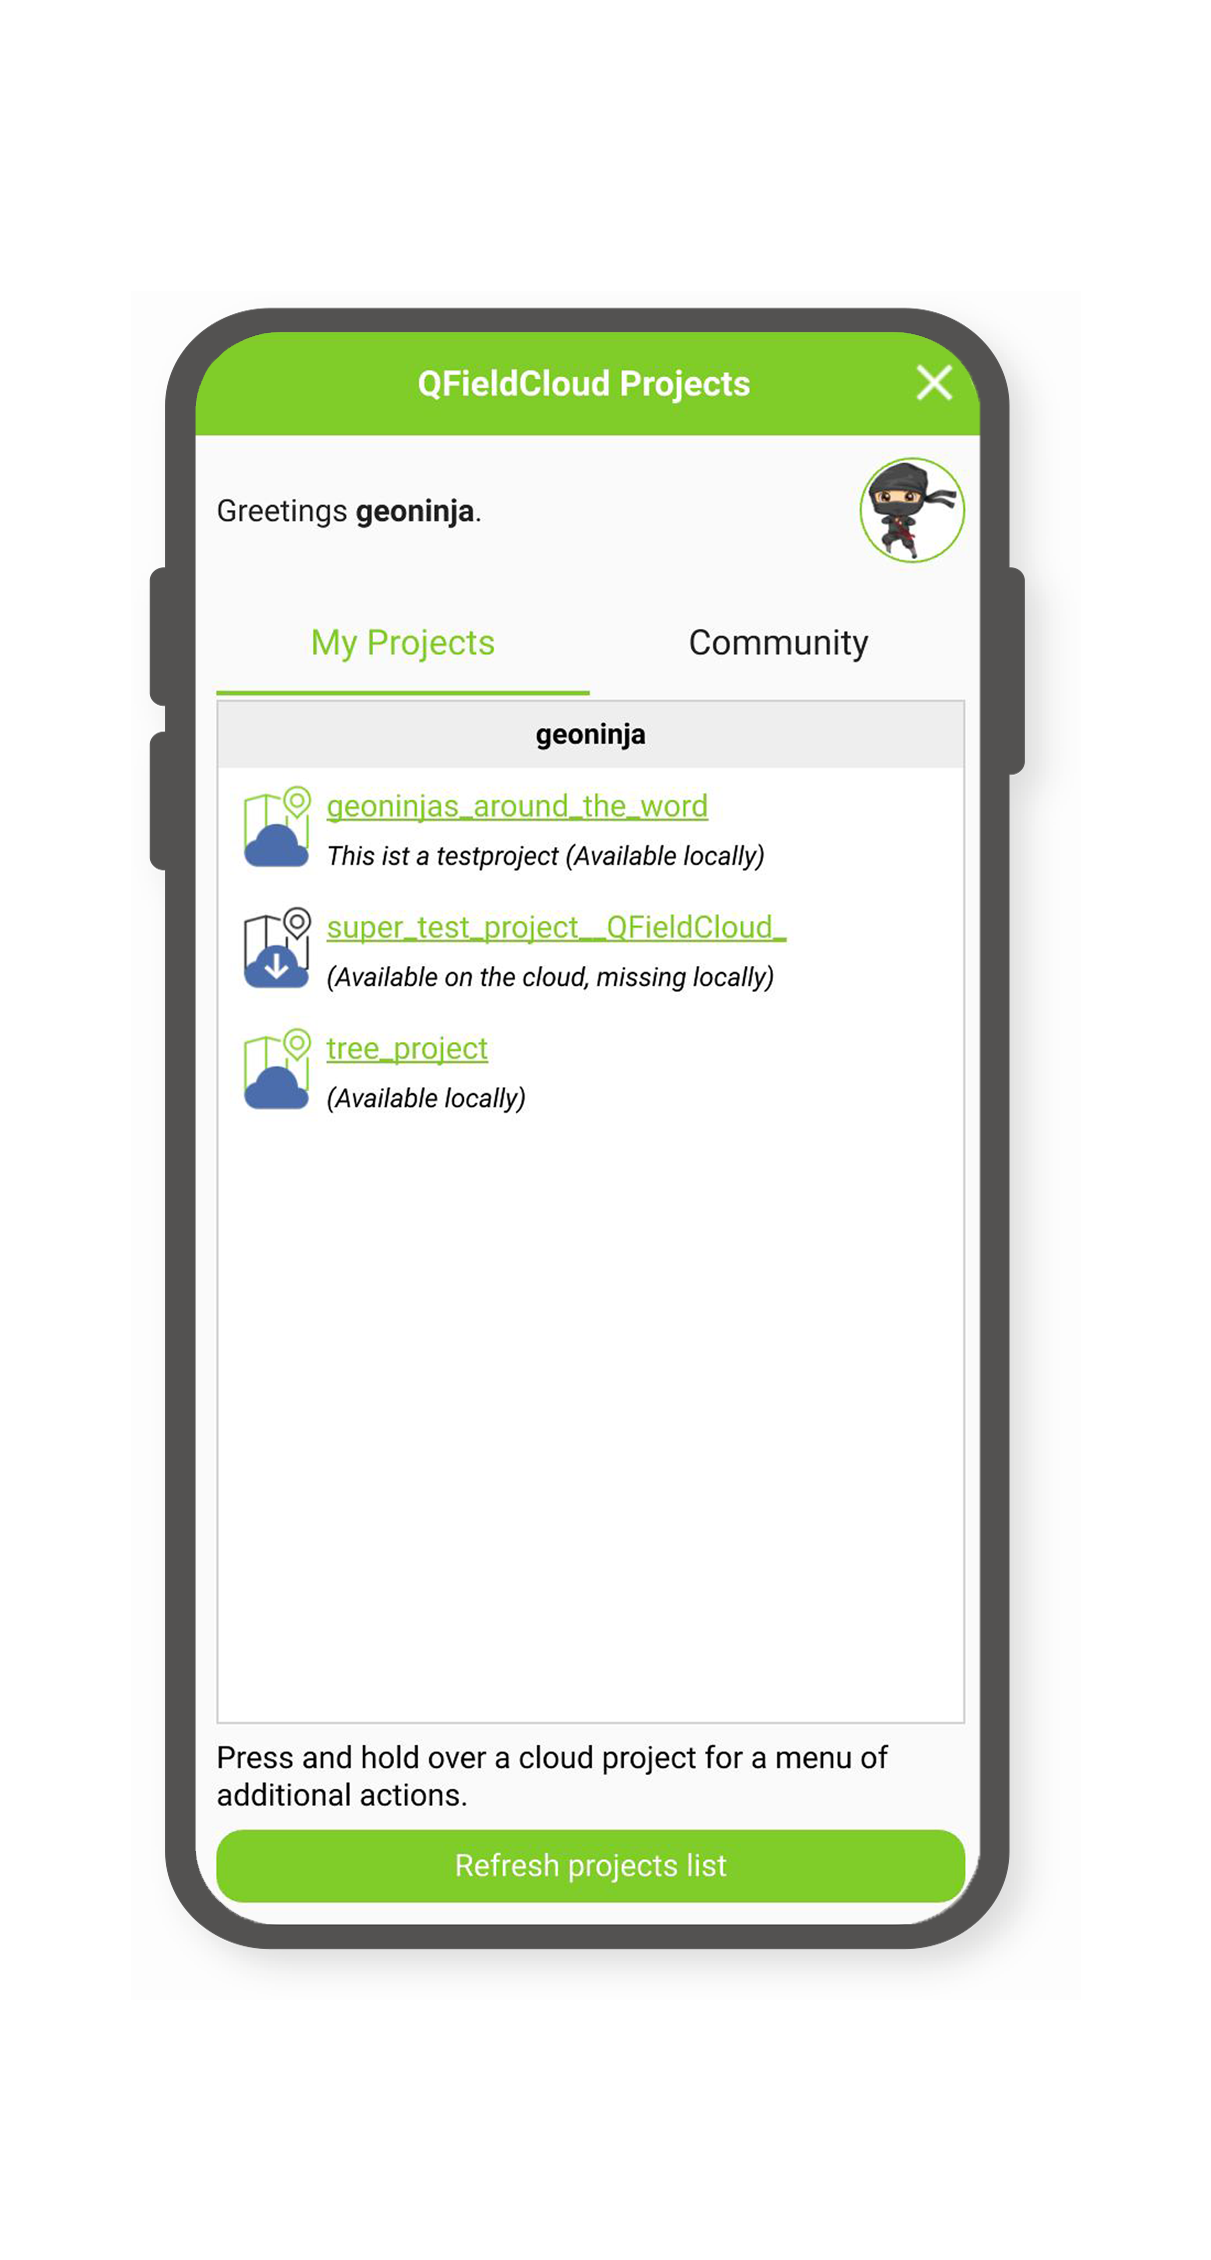
Valitse projekti ladattavaksi laitteellesi

Lataa
Lataa

Synkronoi muutoksesi

Tee muutos projektiisi. Luo uusi ominaisuus, poista ominaisuus tai muokkaa geometriaa tai attribuutteja. Avaa sininen pilvipainike näytön vasemmassa yläkulmassa:

Pilvinäppäin
Pilvinäppäin

Valitse toiminto, jossa on projektiisi tekemäsi muutos. Jokaisella toiminnolla on selitys, mitä sinun pitäisi odottaa tapahtuvan:

Toiminnot
Toiminnot

Muutokset ovat nyt kaikkien saatavilla, joilla on pääsy projektiisi pilvessä.

You can find more information on Advanced QFieldCloud setup and QFieldCloud technical reference.