QFieldSync for Cable Packaging
QFieldSync (QFS)) is the QGIS plugin, which you should use to "package" your projects for QField, which means to make your project available for QField. It is also this plugin you need to use when connecting to QFieldCloud.
QFieldSync hará lo siguiente:
- Empaqueta tu proyecto en un formato 'legible por QField' (por ejemplo,
portable_project). - (Puede) crear mapas base a partir de una sola capa ráster o de un estilo definido en un tema de mapa.
- De forma predeterminada, QFS configurará su proyecto en "edición sin conexión".
- Se utiliza para sincronizar los cambios realizados en el campo con el proyecto de escritorio.
Para obtener una visión general rápida del proceso, aquí tiene una lista de pasos habituales:
- Crear un paquete QField. Esto es una copia de trabajo en una carpeta separada.
- Copiar el paquete QField en el dispositivo de destino.
- Salir y recopilar los datos.
- Copiar los datos modificados de vuelta a su ordenador de escritorio.
- Synchronize the modified data with your local QField package or database.
Instalación
Before you get started with QField you will have to install the plugin through the plugin repository.
Flujo
-
En QGIS, vaya a Complementos > Gestionar e instalar complementos.
-
Busque "QFieldSync".
-
Seleccione el complemento en la lista y haga clic en "Instalar".

Configuración de QFieldSync
You will prepare your QGIS project depending on your requirements and save it as a .qgs or .qgz.
You can save it in a dedicated folder and use it repeatedly.

Layer Packaging for manual cable transfer
Para sincronizar tus proyectos de QField con el escritorio mediante QFS, cada capa debe convertirse a un formato que QFieldSync pueda interpretar. Estas conversiones se realizan mediante "Acciones de capa". En el cuadro de diálogo de configuración del proyecto, puedes establecer la "Acción" necesaria para cada capa. Una acción define si QFS debe registrar los cambios realizados en la capa, acceder a ella directamente (en el caso de una capa WMS o Postgres) o tratarla como una capa de solo lectura.

Dependiendo del tipo de capa, hay disponibles diferentes tipos de acciones:
-
Copia (solo disponible para capas basadas en archivos (por ejemplo, Gpkg, Shp, Tiff)): La capa se copiará a la carpeta del proyecto empaquetado, pero no se realizará su seguimiento. Se creará una nueva copia en la carpeta del proyecto empaquetado. Note: In case that you have multiple layers within one GeoPackage, all layers will be uploaded despite only one of them being present in the QGIS project. It is recommended to have one layer per Gpkg unless strictly necessary. Refer to common best practices for additional tips
-
Conservar existente (copiar si falta): La fuente de la capa se dejará intacta. En el caso de un proyecto a largo plazo, donde la sincronización se produce con frecuencia, es recomendable utilizar esta opción para no tener que volver a empaquetar el archivo cada vez.
-
Edición sin conexión: La capa se copia en la carpeta del proyecto empaquetado. Esta capa se rastrea y los cambios realizados se registran en un registro de cambios, que QFS utilizará posteriormente para la sincronización. Al sincronizar los cambios, este registro se reemplazará y todos los cambios también se aplicarán a la capa de origen original. Esto te permite realizar un seguimiento de los cambios y también trabajar con varios usuarios. Nota: No existe ningún mecanismo de gestión de conflictos.
-
Acceso directo a la fuente de datos: (solo sin archivos) Se accederá directamente a los datos. Esta opción solo está disponible para datos en línea como capas WMS/WFS o Postgres. En este último caso, si desea trabajar en línea, también deberá copiar las credenciales de Postgres (información de la base de datos) a QField. Consulte más información en PostgreSQL
-
Eliminar: La capa no se copiará a su proyecto empaquetado.
Área de interés y mapa base
Un mapa base es una capa ráster que se añade como la capa inferior al archivo del proyecto empaquetado. Al trabajar sin conexión con QField, es necesario añadir una capa ráster o establecer un tema para el mapa.
!!! nota! La configuración de esta sección no se aplica al usar QFieldCloud. Las capas sin conexión deben prepararse antes del trabajo de campo.
Área de interés
Al preparar tu proyecto para QField, puedes definir un área de interés. Al definir un área o una capa, solo se incluirán en el paquete las entidades que intersecten esta área de interés al exportar el proyecto a QField.
Mapa base: Un mapa base es una capa ráster que se añade como la capa inferior al archivo del proyecto empaquetado.
Existen dos opciones posibles para establecer un mapa base:
-
Capa única: Una capa ráster es útil para tomar una copia sin conexión de una capa en línea como un WMS o para tomar una copia de trabajo de un formato no compatible como una capa ECW o MrSID.
-
Tema de mapa: Un tema de mapa es útil para crear un mapa base a partir de una combinación de varias capas con estilos. Estas capas se pueden eliminar del paquete de trabajo y no es necesario renderizarlas en el dispositivo. Esto puede ahorrar espacio en disco y batería en el dispositivo.
Tamaño de la tesela
El tamaño de la tesela define la resolución espacial, es decir, el número de unidades de mapa por píxel. Por ejemplo, si el SRC del lienzo del mapa utiliza metros como unidades y el tamaño de la tesela se establece en 1, cada píxel ráster tendrá una extensión espacial de 1x1 m.
Nivel de zoom:
Al establecer los niveles de zoom mínimo y máximo, defines el nivel de detalle que verás al acercar y alejar la imagen.
- Nivel mínimo de zoom de los mosaicos: define el nivel de zoom mínimo para los mosaicos rasterizados. Un valor más bajo aumenta la cobertura espacial, pero la resolución espacial es limitada. (Predeterminado: 14)
- Nivel máximo de zoom de los mosaicos: define el nivel de zoom máximo para las teselas raster. Un valor más alto aumenta el detalle, pero puede requerir más espacio de almacenamiento, además de aumentar la duración de la exportación sin conexión. (Predeterminado: 14)

Propiedades adicionales
Existen algunas opciones de propiedades más avanzadas que pueden resultarle relevantes dependiendo de su dominio:
-
Permisos: Deshabilitar las opciones para agregar o eliminar elementos, editar atributos o editar geometría.
-
Nombres predeterminados de los archivos adjuntos: Si desea guardar los archivos adjuntos dentro de sus datos, puede modificar los nombres predeterminados establecidos. Consulte Cómo configurar la ruta de sus archivos adjuntos.
-
Número máximo de elementos disponibles en una relación: Al trabajar con relaciones, puede establecer el número máximo de elementos que se muestran en el widget del editor de relaciones.

Configuración de la visibilidad máxima de elementos para QField
Flujo
-
Direct to Vector Layer Properties... > QField.
-
Under "Relationship Settings" set the "Maximum number of items visible".
Note
- The default number is set to 4.
- If empty, the number is unlimited.


Empaquetar para QField
Una vez que hayas terminado de configurar tu proyecto, capas y estilos, estarás listo para empaquetarlo.
Flujo
-
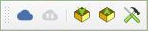
Direct to Plugins > QFieldSync > Package for QField or click on the according symbol in the QFieldSync Toolbar.

Package the project for QField -
Select the folders which also should be copied to QField.

Select subdirectories By default, QFieldSync chooses the filepath for exporting a project. It is however possible to change those defaults by directing to Plugins > QFieldSync > Preferences.

QFieldSync Preferences button In this window you can also manage whether the packaging options are shown in the QFieldSync toolbar.

QFieldSync Preferences 
-
To start working in QField, copy the whole folder on your device. Check the Storage section for the directory specification, depending on your system (Android, IOS, Windows). Typically the filepath will look something like this:
Android/data/ch.opengis.qfield/files/QField/...
Tip
Make sure to save the QGIS project using the regular Save As of QGIS as you'll have to re-open it later when you want to synchronize the changes.
Sincronizar desde QField
Una vez finalizada la recopilación, es hora de sincronizar los datos con su proyecto de escritorio.
Flujo
- Vuelva a abrir el proyecto en QGIS (el que guardó previamente con la opción "Guardar como").
- Copie la carpeta del proyecto de su dispositivo a su computadora.
- Vaya al menú Complementos > QFieldSync > Sincronizar desde QField para sincronizar los cambios del proyecto de QField con el proyecto de escritorio.

Atención
Asegúrese de sincronizar los datos solo una vez.
Esto significa que, si va a recopilar más datos, deberá crear un nuevo paquete de QField previamente para evitar problemas de sincronización posteriores (como duplicados).