You can track yourself and collect points, lines or polygons while browsing the map, working on other features and layers, or in the background while having the device in your pocket.
For lines and polygons, one object will be created per tracking session.
For points, a new object will be created for each recorded position.
The attributes you enter in the beginning of the tracking session will be added to every object recorded.
Nota
To enable tracking, you need to ensure that your positioning is activated.
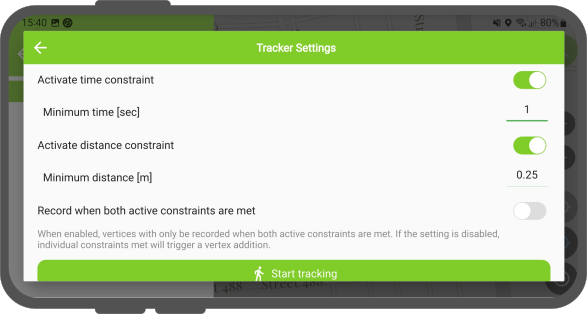
Puede elegir entre dos opciones para el intervalo de grabación de vértices durante la sesión de seguimiento:
Requisitos de tiempo: Esta opción registra su posición a un ritmo regular (por ejemplo, cada 30 segundos), lo que es ideal para registros consistentes y ahorrar batería.
Distance requirement: This option records a new vertex or feature only after you move a minimum distance.
Esto mantiene tu pista limpia al ignorar el movimiento cuando estás parado.
Flujo
Option 1: Through the Side Dashboard
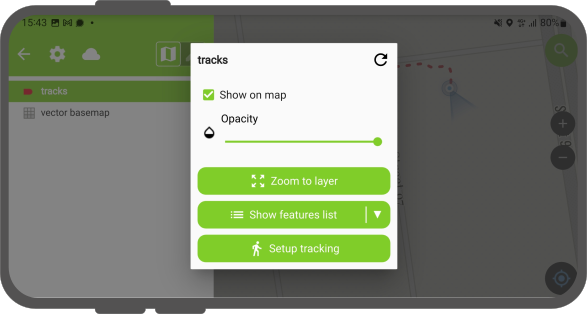
Open the Side Dashboard and long-press on the layer which you want to use for tracking.
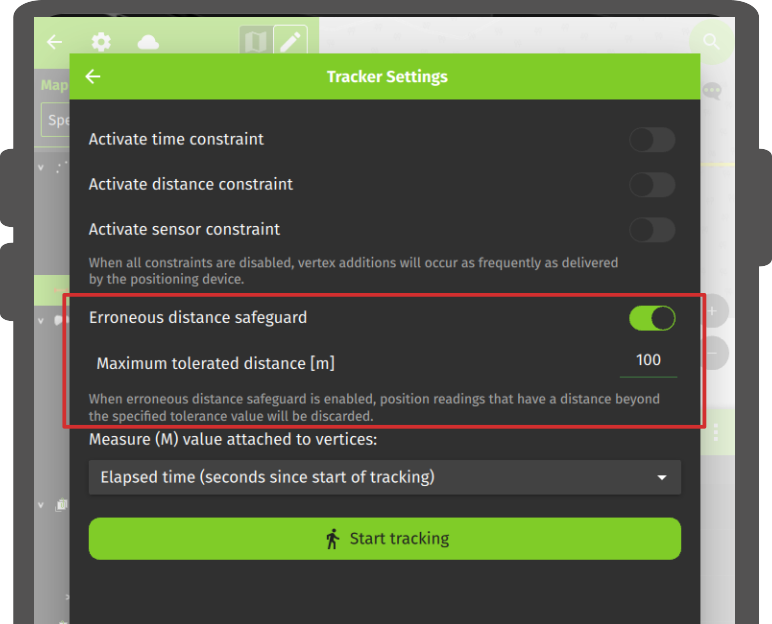
Tap Setup tracking and a new window will appear showing the configuration settings.
Tap the Start tracking button to begin the tracking.
Enter the attributes for the feature(s) about to be created and tap the .
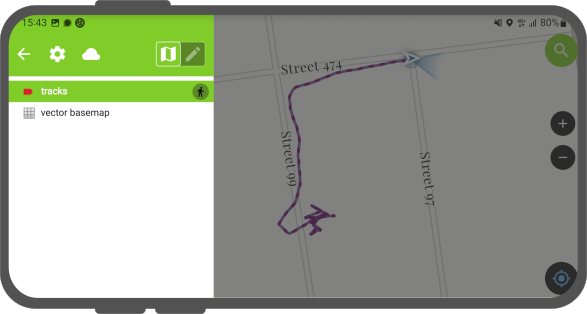
Once a tracking session is set up, a badge appears in the Side Dashboard next to the tracked layers.
During a tracking session, a rubberband line appears on the map to visualize the recorded path.
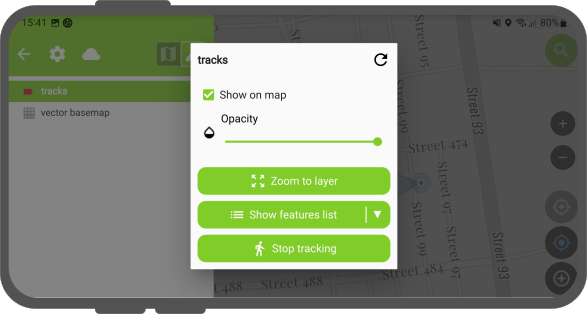
Once finished open the Side Dashboard and long-press on the layer's tracking badge you want to stop.
Tap Stop tracking to finish the session.
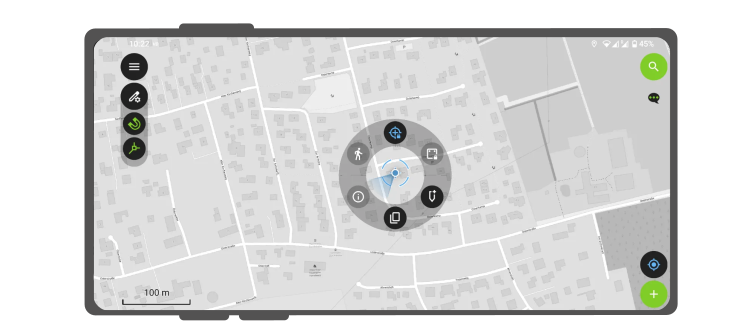
Option 2: Through the Location Pie Menu
Tap on your position on the map
A pie menu will open around your position.
Choose the Tracking icon (small walking figure).
Enter the attributes for the feature(s) about to be created and tap the .
There are additional settings which you can activate.
Sensor data requirement: In case that you are working with a sensor, you can toggle this option and record a point/vertex anytime when a new sensor reading is being recorded
Erroneous distance safeguard: If exact positioning is important to you, you can enable this option and set a maximum distance between two vertices so that bad GNSS readings are not tracked.
Measure(M) value attached to vertices: If your layer supports the M dimension, QField can store the time passed since the first vertex recorded in each vertex's M value.
Tip
You can simultaneously record multiple tracking sessions across several layers.
Si no finalizó explícitamente su sesión de seguimiento (por ejemplo, cerró la aplicación), QField le permite continuar donde la dejó.
Aparecerá un mensaje preguntándole si desea reanudar la última sesión o iniciar una nueva.
Reanudando: Una sesión para una capa de línea o polígono continuará agregando vértices a la entidad de la sesión anterior.
Esto le permite continuar de forma sencilla tras reiniciar la aplicación.
Iniciar una nueva sesión: Esta opción descartará la función incompleta de la sesión anterior y comenzará una nueva.