How to manage Organizations in QFieldCloud on-premise
Managing Users
Adding
Workflow
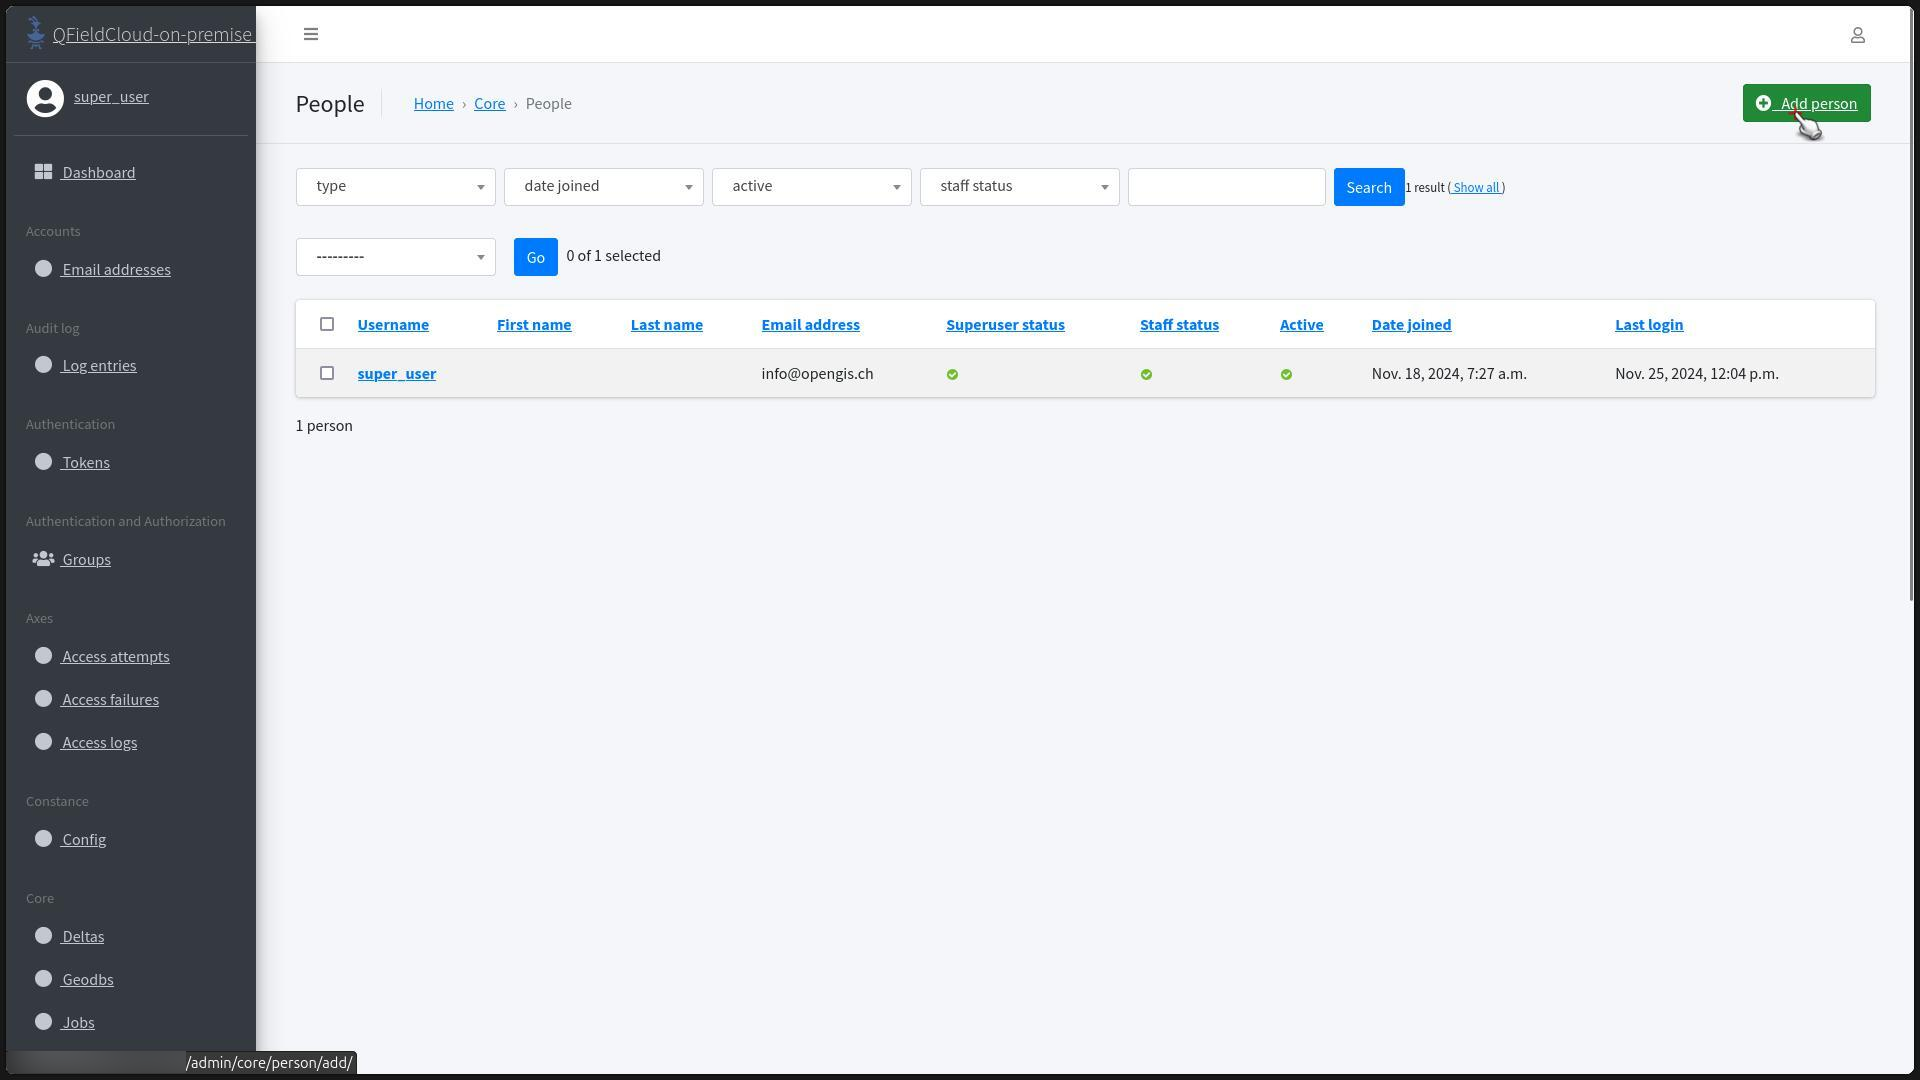
- From the homepage, scroll down to find the "Core" pages and select the "People" page.
-
Click on "Add Person".
-
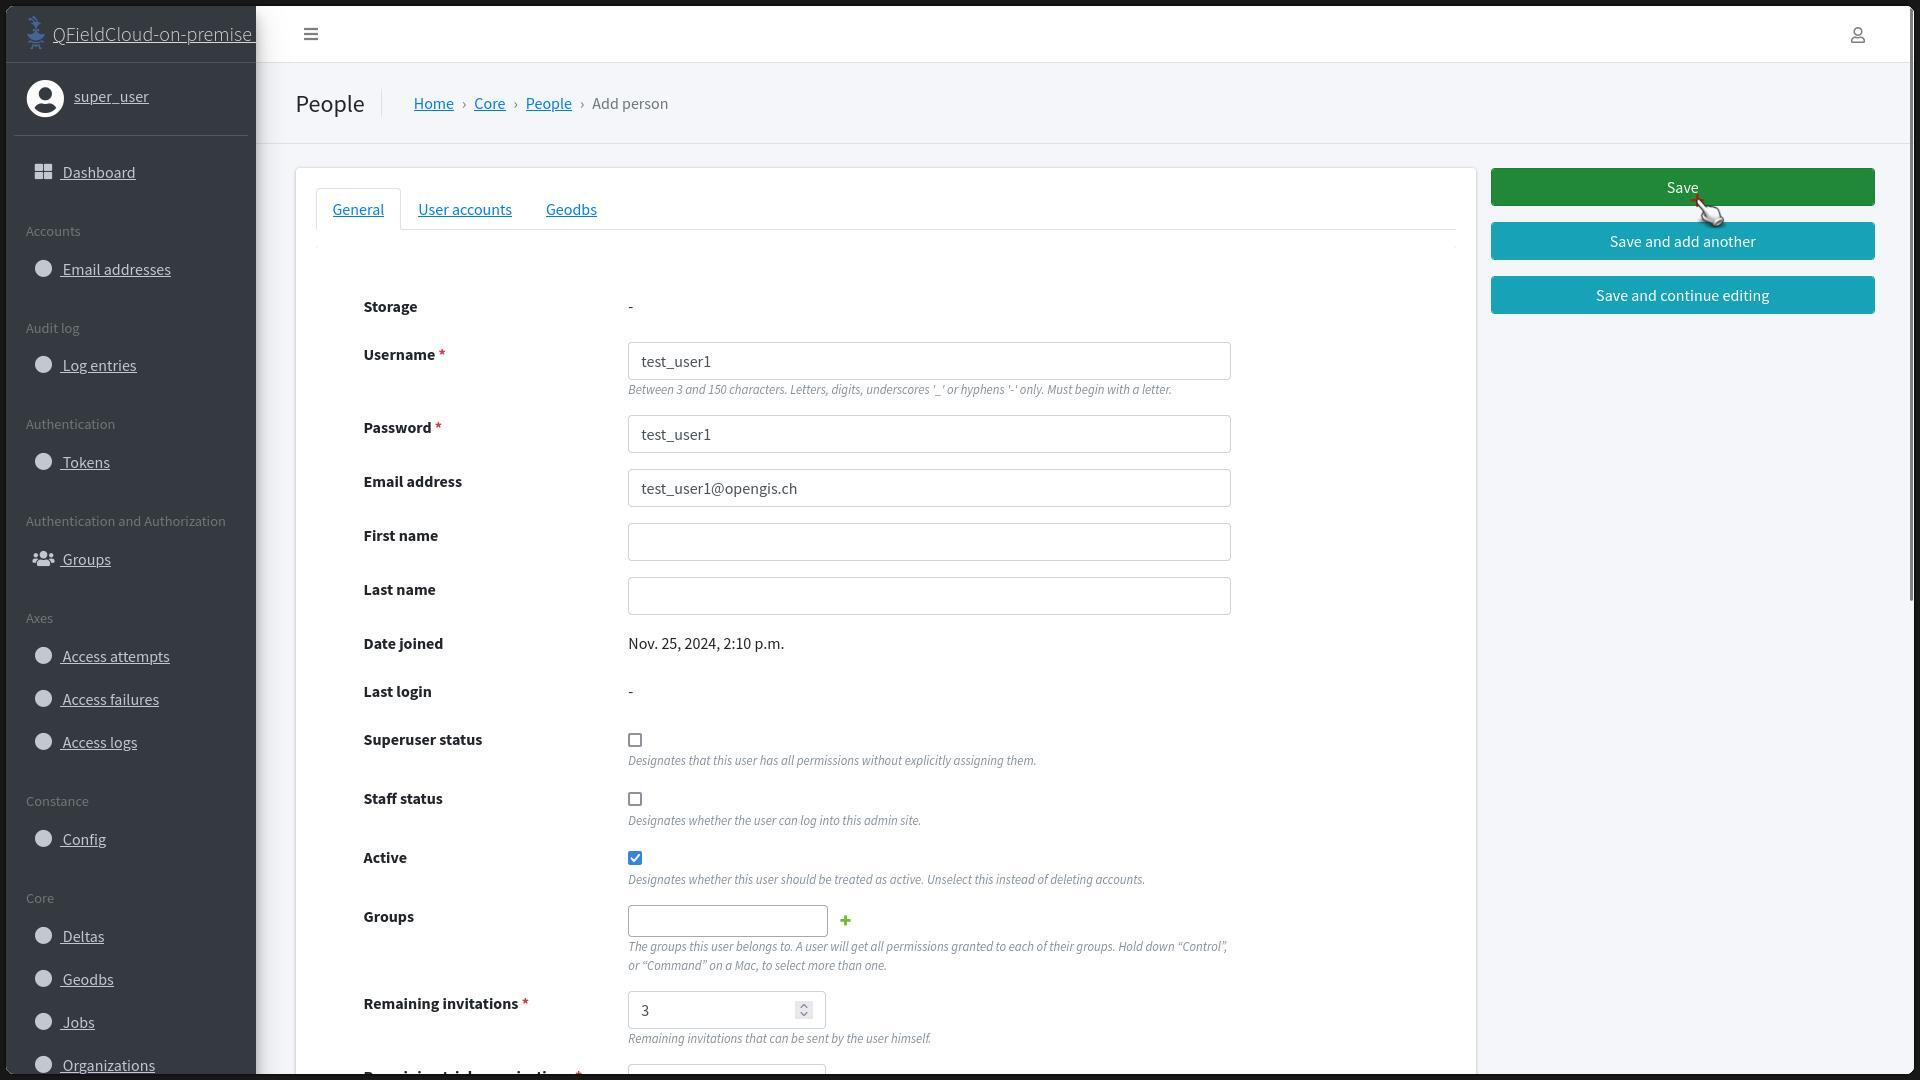
Fill in the required fields, including the "Username", "Password", "Email address", and any additional user information.
Tip
You can also set the user's "Timezone" and email notification preferences for project and organization changes.
- Click "Save" to add the user, and you'll be redirected to the "People" page with a success message.
Tip
The "Password" field will show the hashed version of any password. If a system administrator wants to change it, just replace the contents with the new password, QFieldCloud will handle it automatically.
Deleting
Workflow
- In the "Core" pages, click on "People".
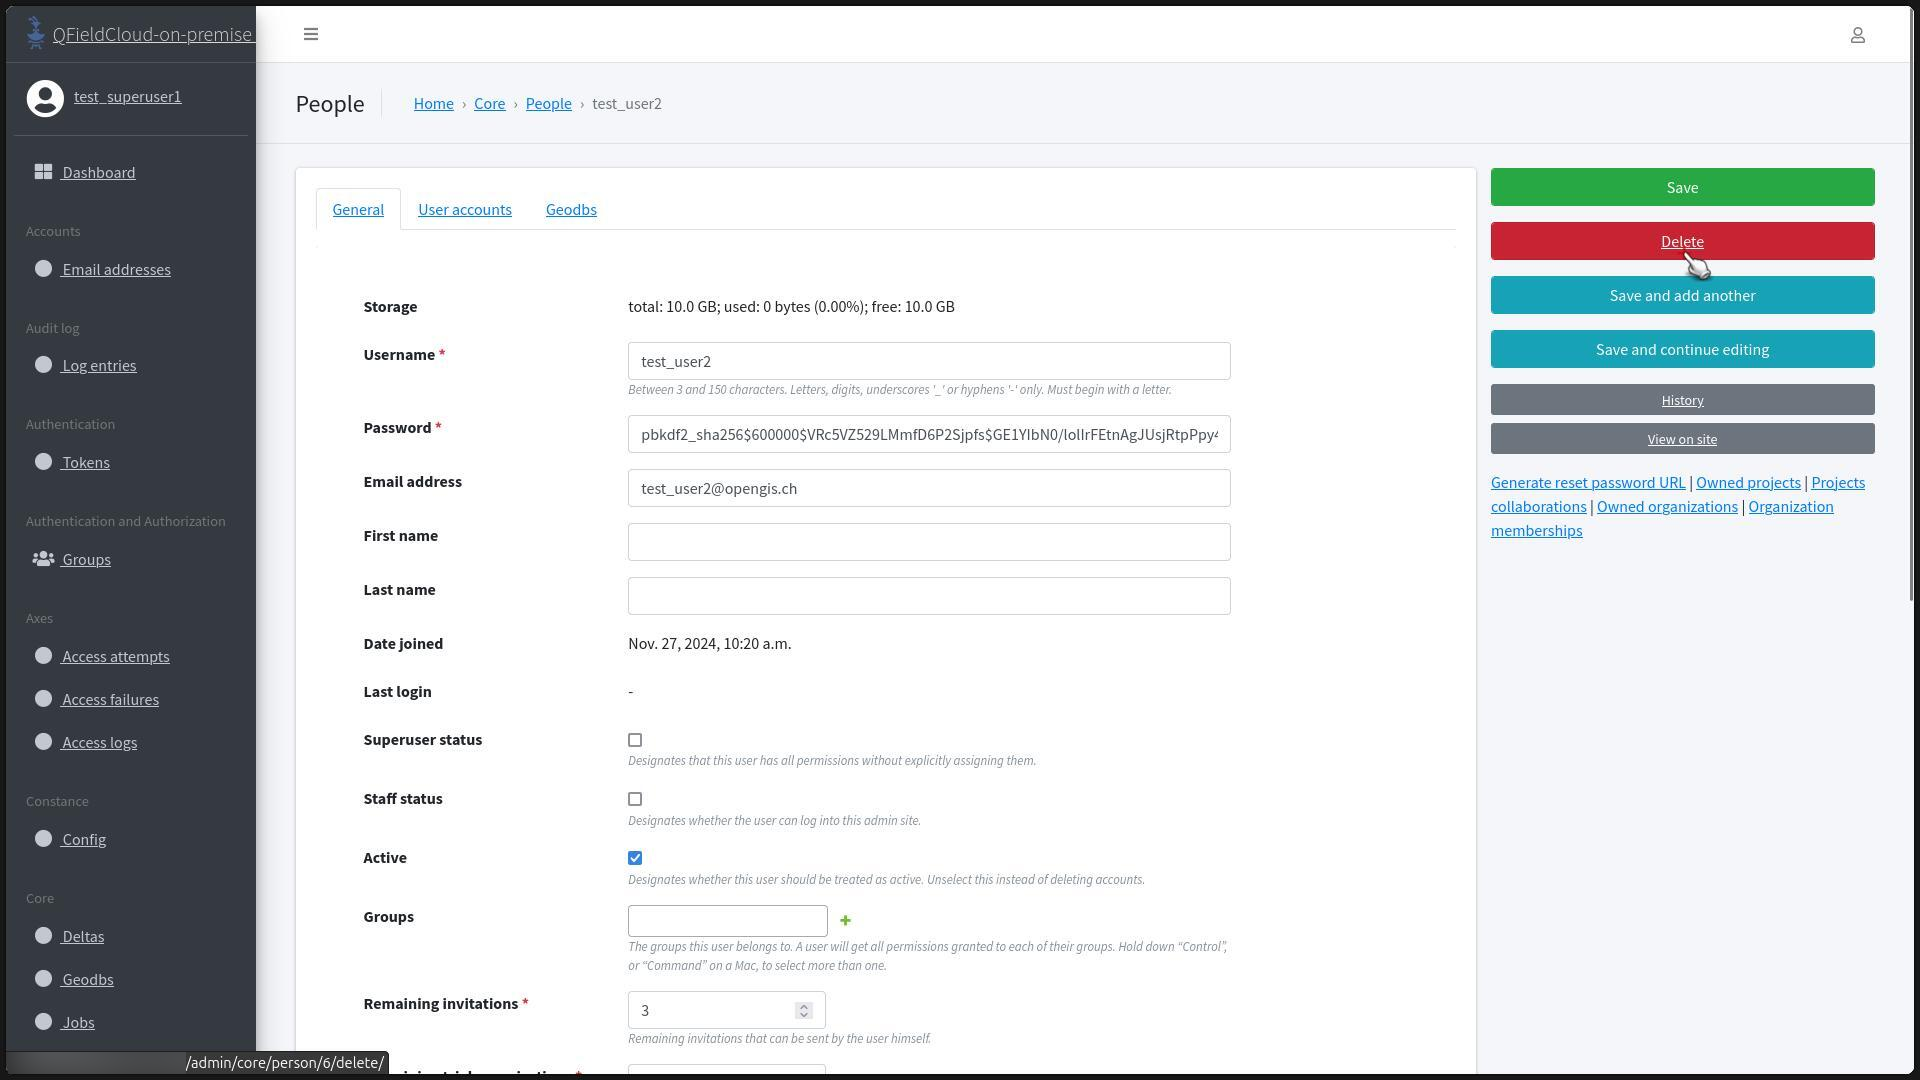
- Select the user by clicking on its "Username".
-
Click the "Delete" button.
-
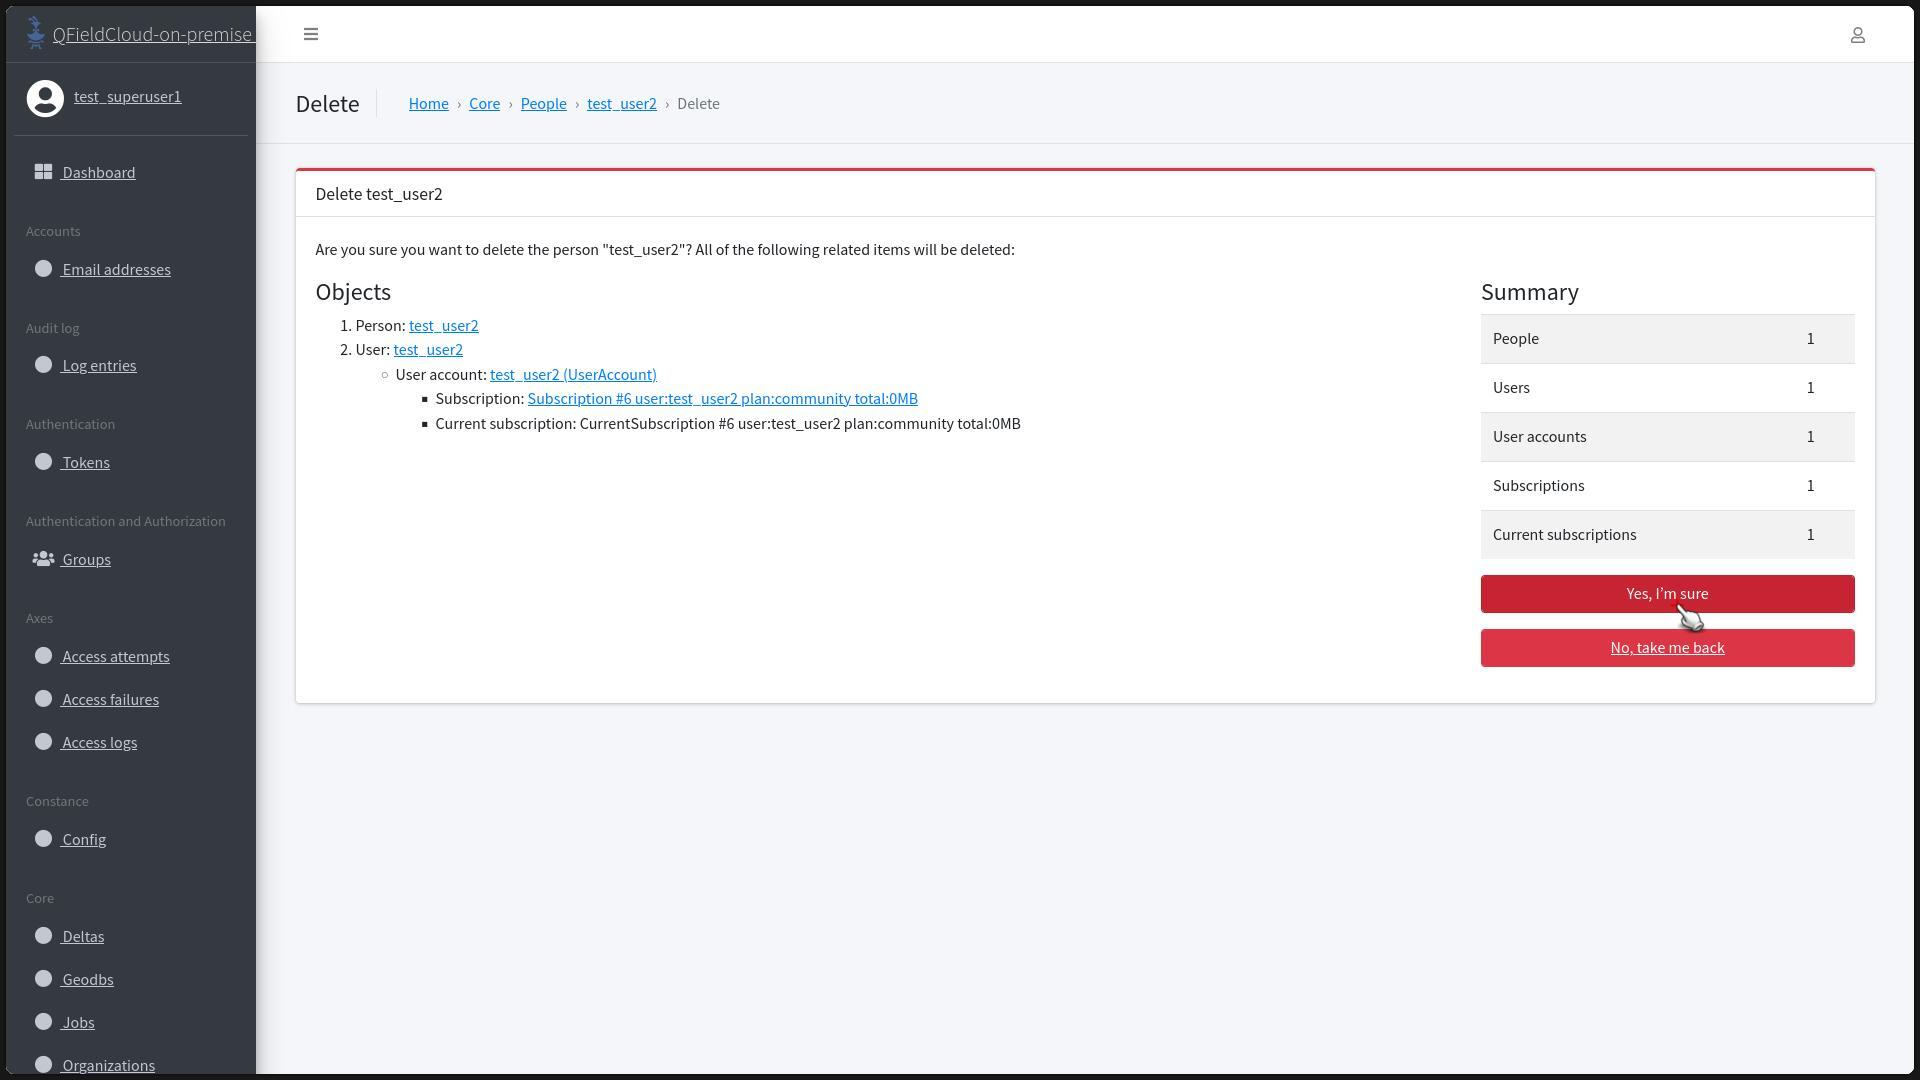
The screen will show you all the related objects that will be deleted. Once you are sure that you wish to complete the deletion click "Yes, I'm sure".
-
You will be redirected to the "People" Section and a message should appear at the top of the page indicating the successful deletion.

Generating a Reset Password URL
Workflow
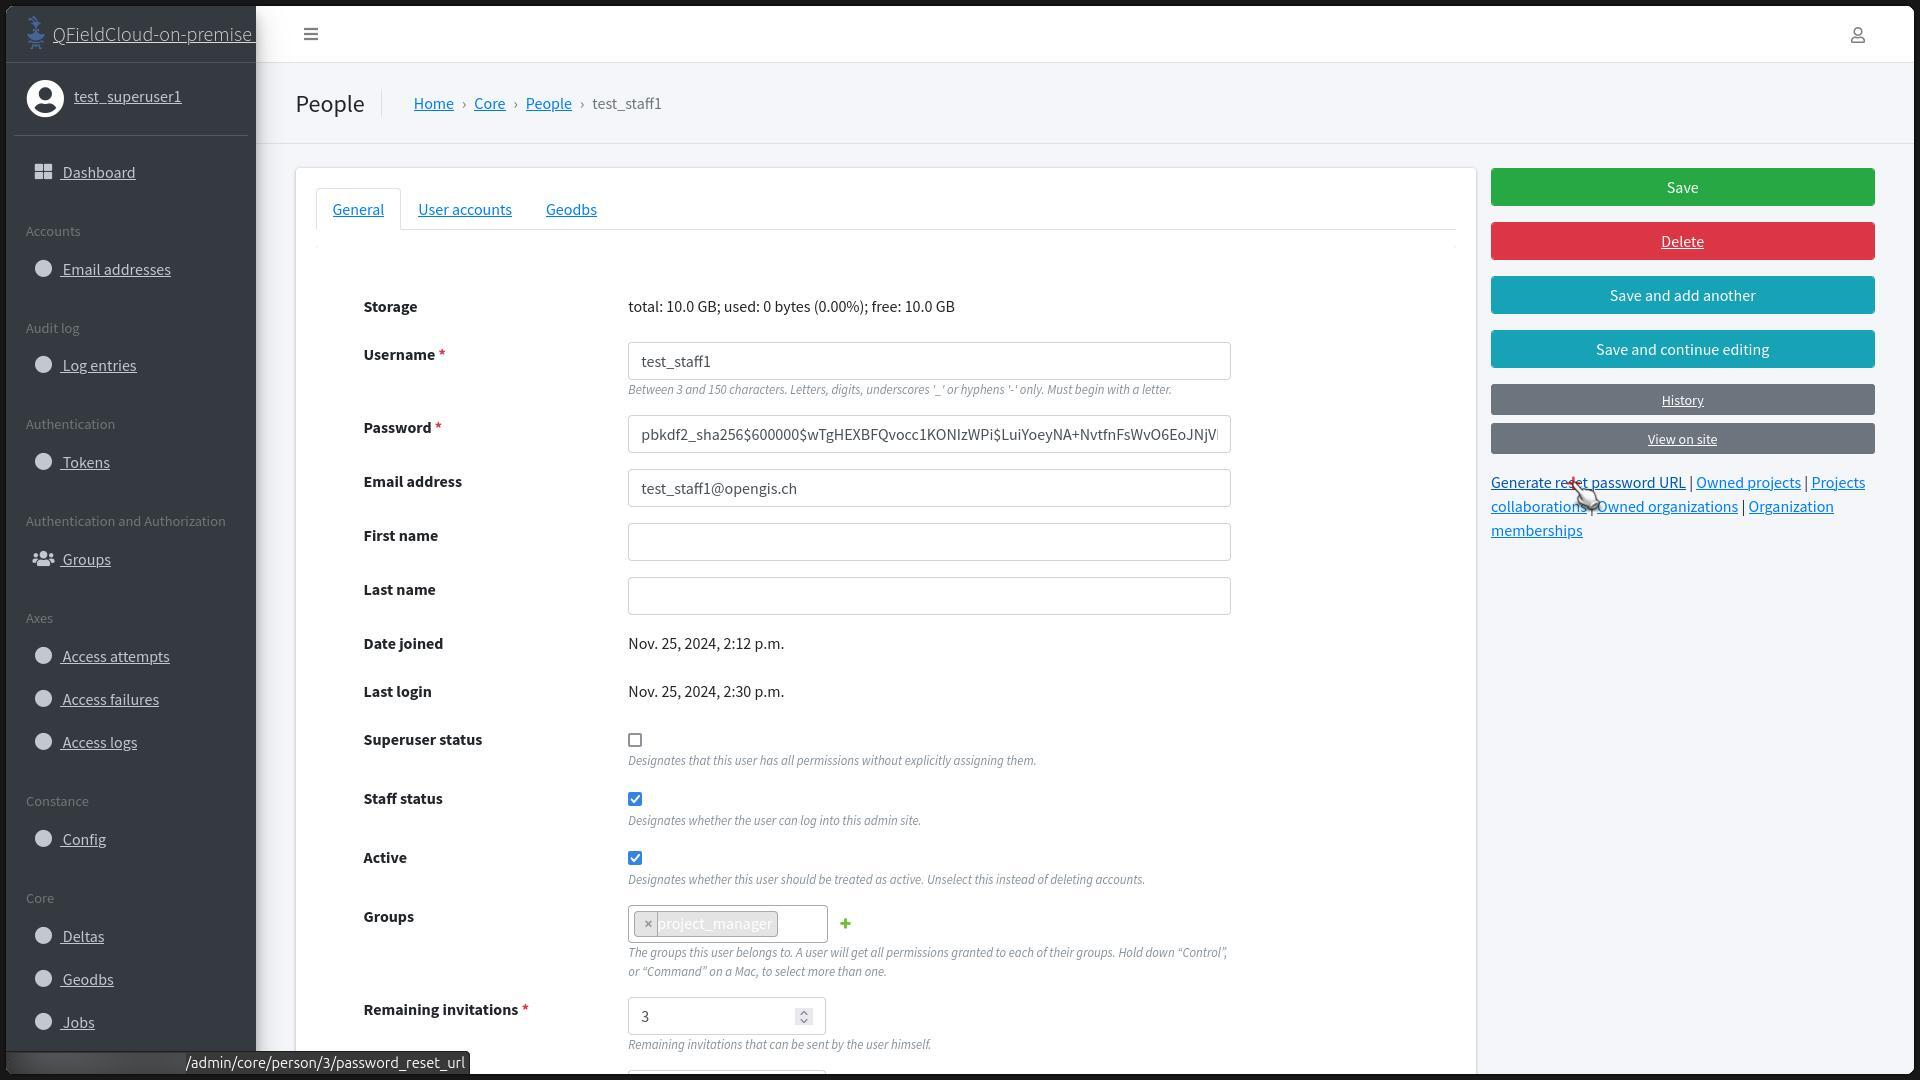
- Access the "People" Page under the "Core" pages section.
- Click on the "Username" of the user for whom you want to generate a new password URL.
-
On the user's page to find the "Generate reset password URL" option.
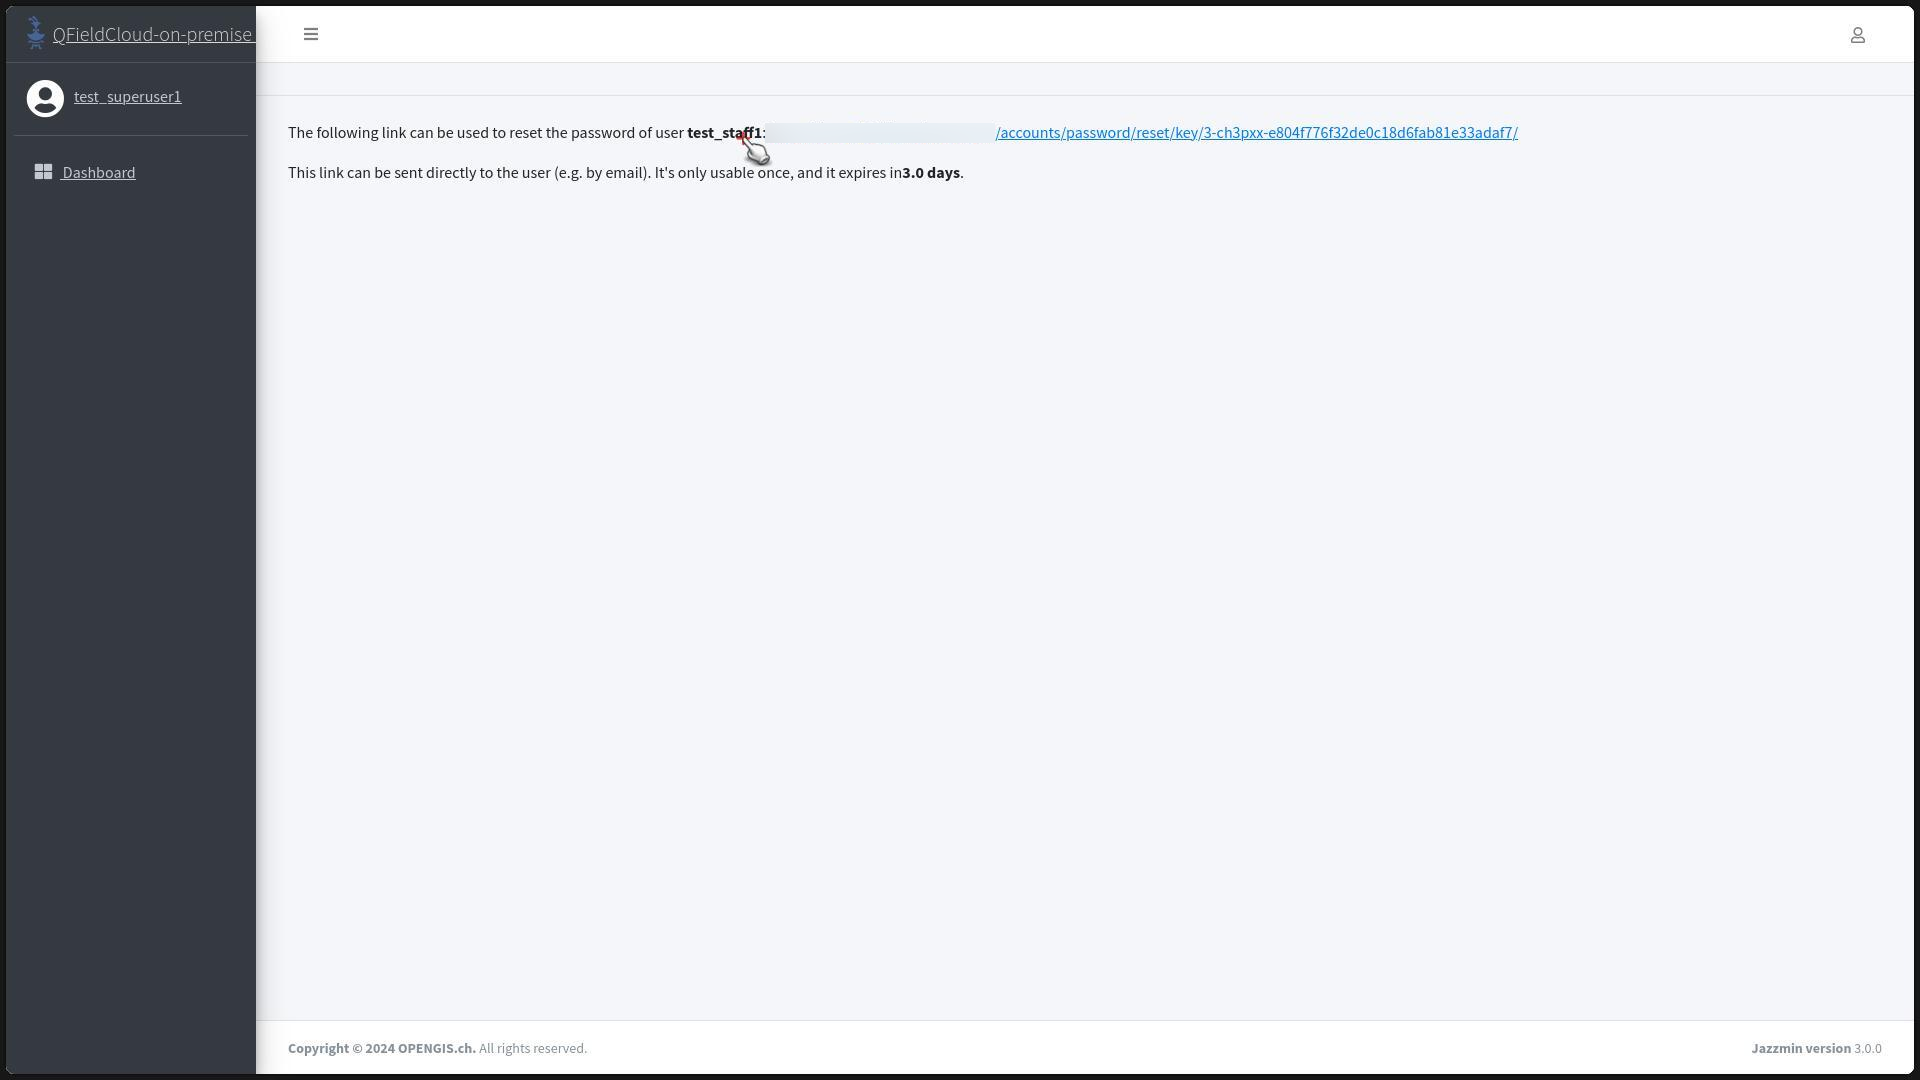
-
The manager should send the URL to the user via email for password reset.
Managing Organizations
Adding
Worflow
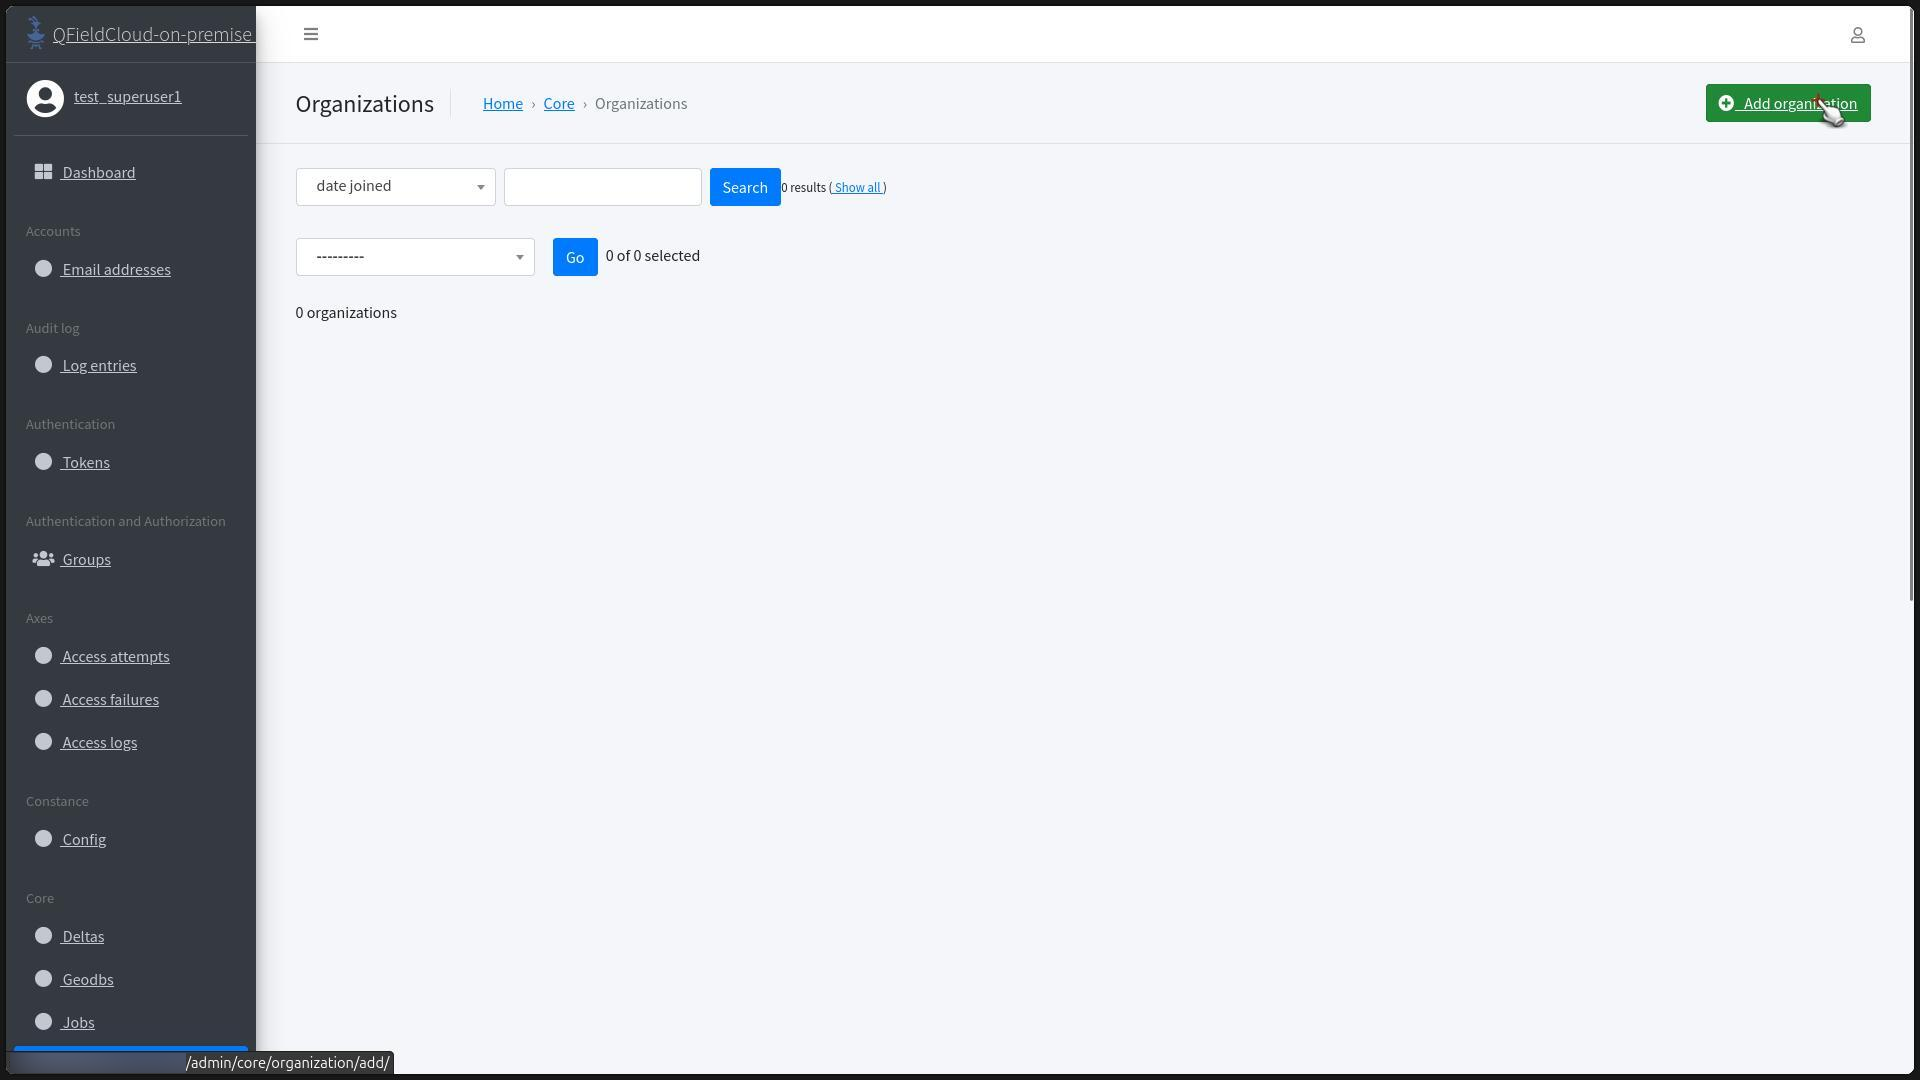
- Click on "Organizations" under the "Core" section.
-
Click "Add Organization".
-
Fill in the organization details, including "Username" for the organization name, "Email address" for the admin, and select the owner from the dropdown list.
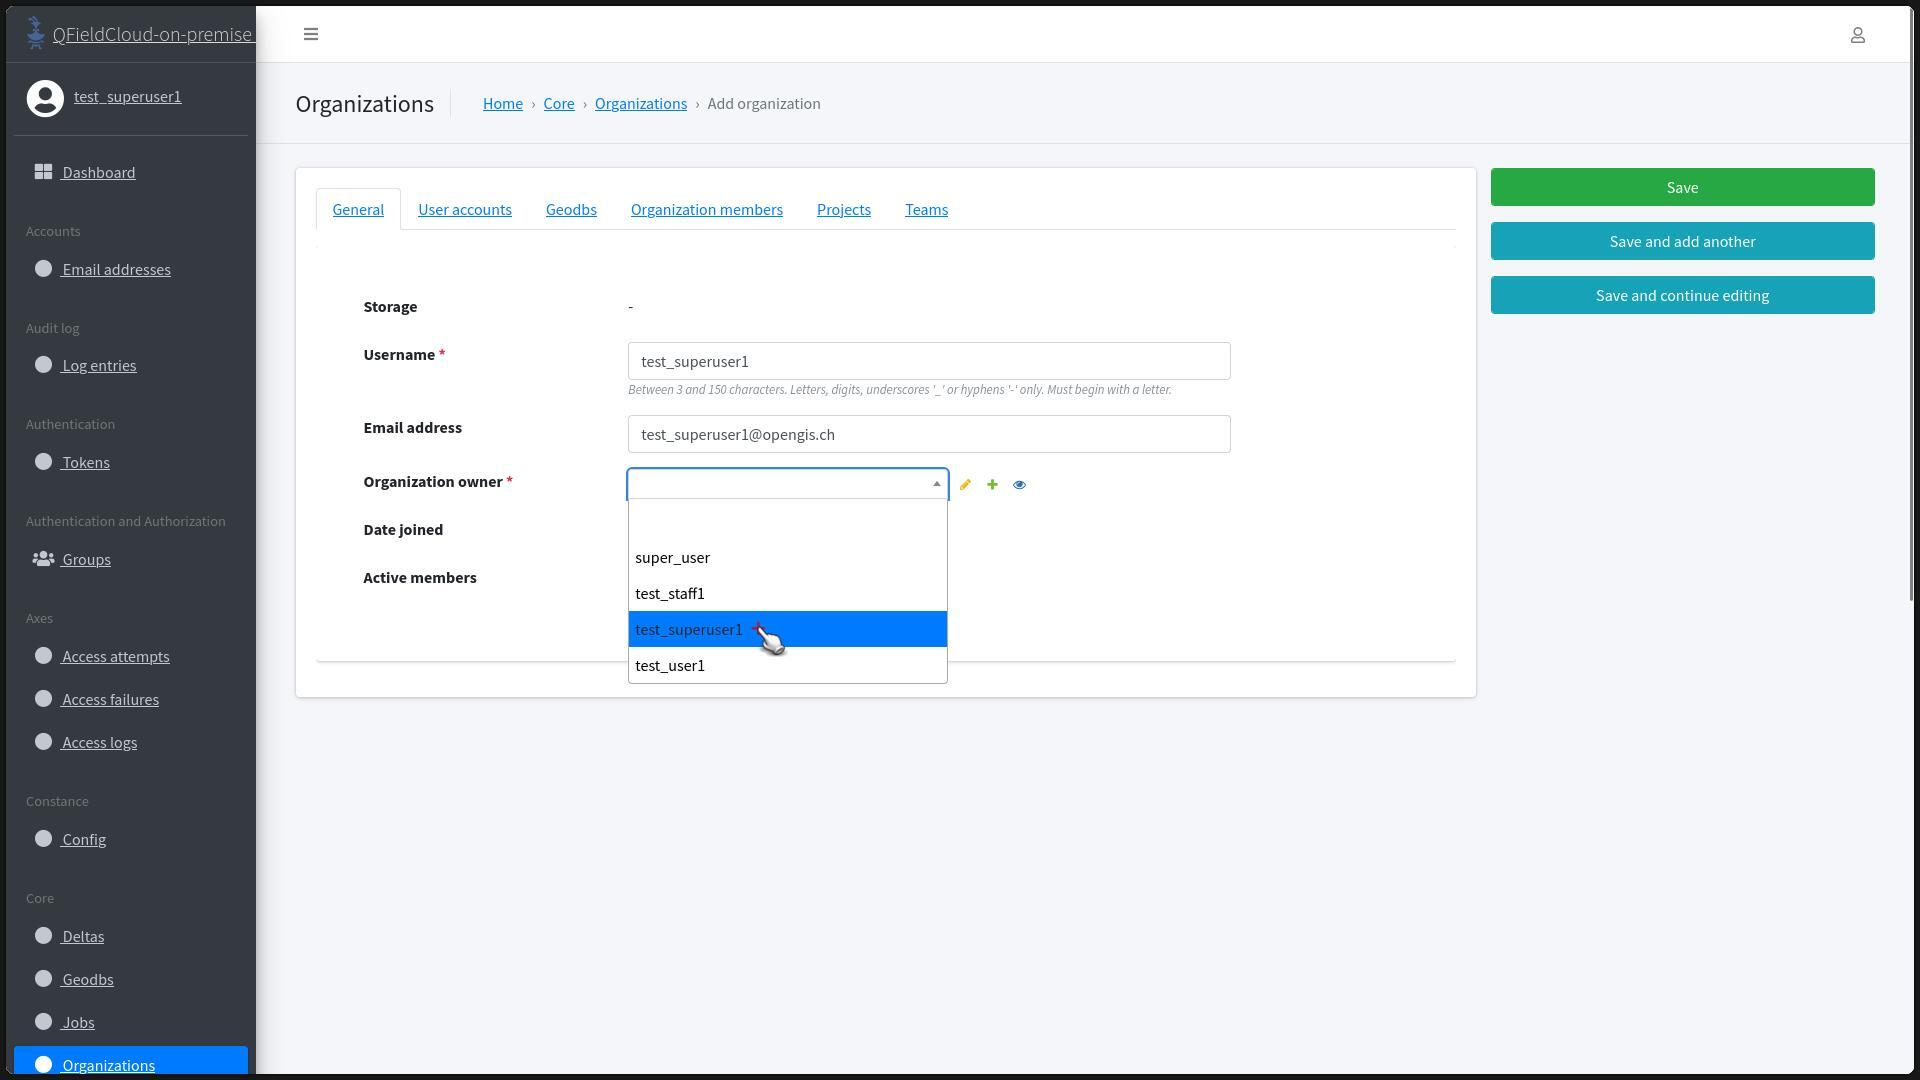
-
Click "Save" to create the organization, and a success message should be shown at the top of the browser.
Deleting
Workflow
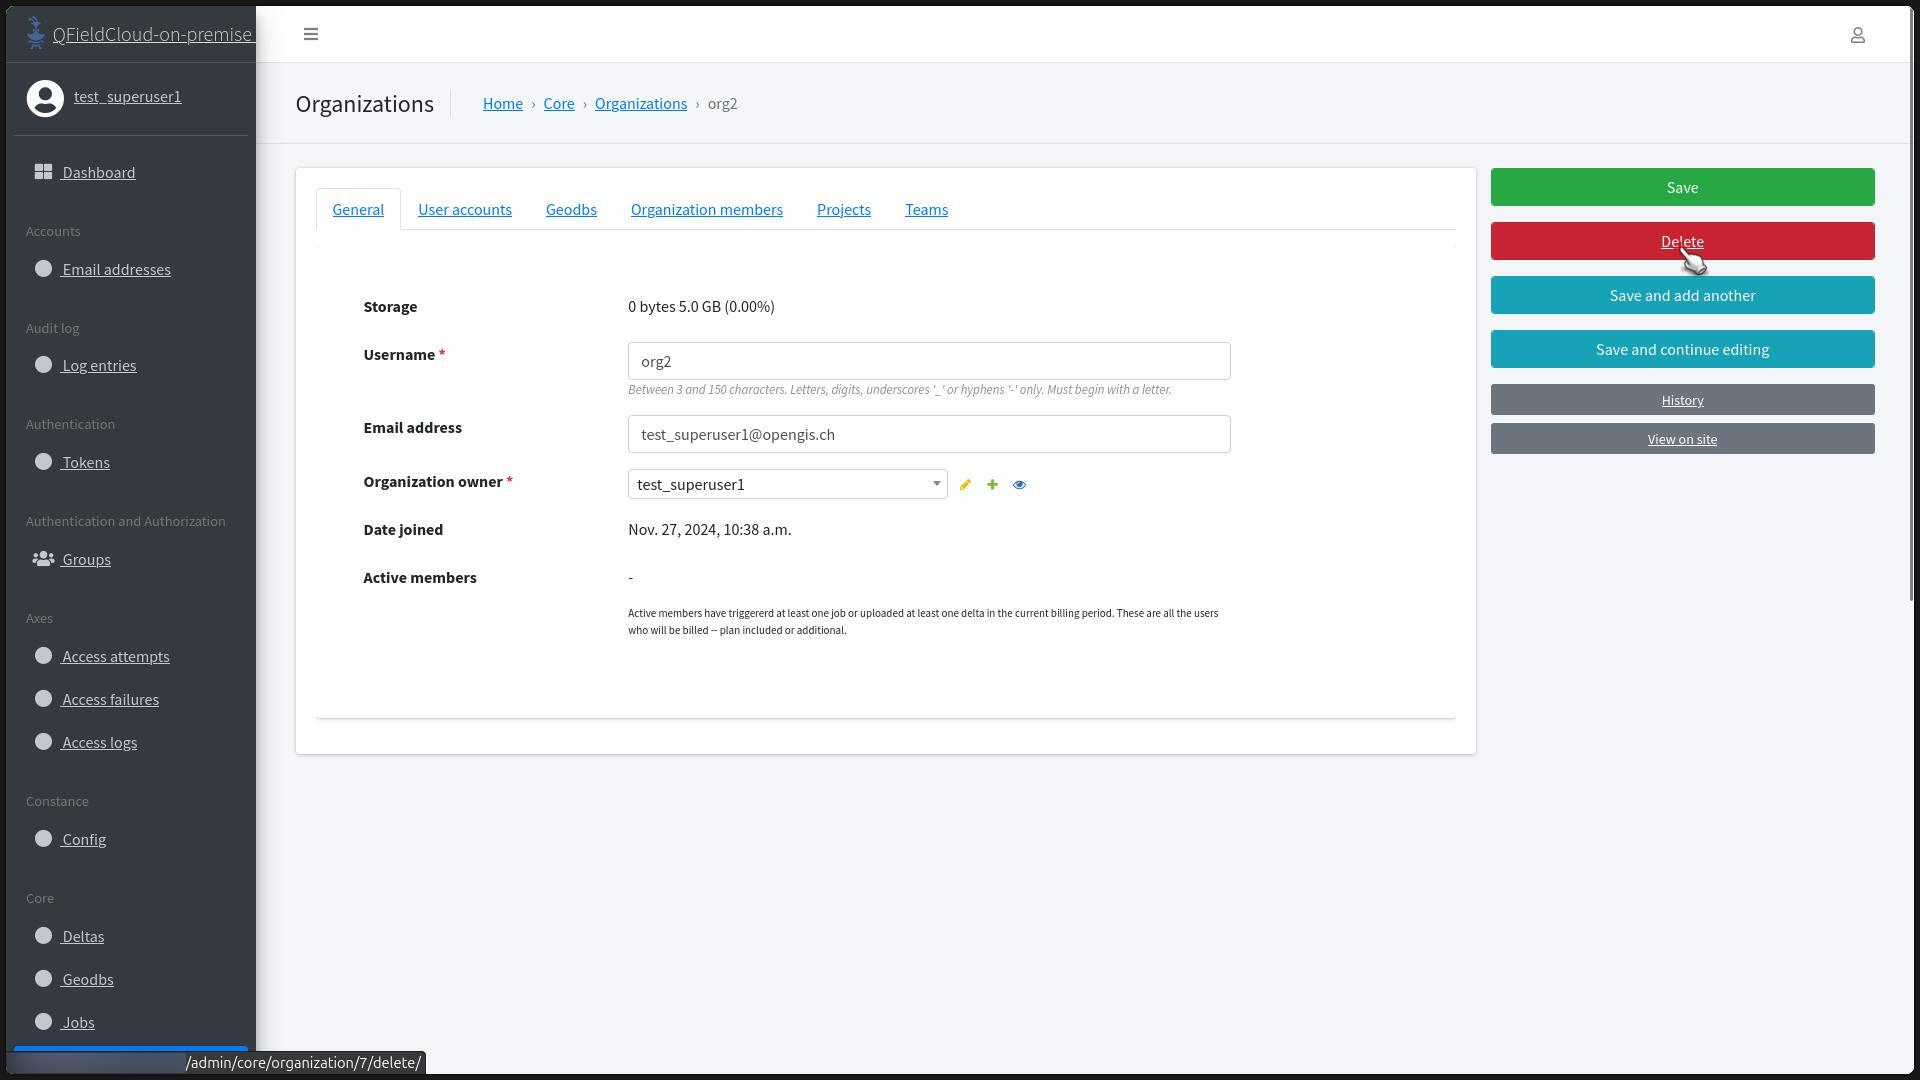
- Click on "Organizations" under the "Core" section.
-
Click on the organization's name.

-
Find the "Delete" button.
-
The screen will show you all the related objects that will be deleted. Once you are sure that you wish to complete the deletion click "Yes, I'm sure".

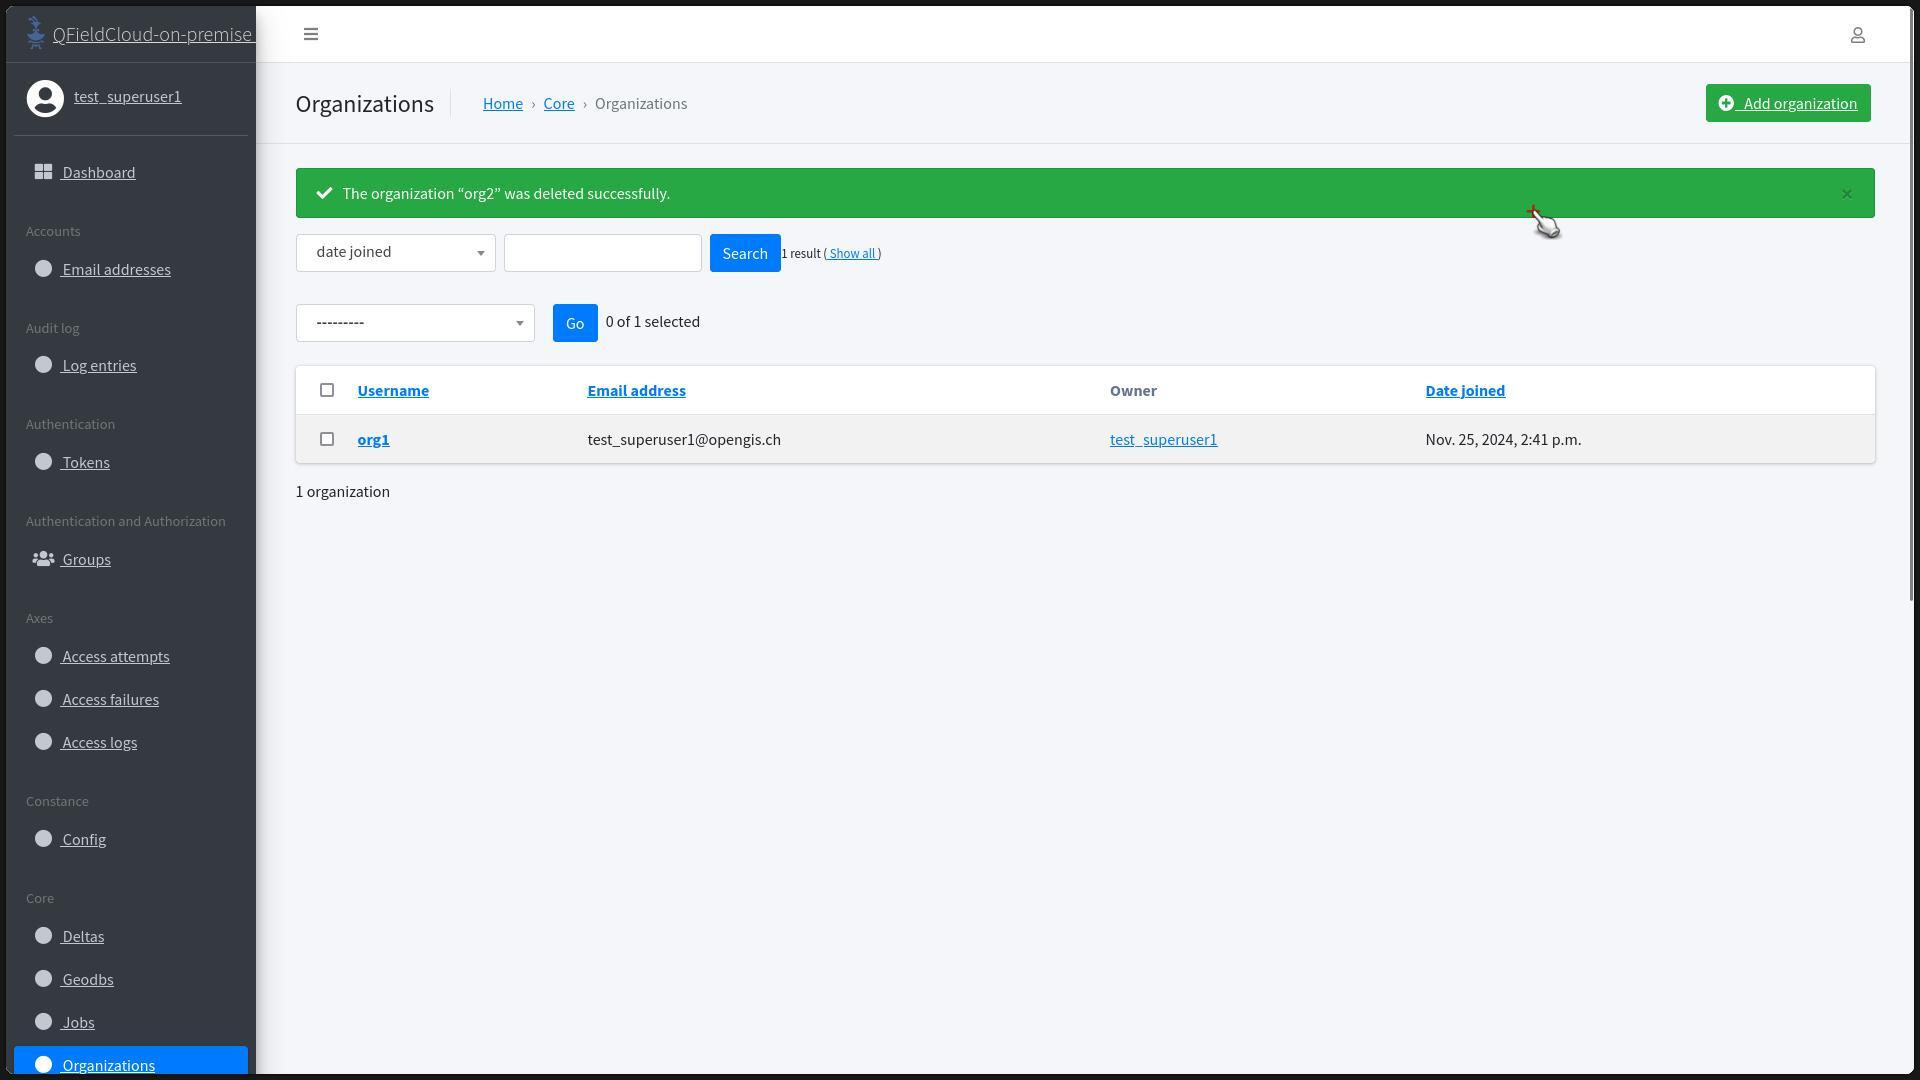
5.You will be redirected to the "Organization" Section and a message should appear at the top of the page indicating the successful deletion.
Adding Members
Workflow
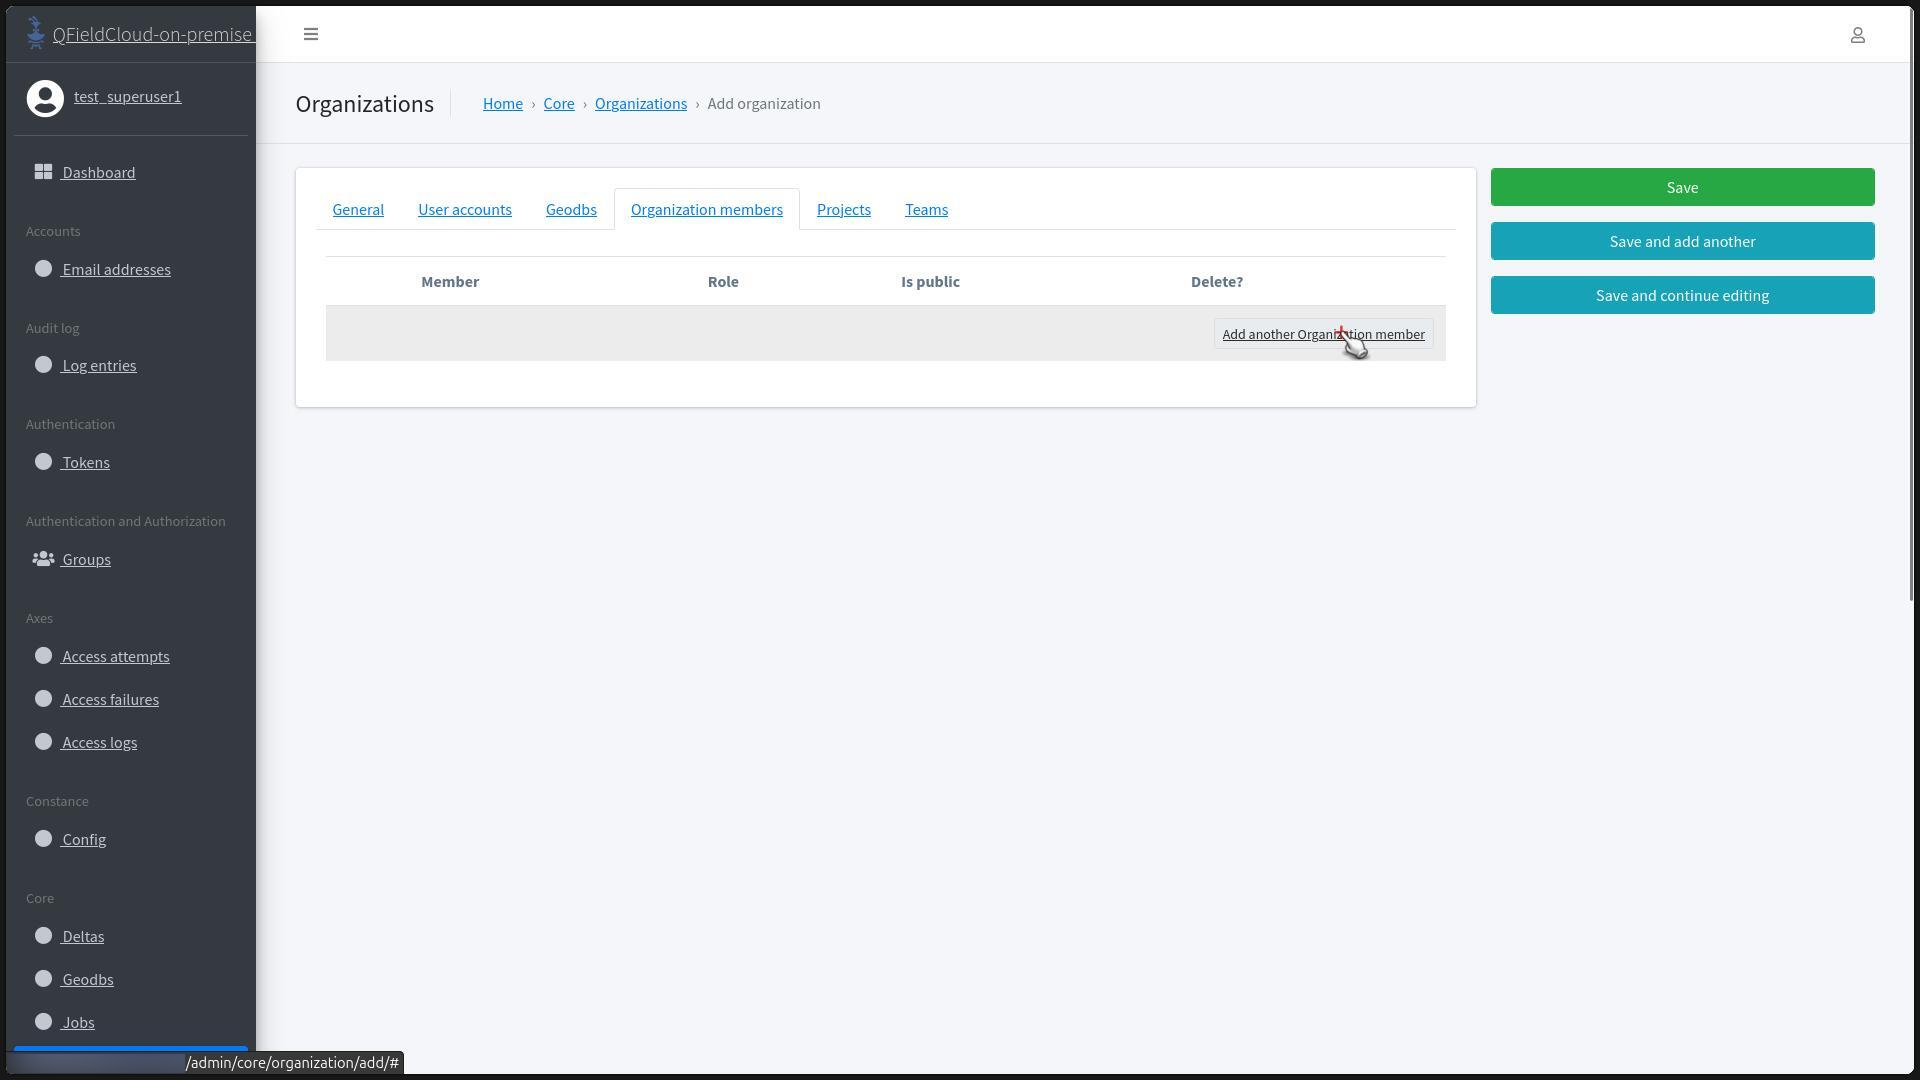
- Go to the "Organizations" page and select the organization where you want to add a new member.
-
Open the "Organization members" tab and click on "Add another Organization member".
-
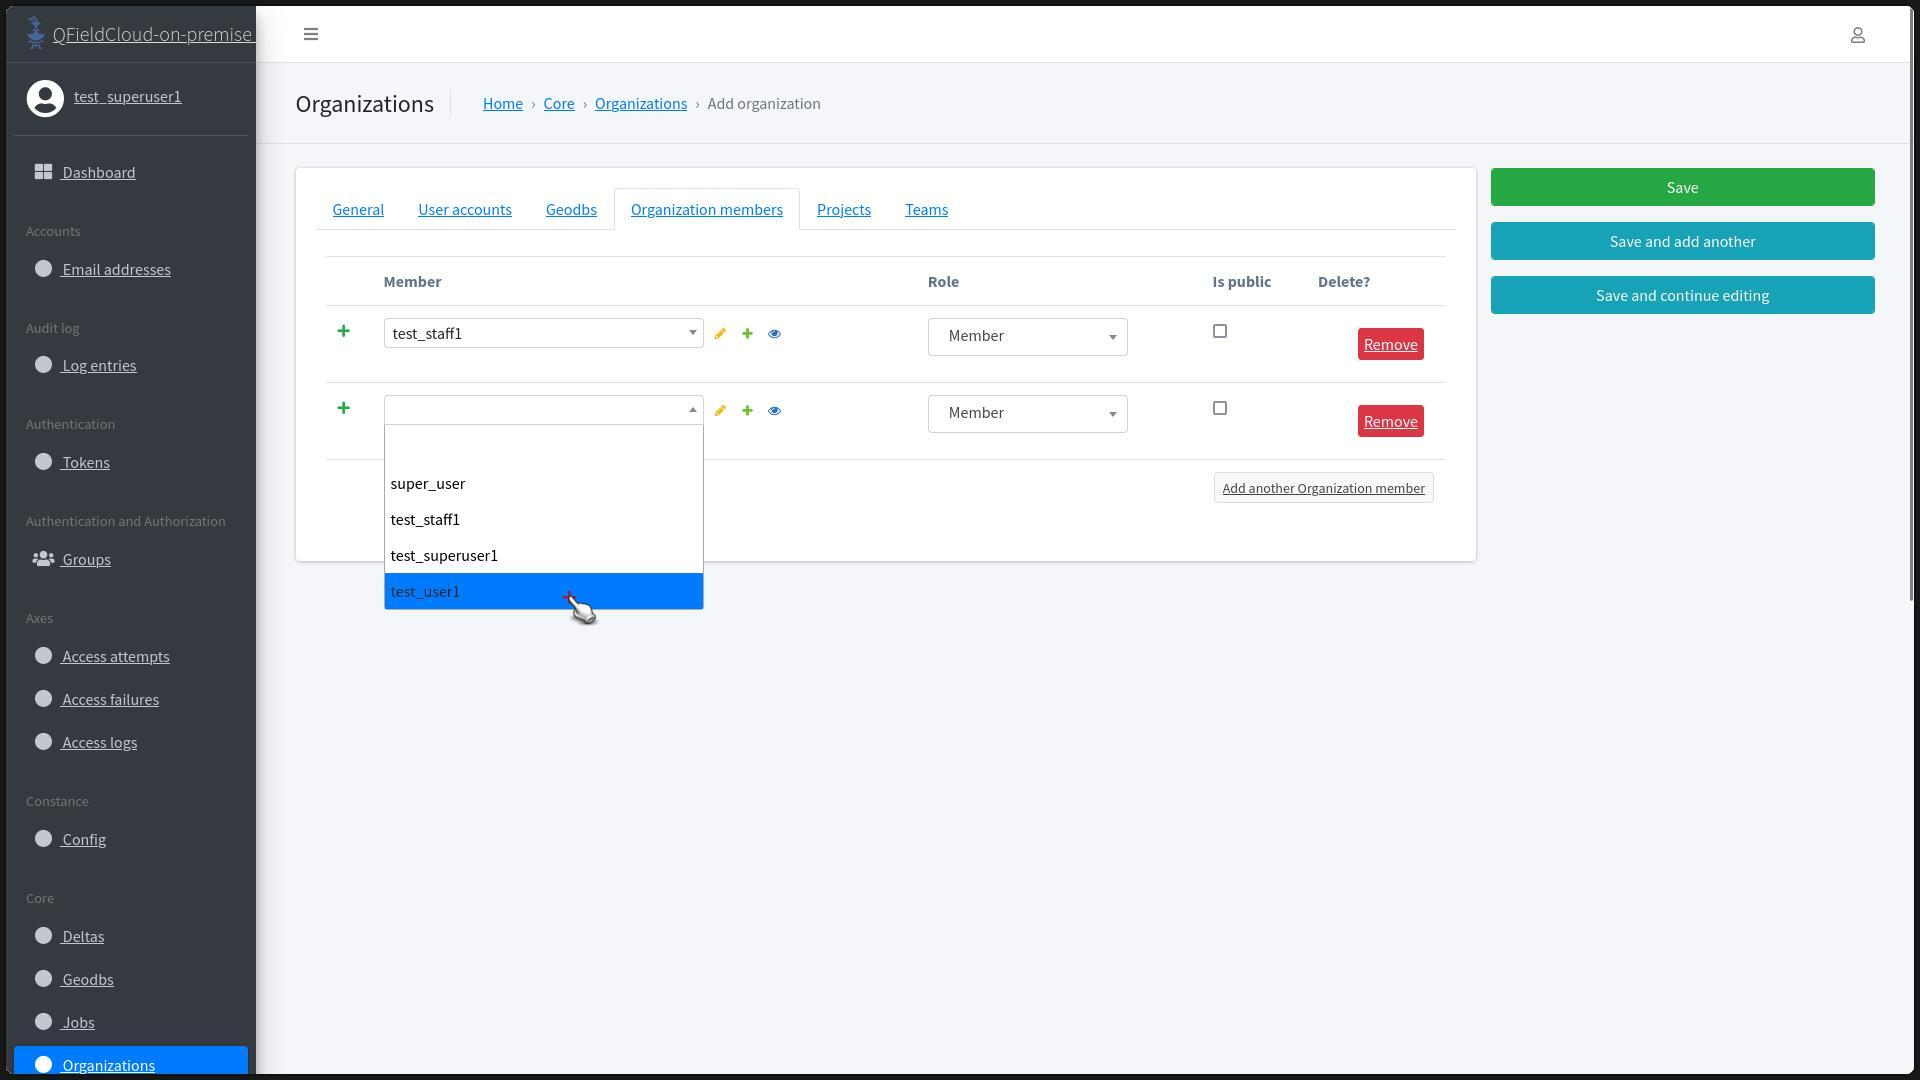
In the search bar, type the username of the user you want to add.
-
After finding the user, click on the name and add them to the "Organization Members" list.
-
Once all desired members are added, click on "Save".

-
You will be redirected to the "Team" Section and a message should appear at the top of the page indicating the successful addition of members.
Remove Members
Worfklow
- Go to the "Organizations" page and select the organization where you want to remove one or multiple members.
- Open the "Organization members" tab.
-
Check the "Delete?" checkbox for the user you want to remove.

-
Click "Save".
-
You will be redirected to the "Organization Member" Section and a message should appear at the top of the page indicating the successful removal of the selected members.
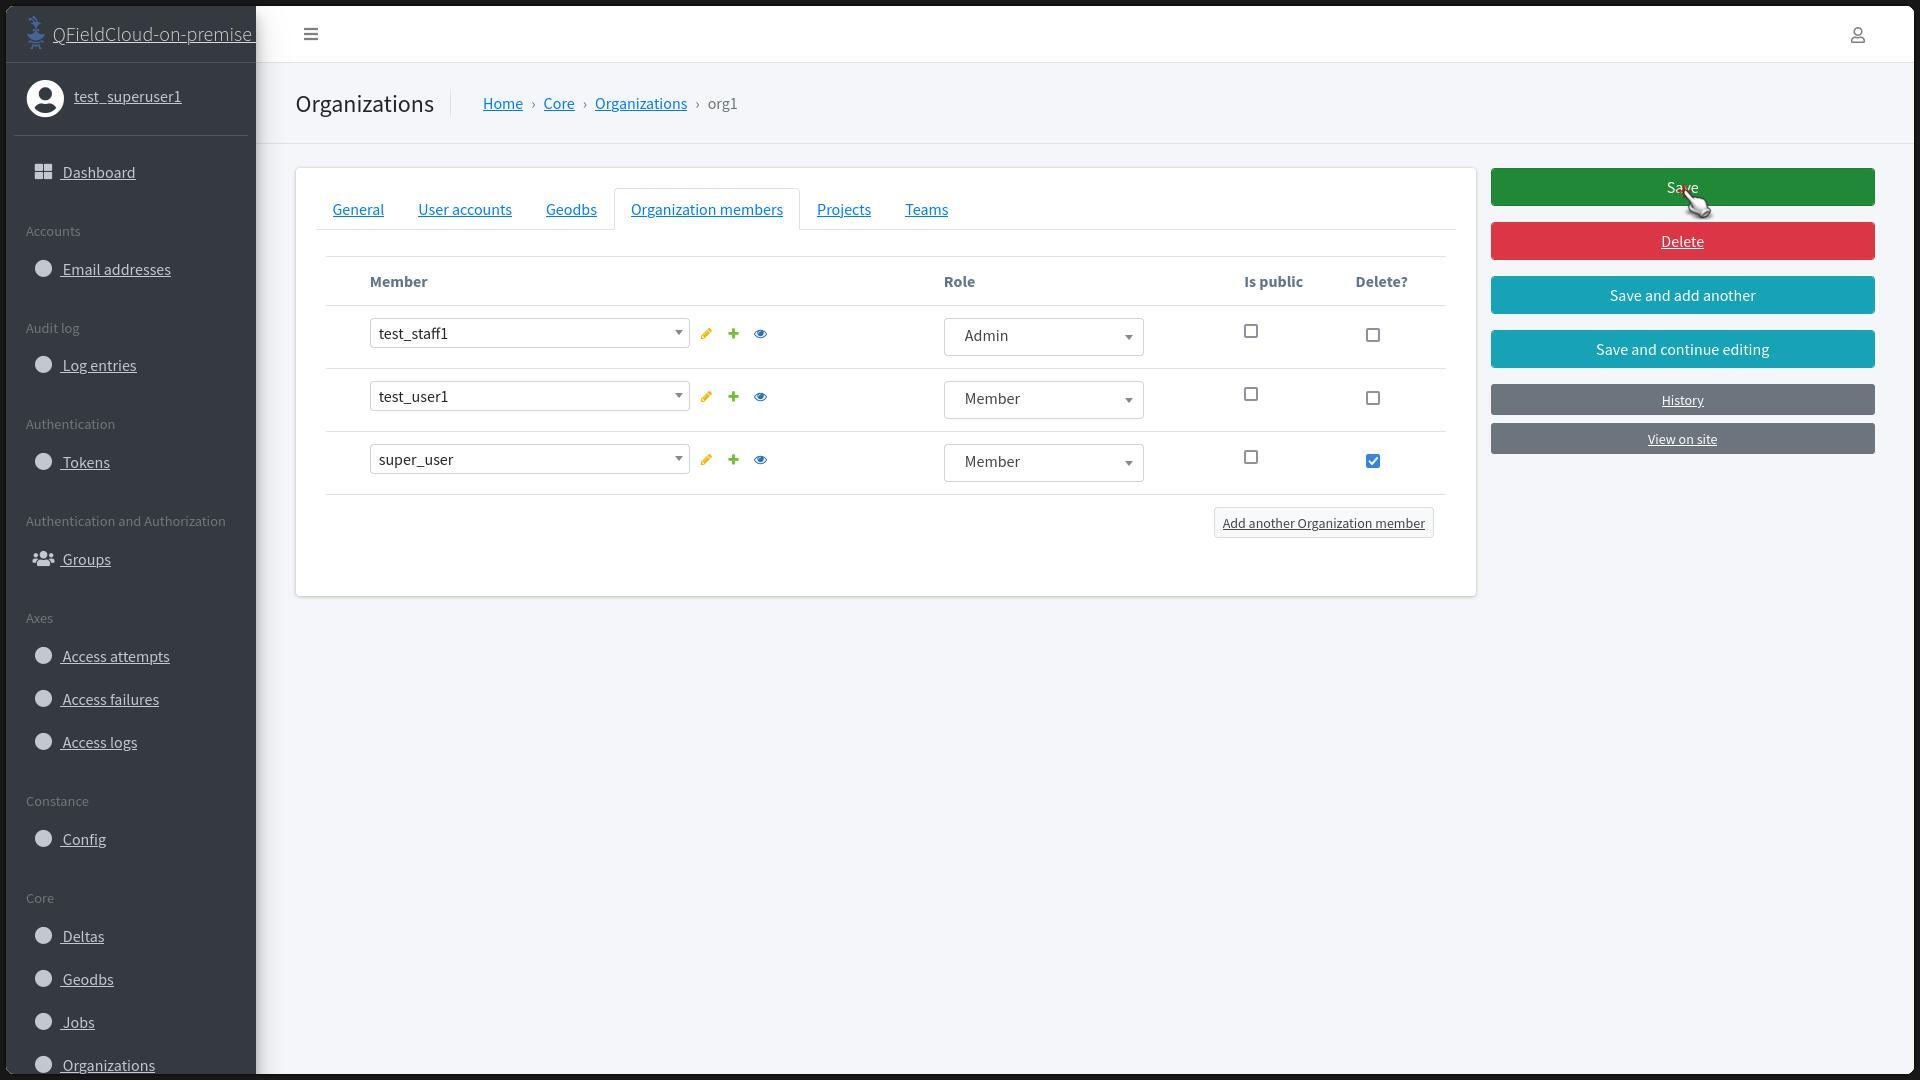
Changing Roles of Members
Workflow
- Find the organization where you wish to change the role of the member.
- Open the "Organization members" tab.
-
In the "Role" field of the user, click the dropdown and choose "Member" or "Admin".
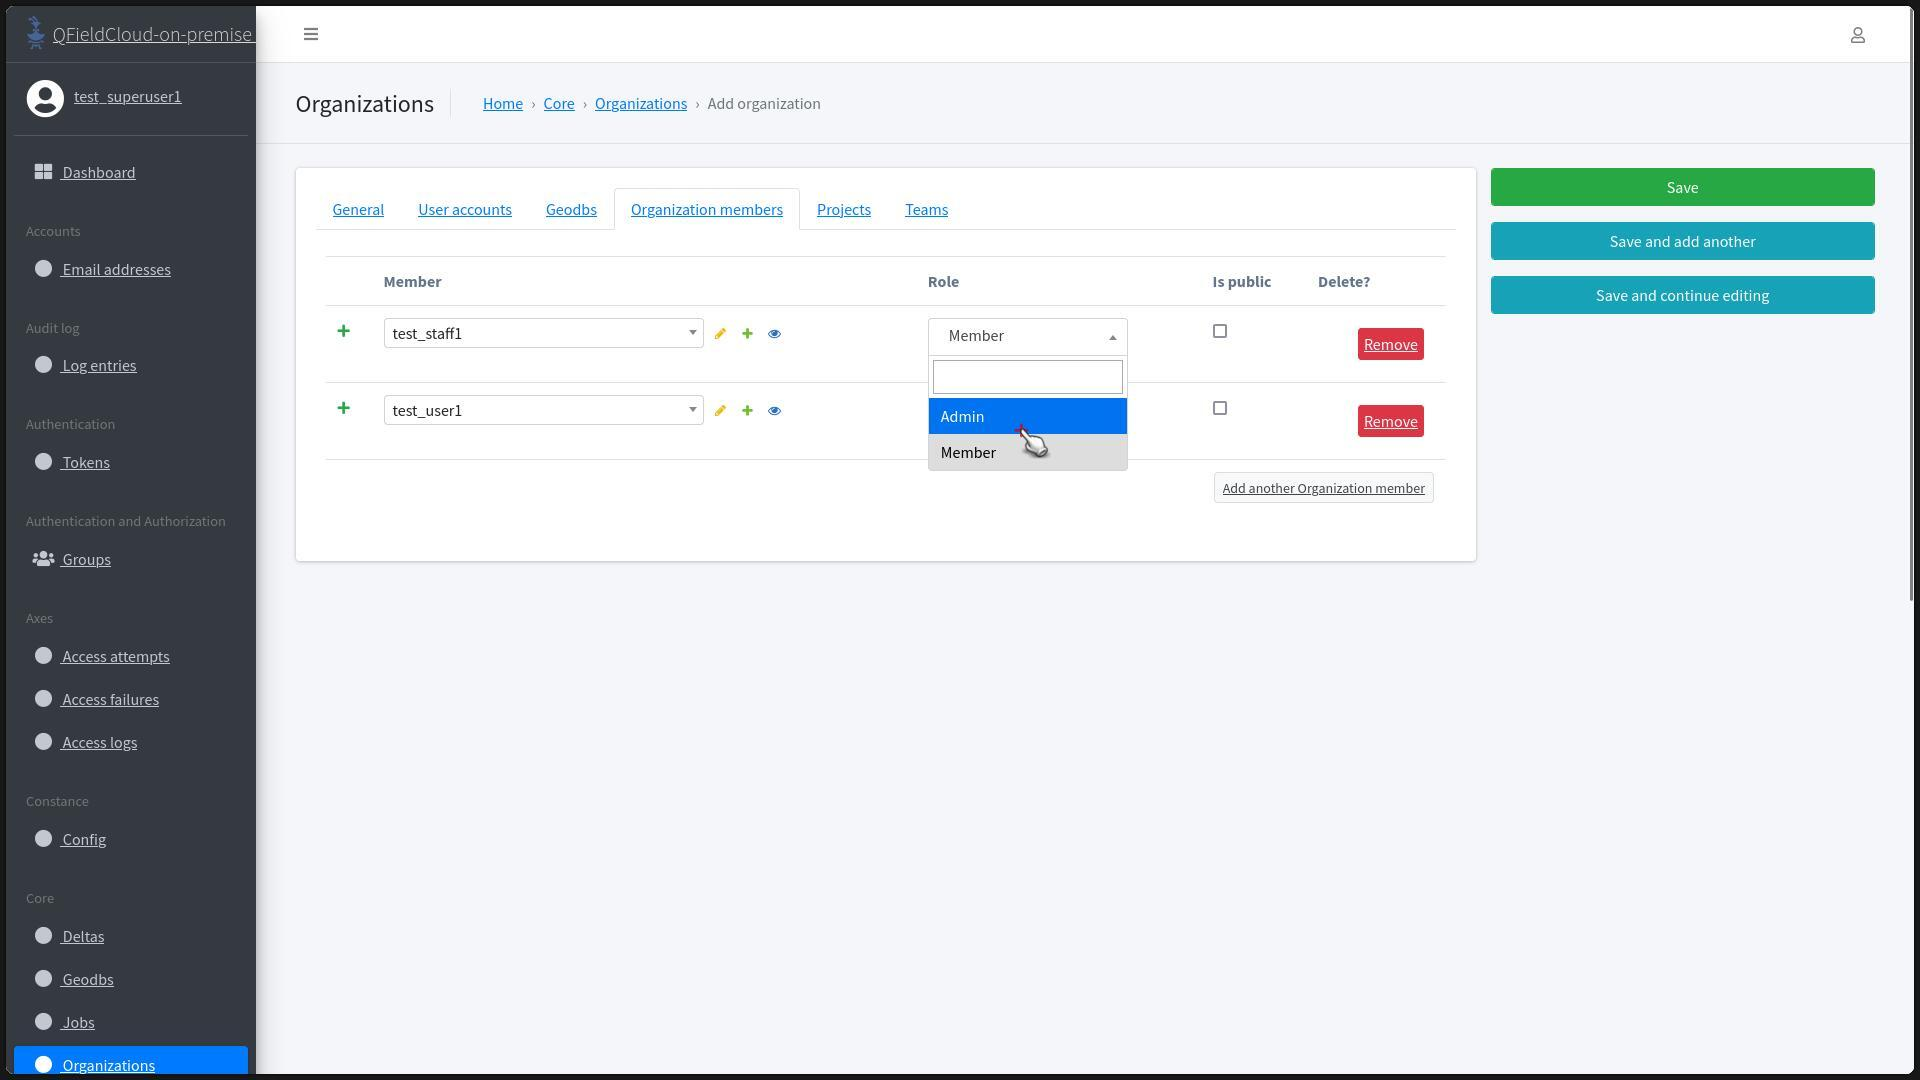
-
Select the role you want to assign to the user and click to "Save" the updated data for the "Organization".
- You will be redirected to the "Team" Section and a message should appear at the top of the page indicating the successful role change of the selected members.
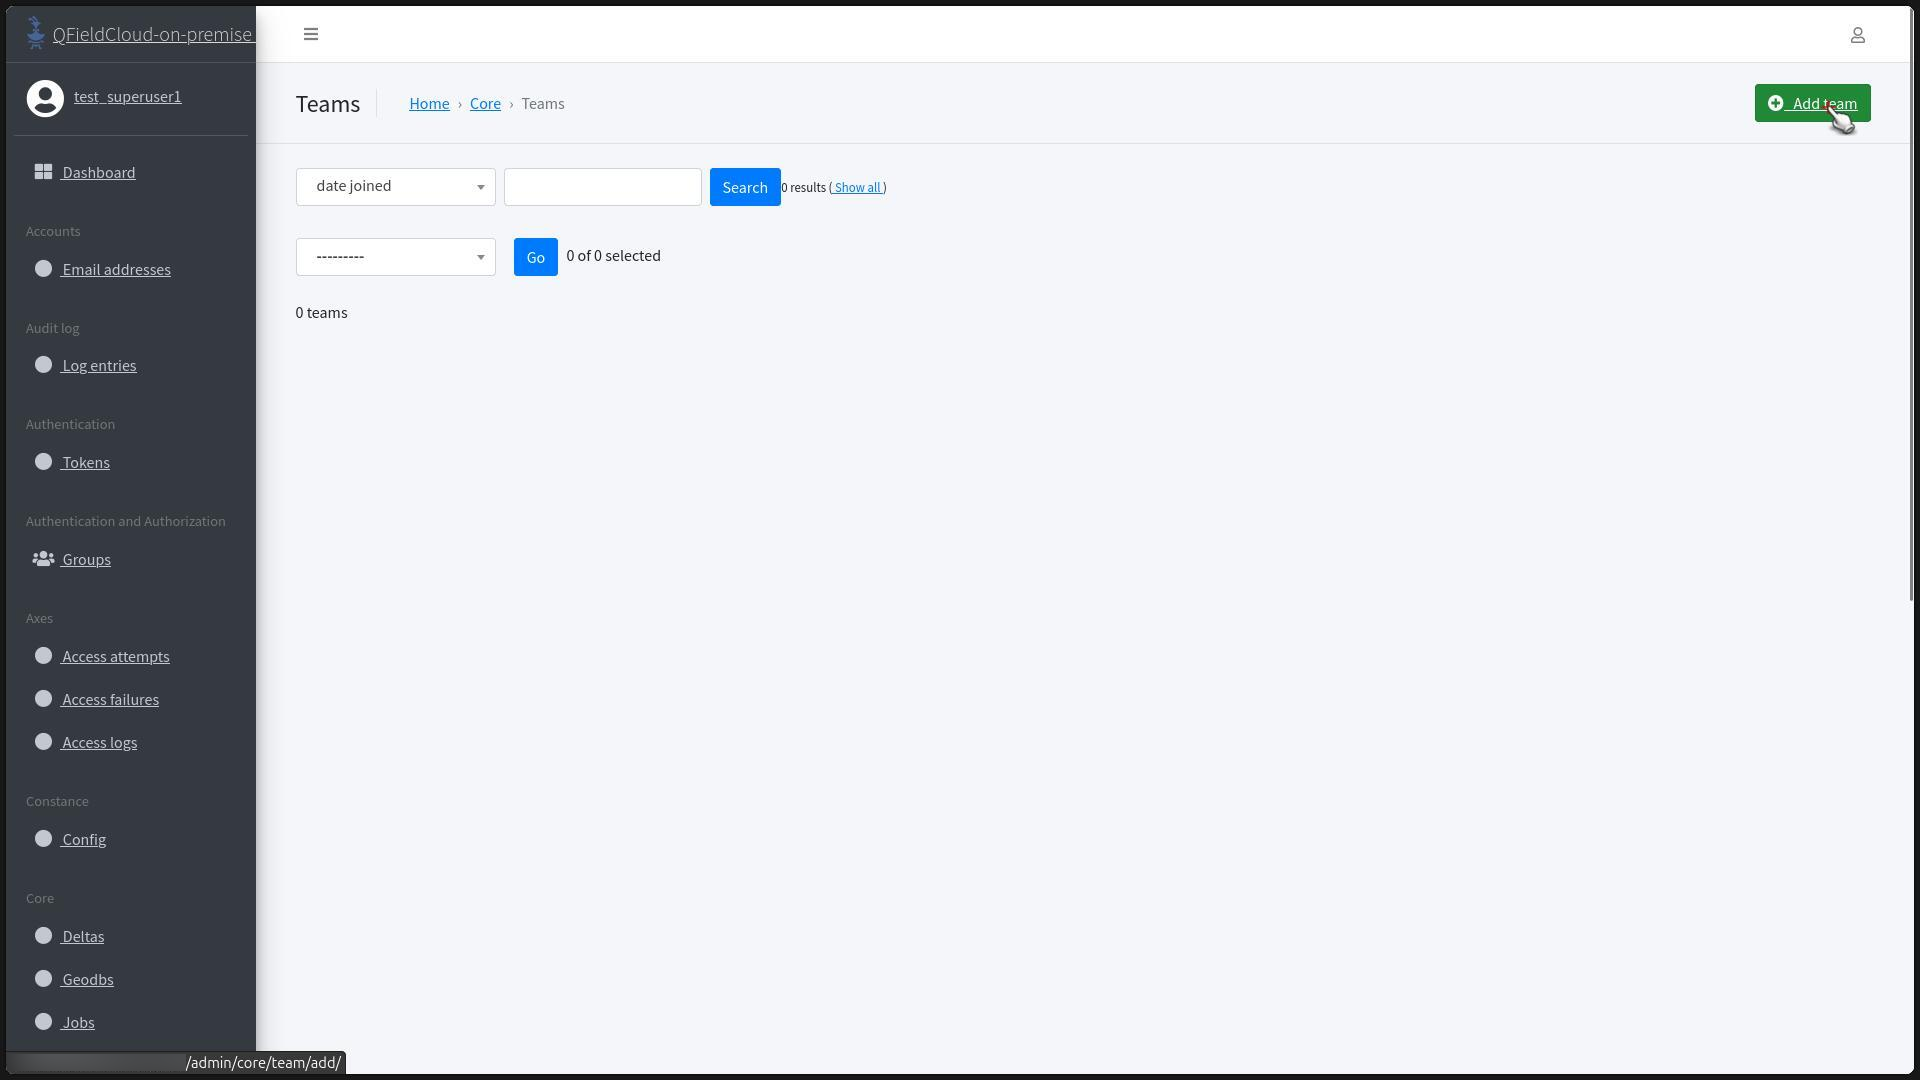
Creating Teams
Workflow
- Access the "Teams" pages under the "Core" section.
-
Click on "Add Team".
-
Provide a name for the team in the "Username" field and select the organization where the team should belong.

-
In the "Team members" section, click on "Add another Team member".

-
Search for the team members you wish to add. The people added to the Team must be members of the Team's Organization.
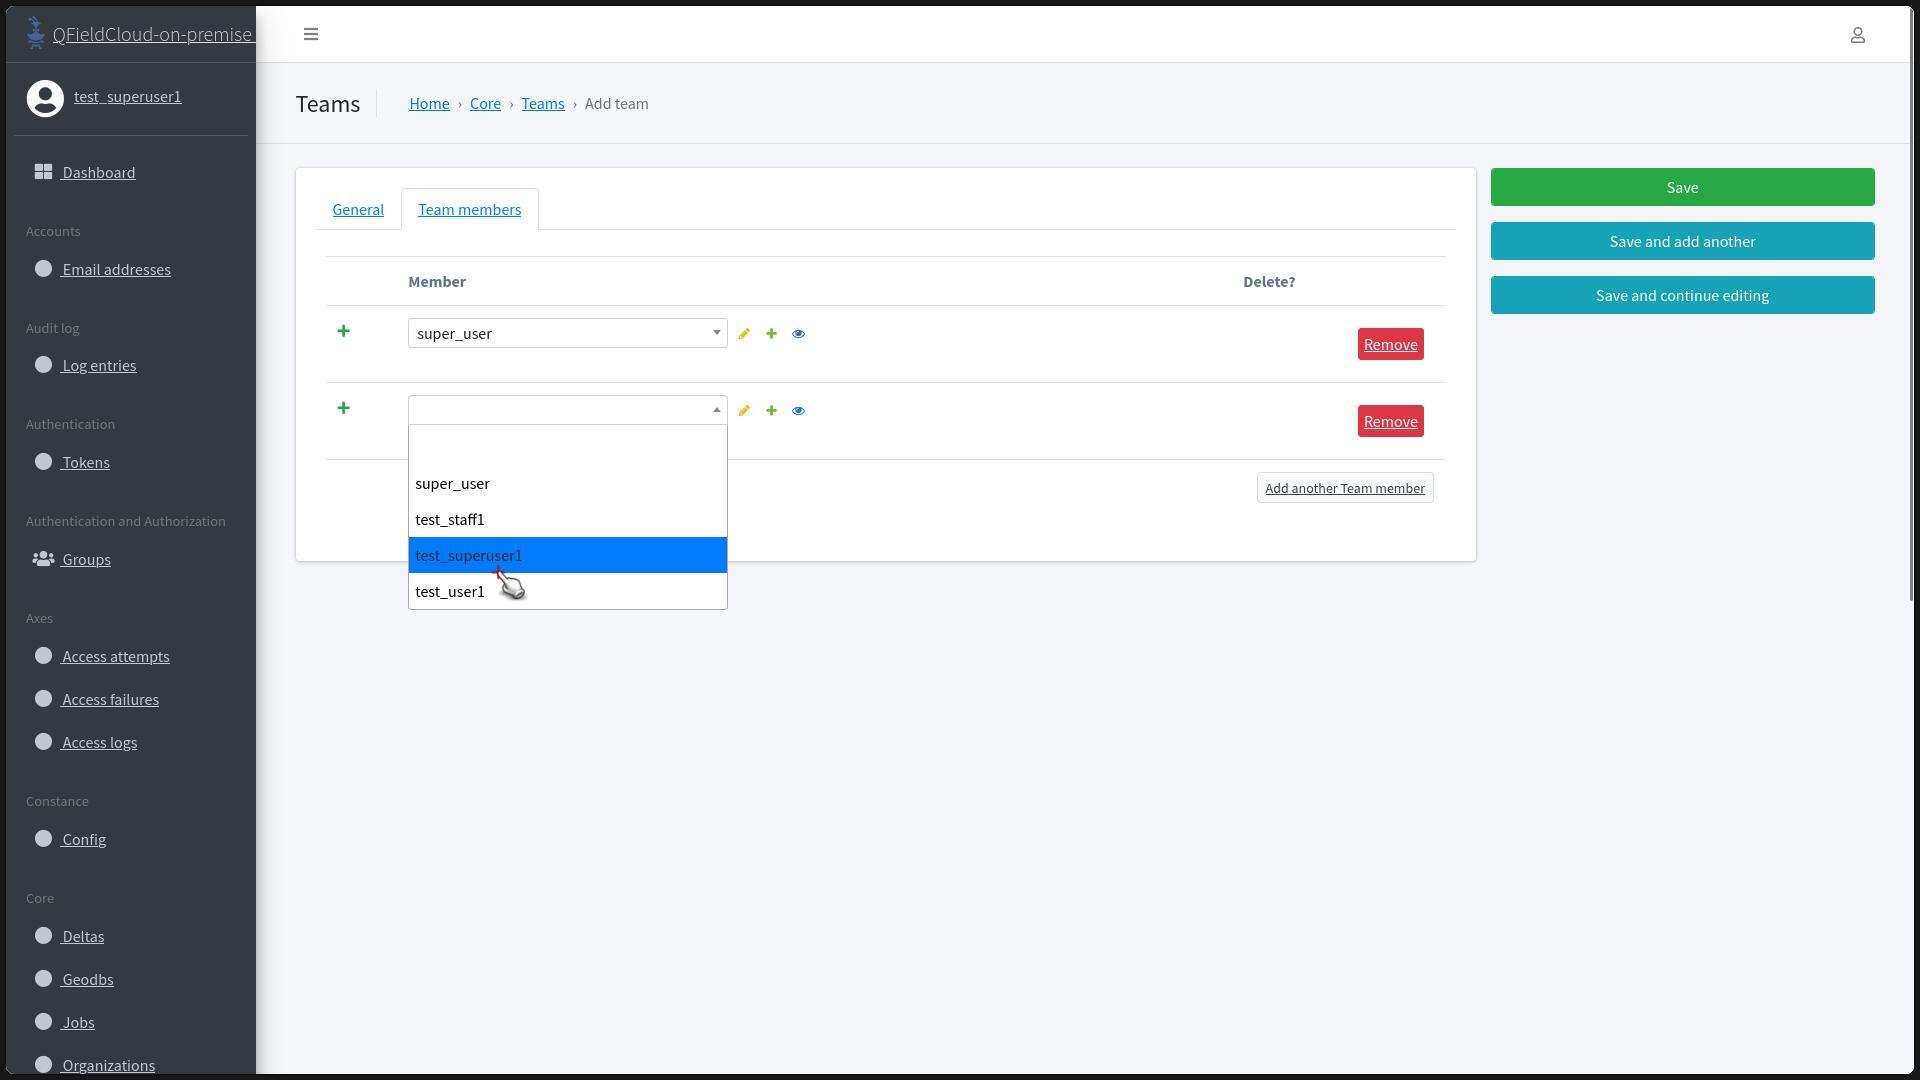
-
Once all members are added, click "Save".
- You will be redirected to the "Teams" section and a message should appear at the top of the page indicating the successful addition of the selected members to the team.
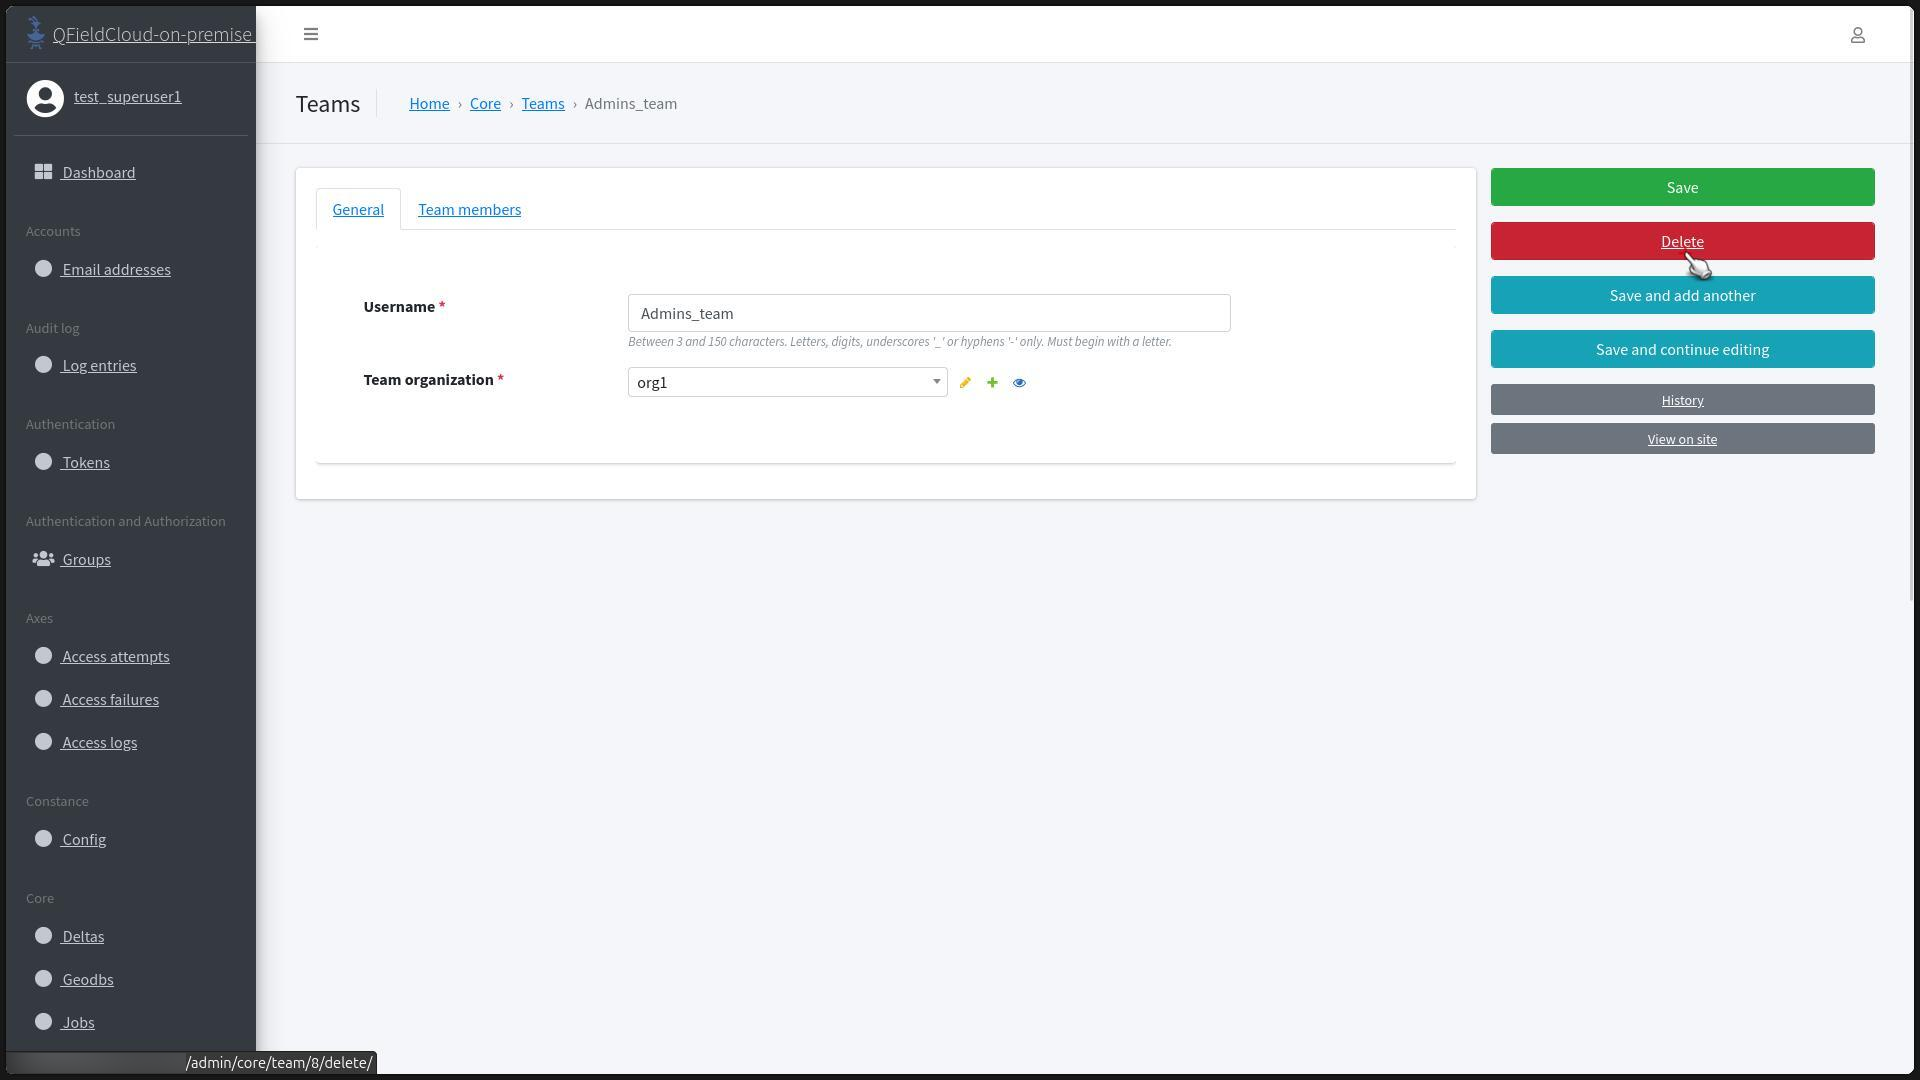
Deleting Teams
Worfklow
- Access the "Teams" page under the "Core" section
- Find the team which you wish to delete.
-
Select the "Delete Button".
-
The screen will show you all the related objects that will be deleted. Once you are sure that you wish to complete the deletion click "Yes, I'm sure".
-
You will be redirected to the "Teams" section and a message should appear at the top of the page indicating the successful deletion of the selected members.
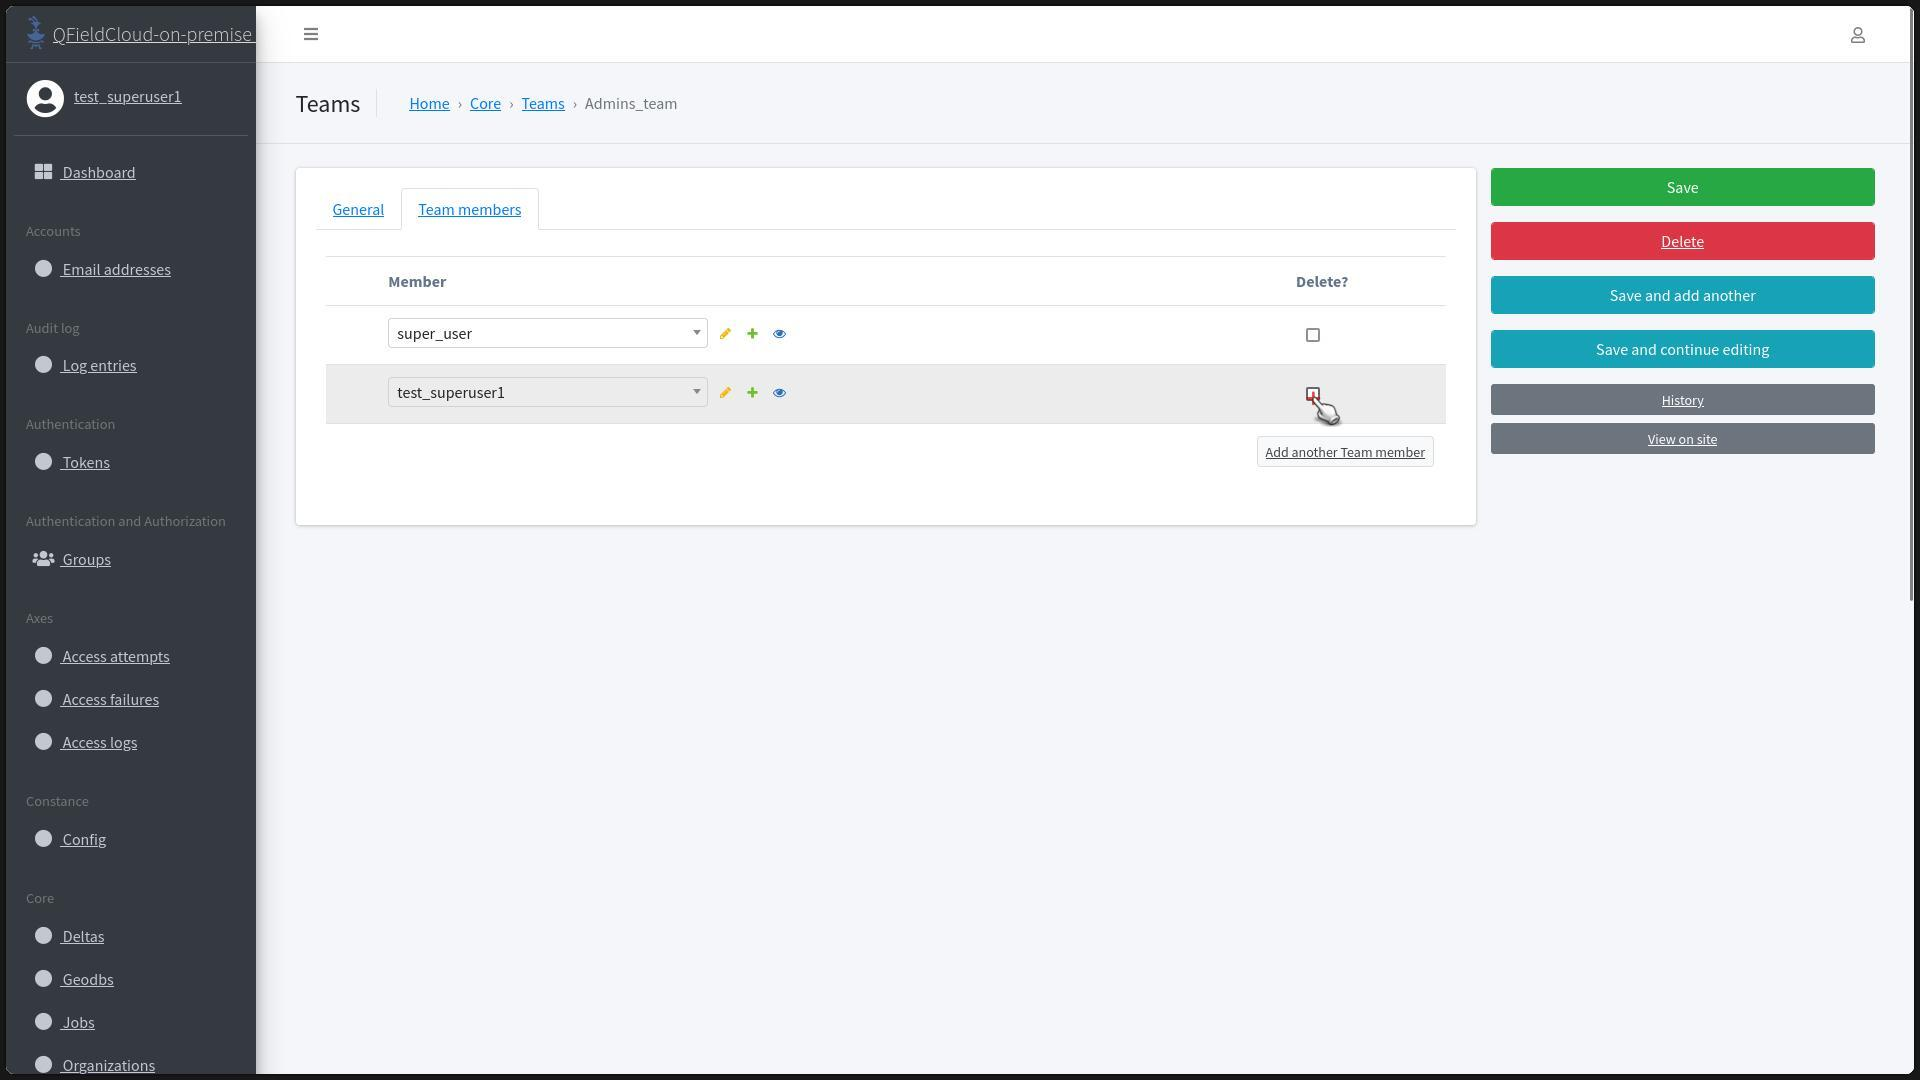
Removing Members from the Team
Workflow
- Enter the team where you want to delete users.
-
In the team, activate the "Delete?" checkbox for the users you want to remove.

-
Click to "Save" the updated data for the "Team".
- You will be redirected to the "Teams" section and a message should appear at the top of the page indicating the successful removal of the selected members.
Managing Projects
Creating Projects
There are two ways in which you can create projects, follow either Method 1 or Method 2.
Method 1: Convert a Local Project to a QFieldCloud Project
Workflow
- In QGIS, access your project and open the QFieldSync plugin.
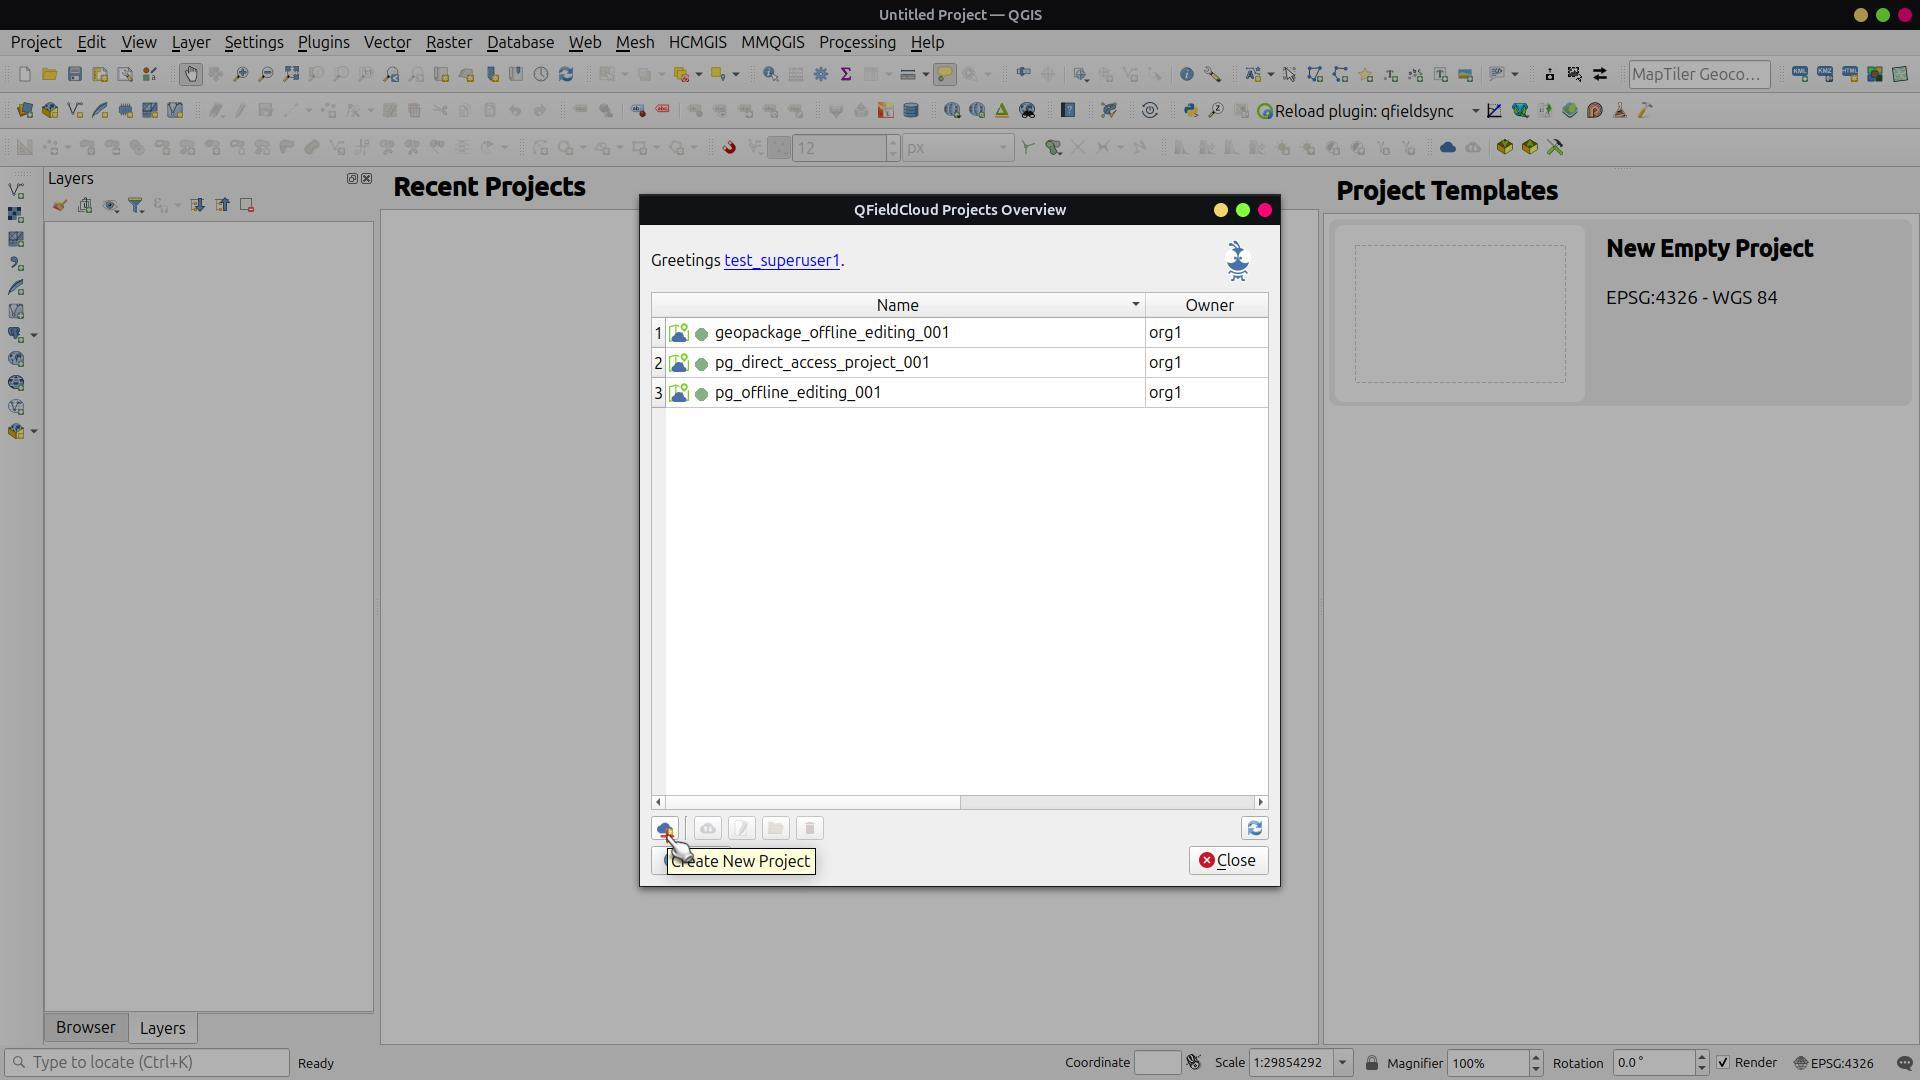
- Click on "QFieldCloud Projects Overview".
- Click "Create New Project".
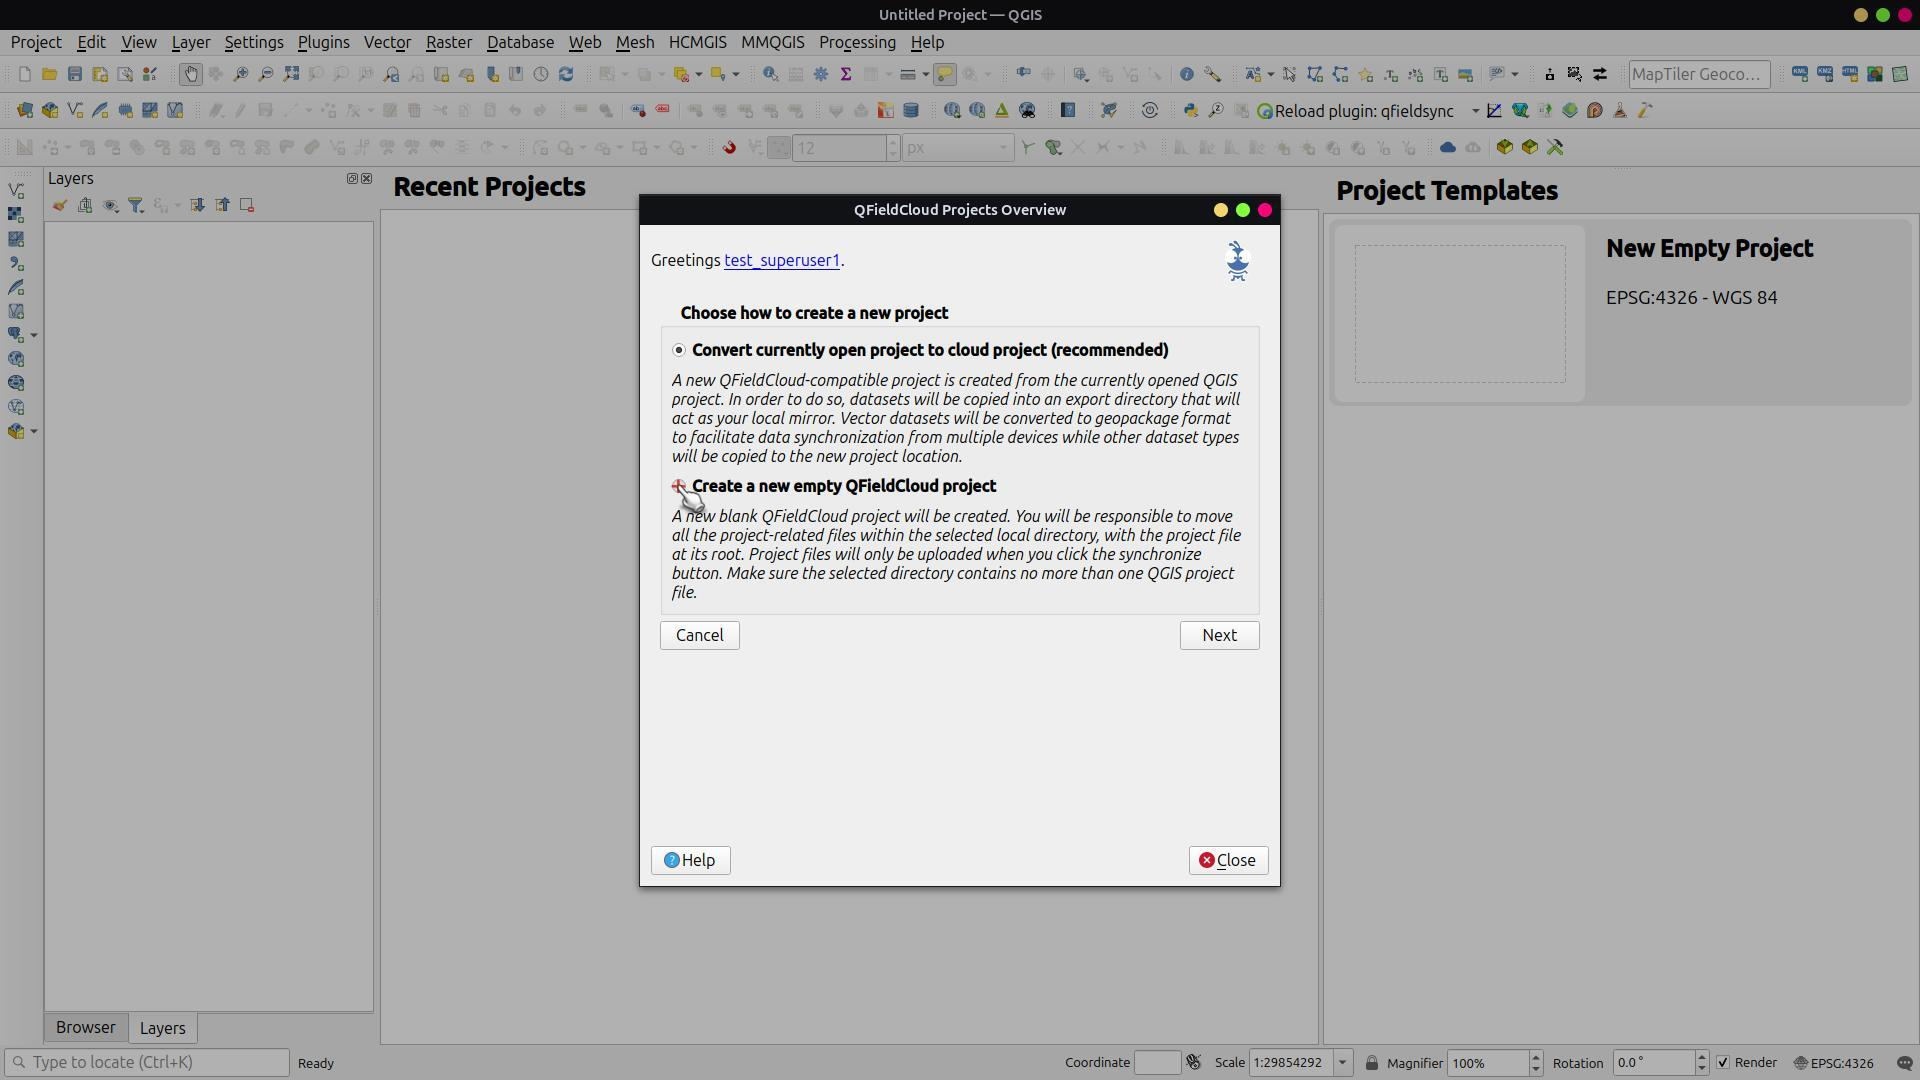
-
Choose the first option "Convert the currently open project to a cloud project".
-
Provide project details and select the organization.
-
Click "Create".

-
Once completed, click "Ok".
- The project will be listed in the "QFieldCloud Projects Overview".
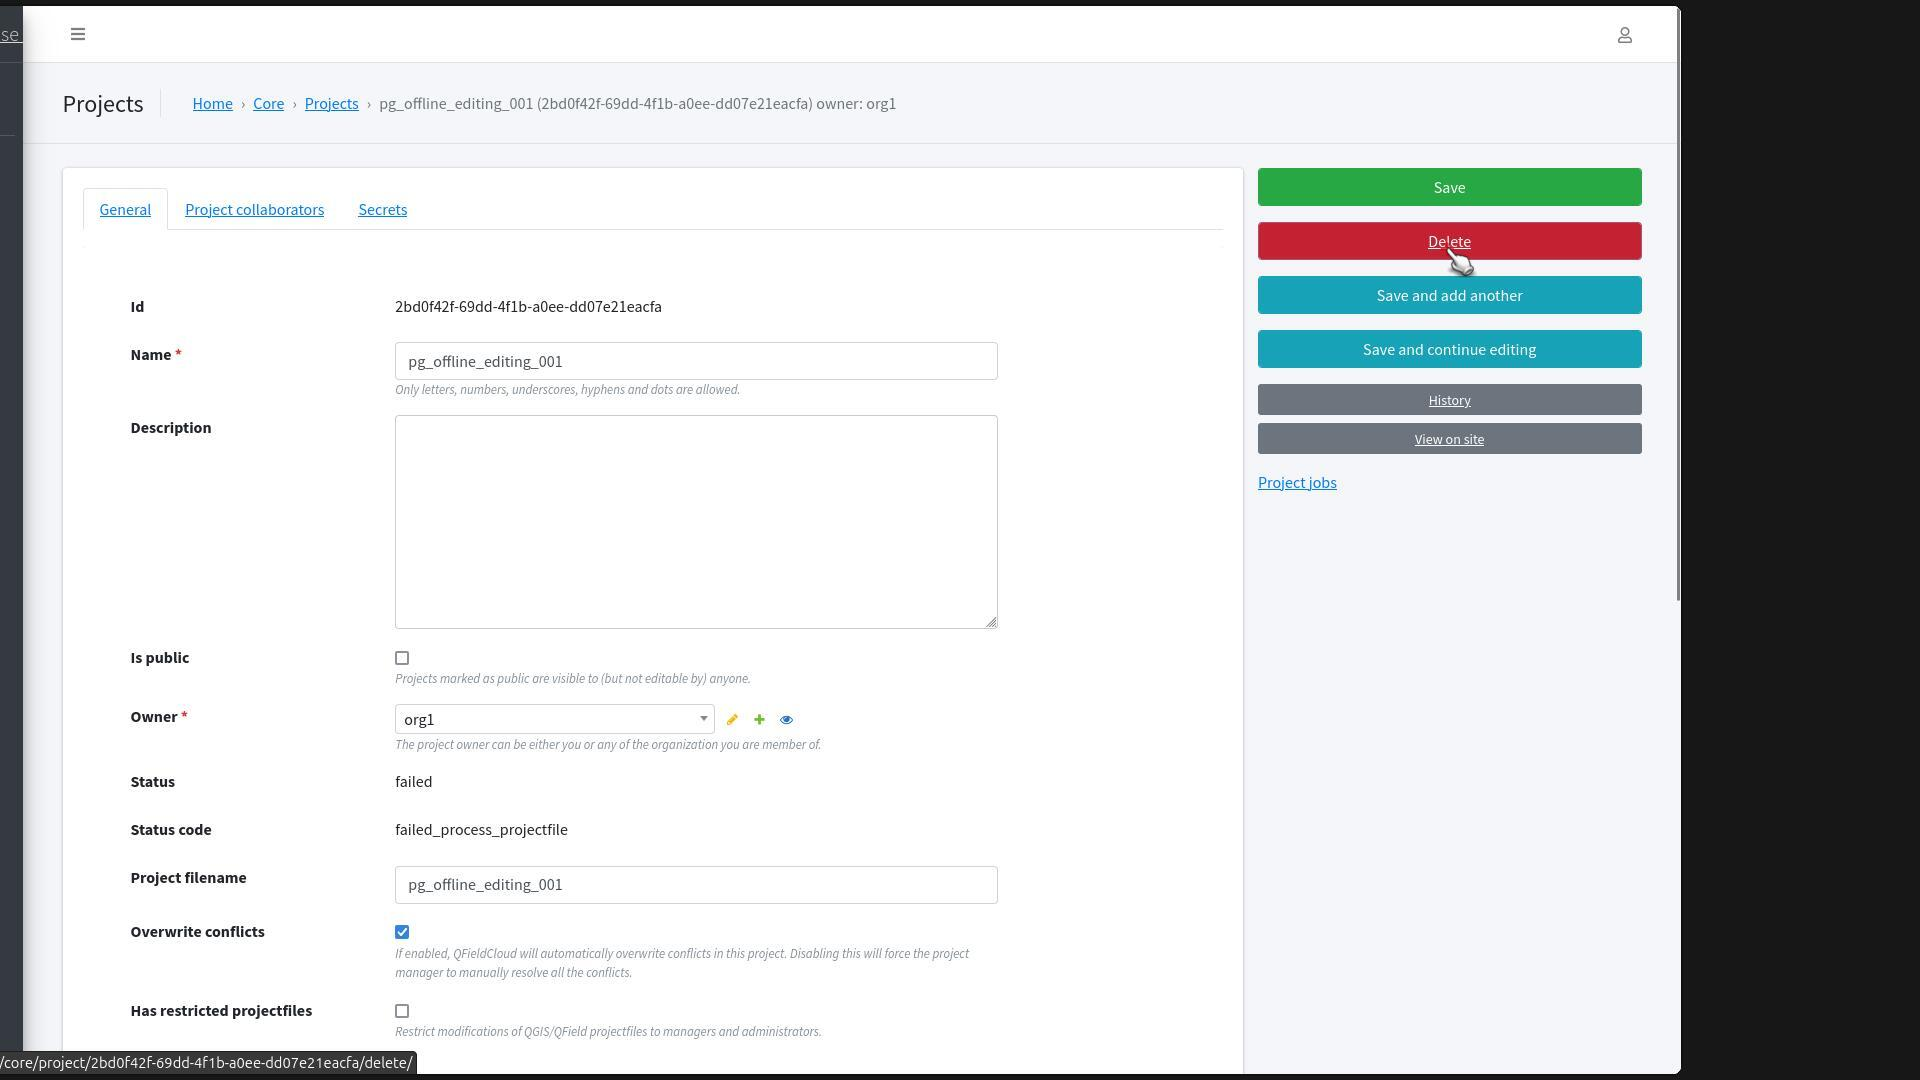
- In the Admin view, navigate to the "Projects" and inspect the project's information.

Method 2: Creating an Empty Project
You can create Empty projects by using QFieldSync or directly in QFieldCloud.
2.1. Creating an empty project QFieldCloud method
Workflow
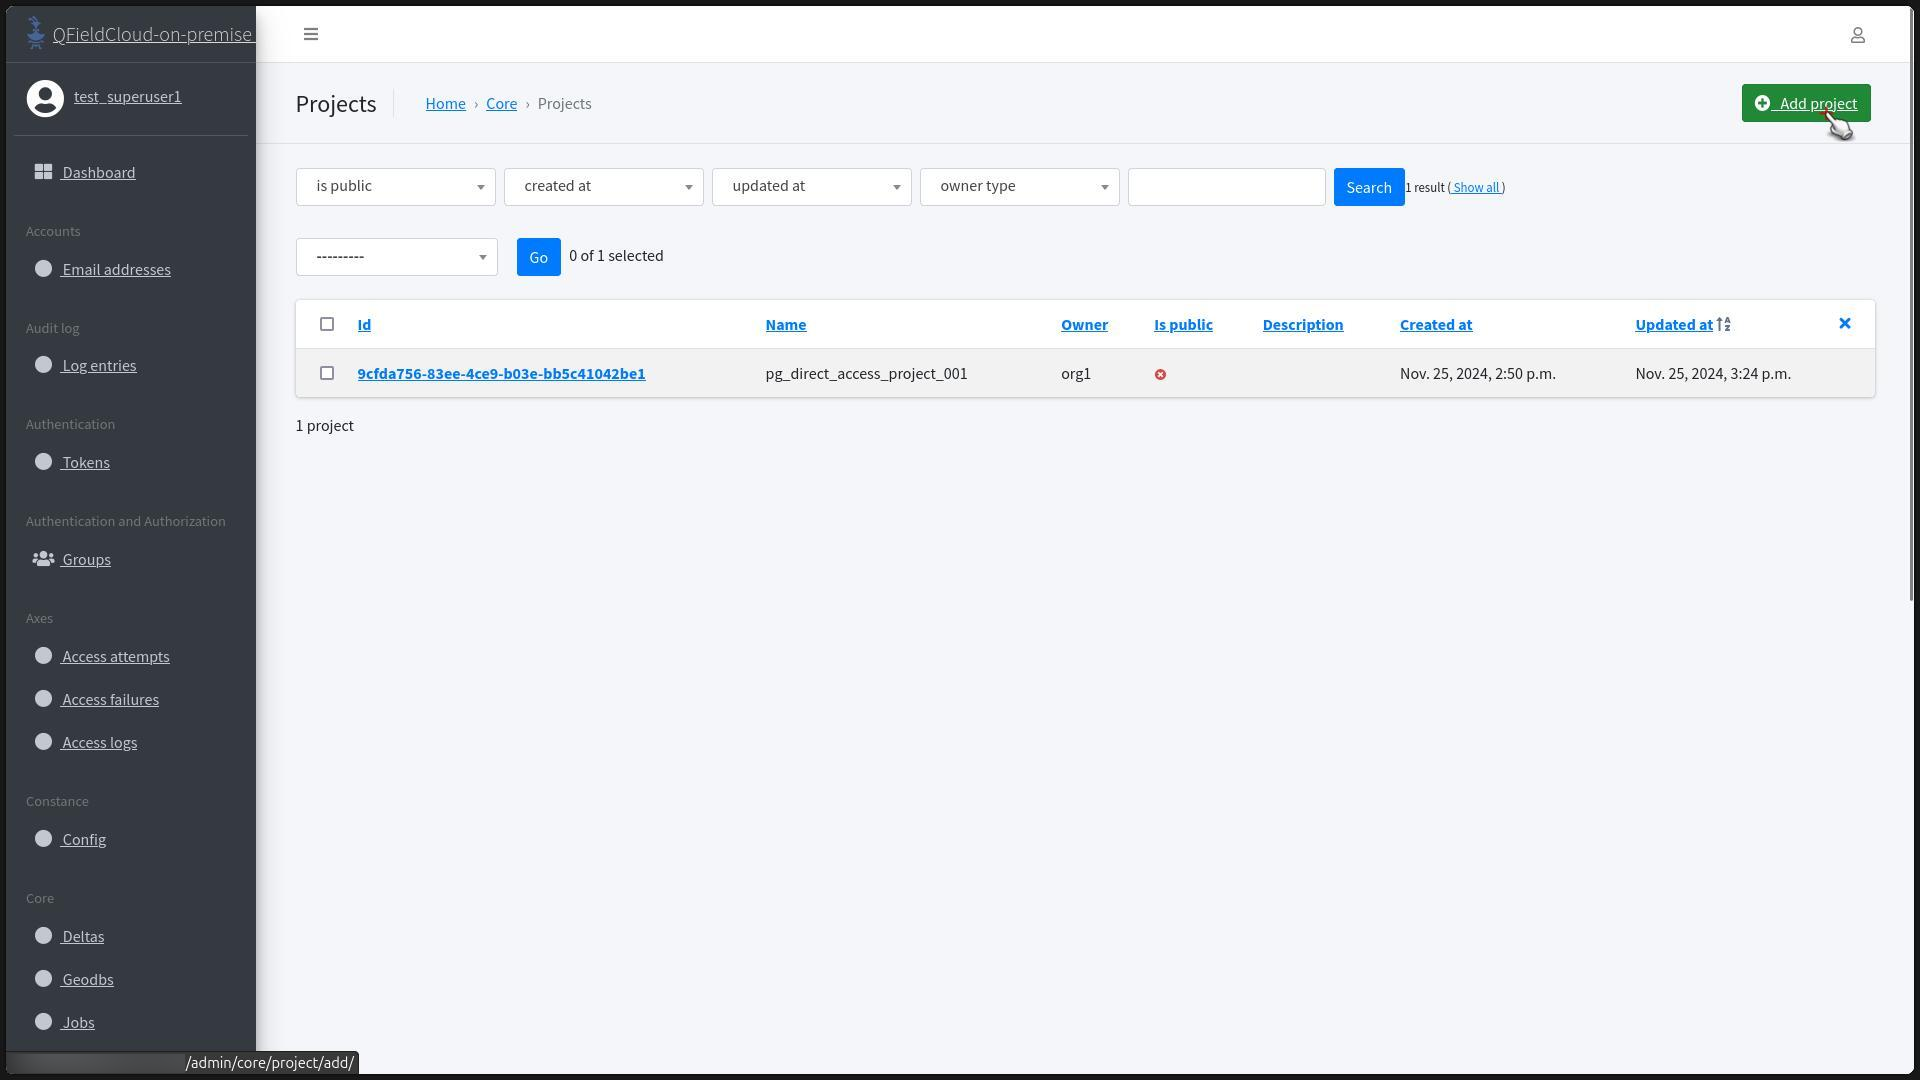
-
Go to the "Projects" Section and click on "Add Project".
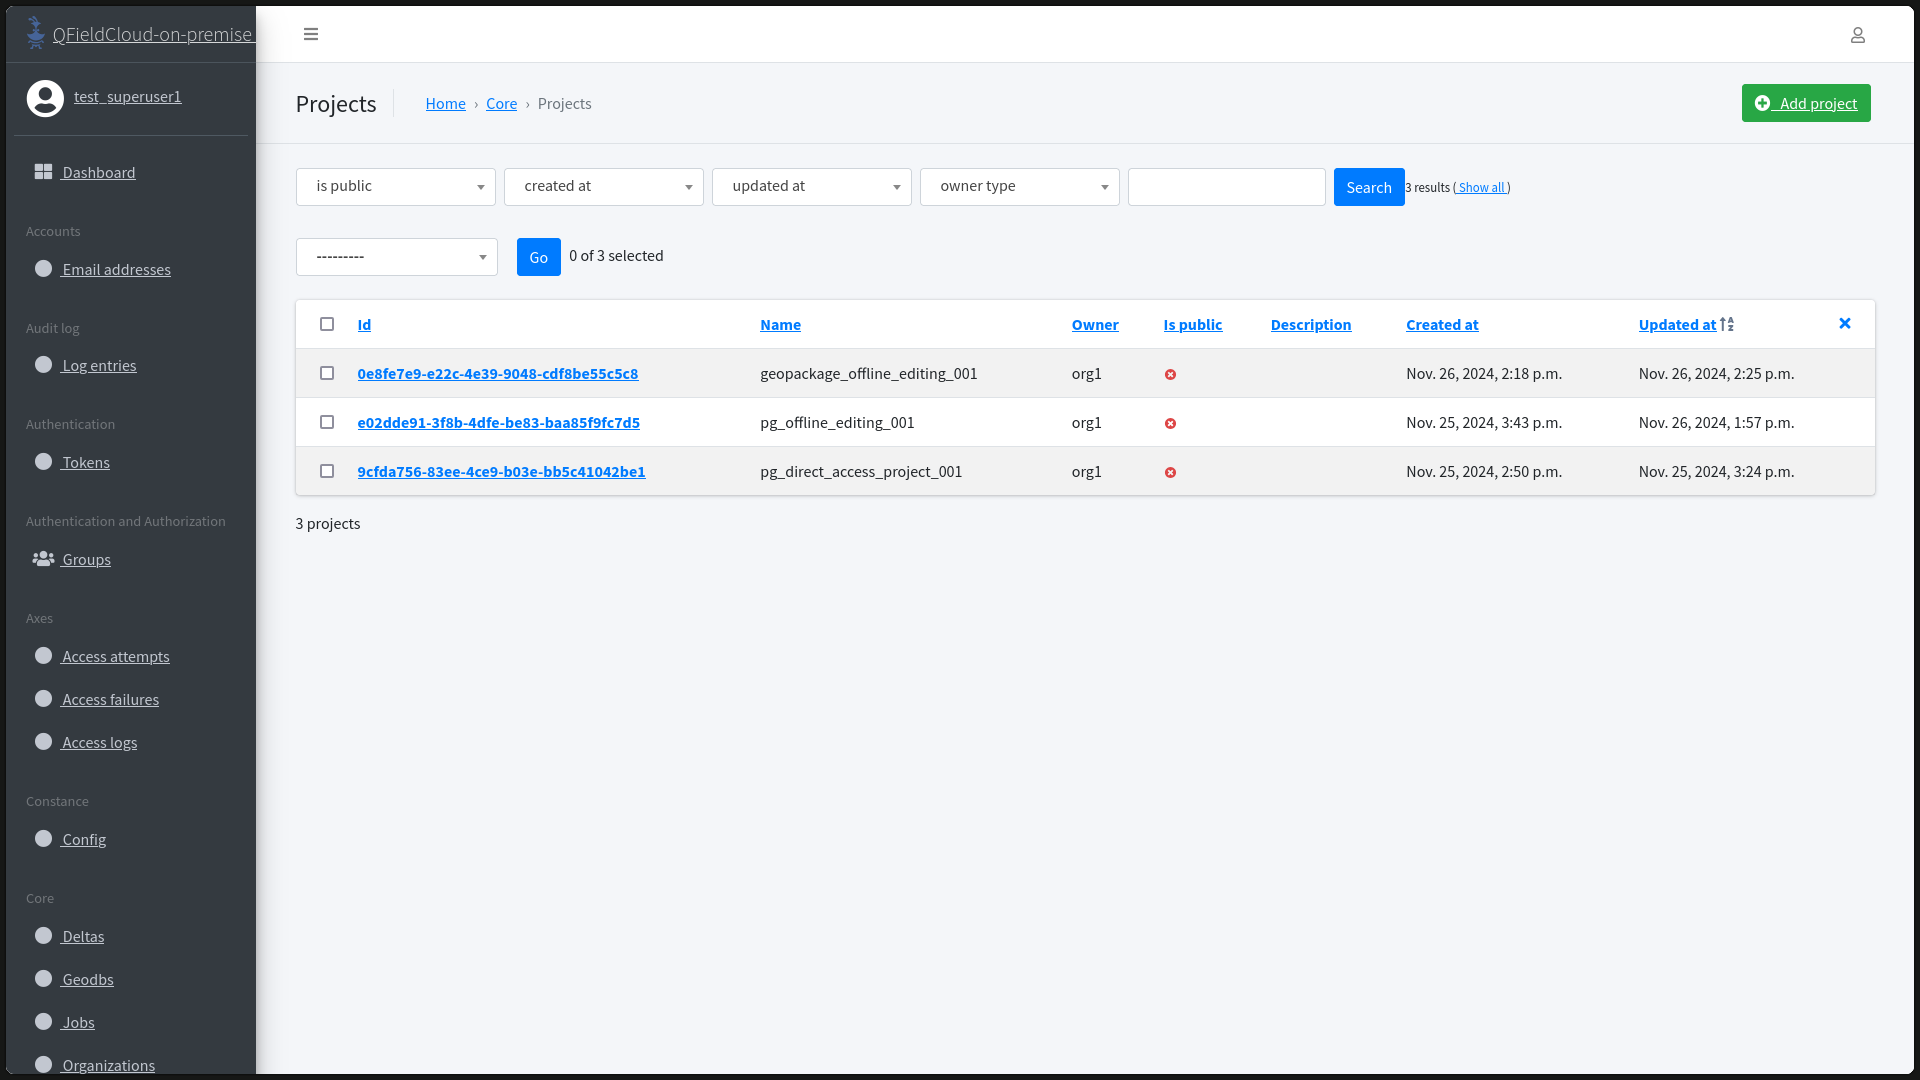
-
Fill in the project details and select an organization as the owner.
-
Click to "Save" the updated data for the project.
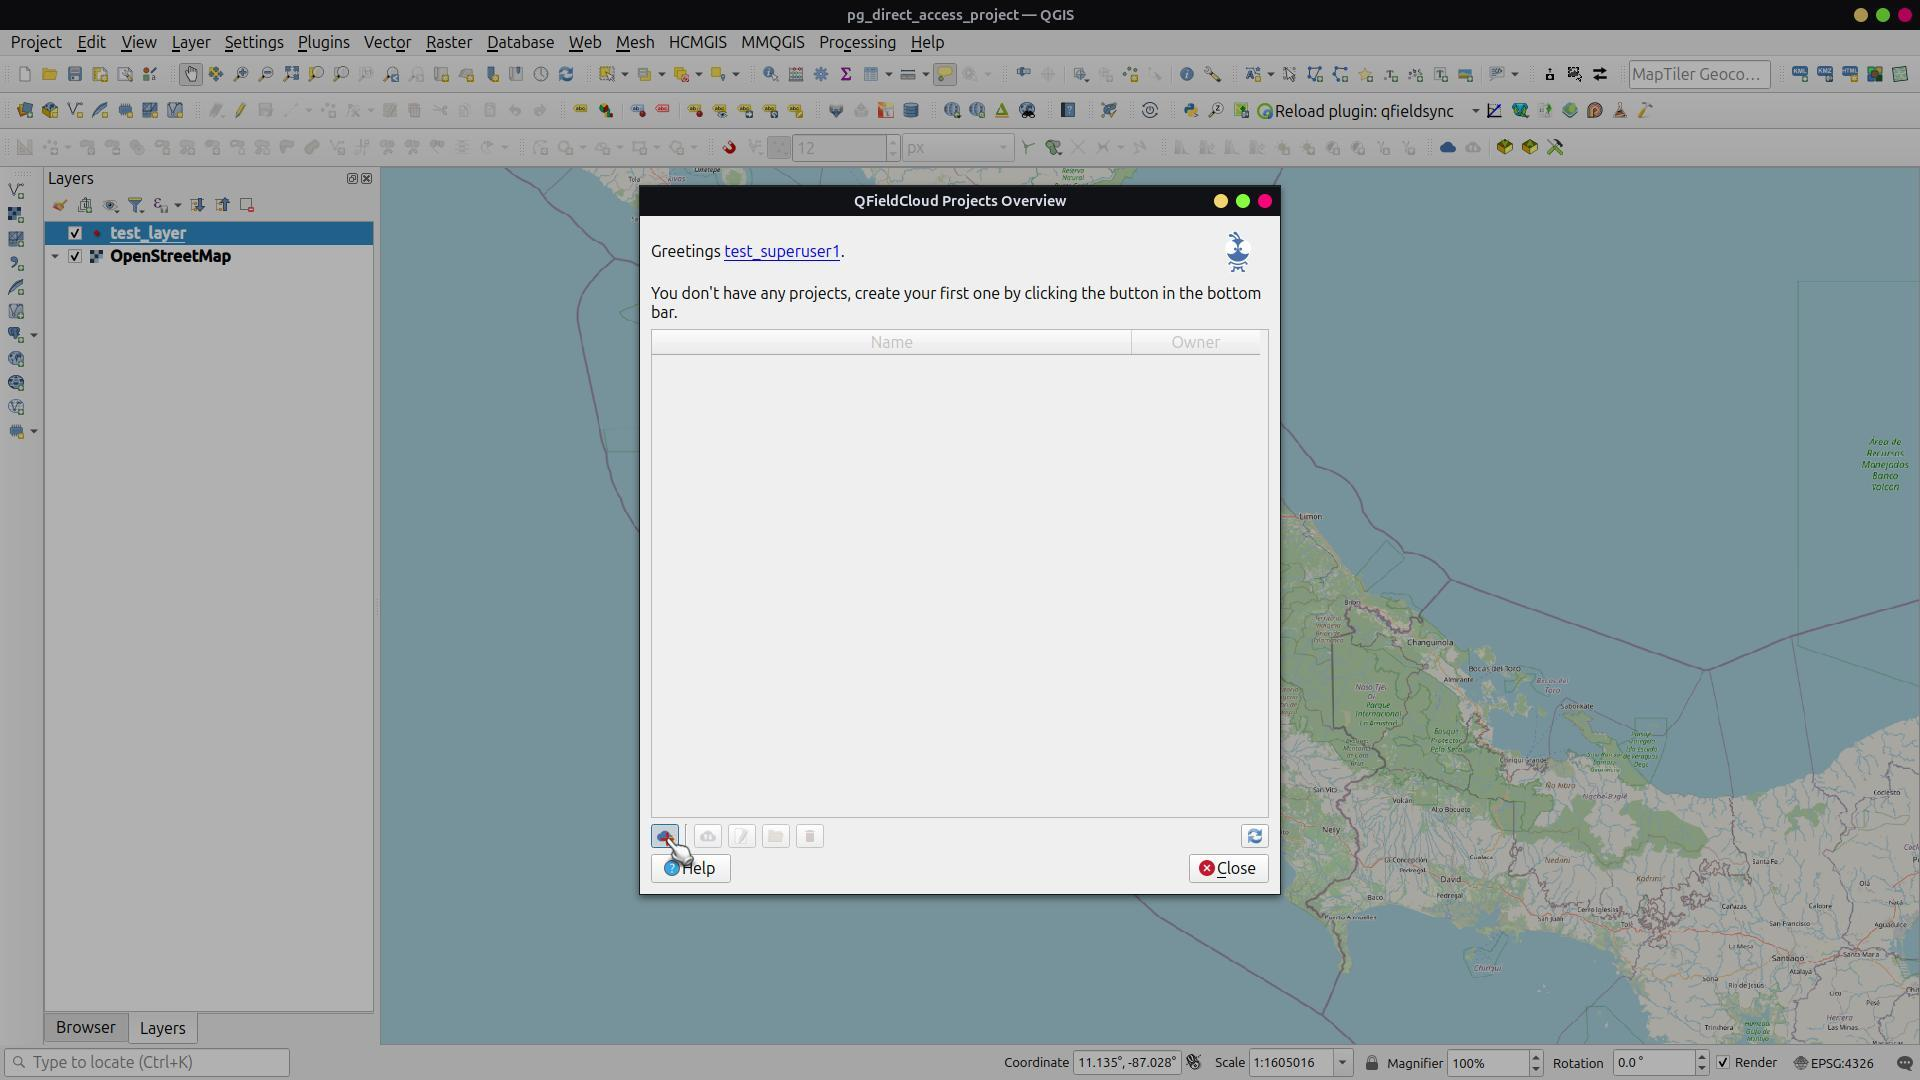
-
In QGIS use QFieldSync to access the "QFieldCloud Projects Overview".
- Select the newly created project and synchronize it.
-
Choose the path for storing the project files and complete the synchronization.
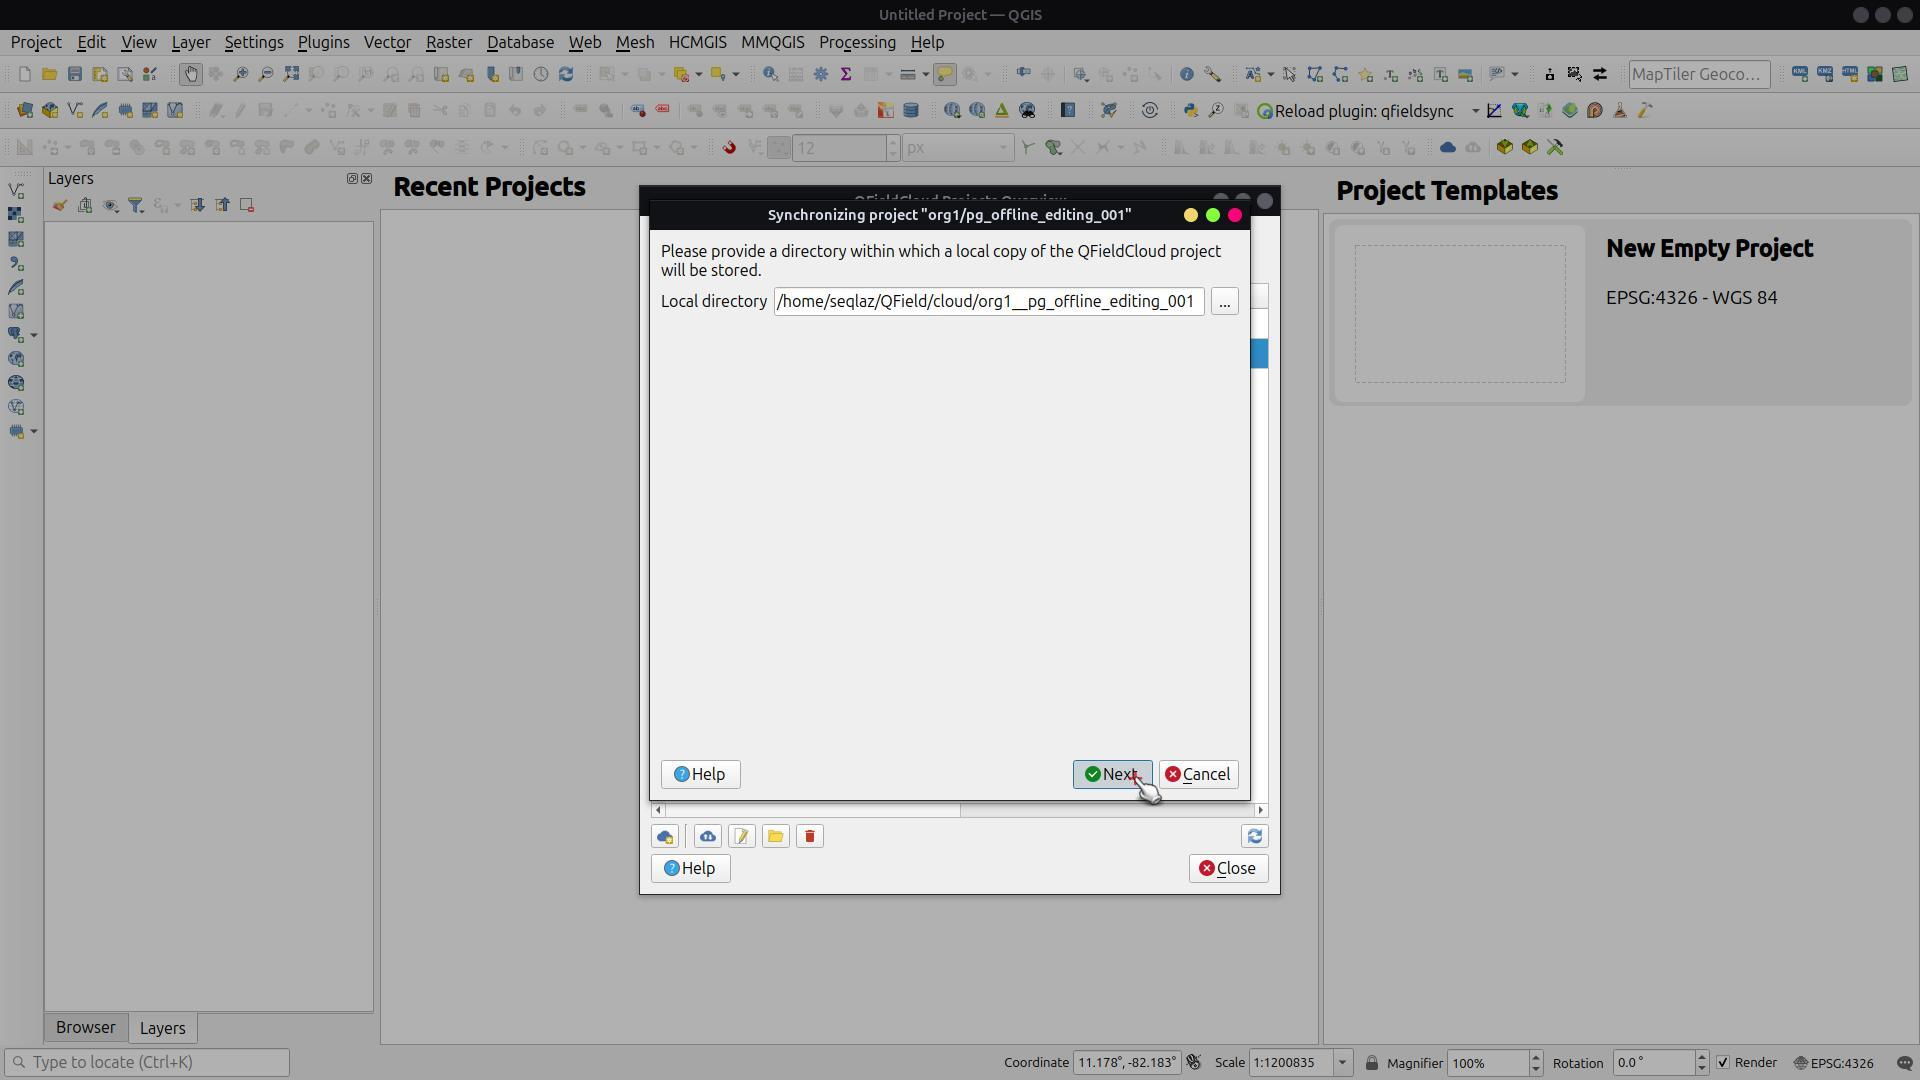
-
Click "Ok".
- Edit the project in an external file browser.
- Paste the necessary project files into the folder.
-
Return to QFieldSync and complete the synchronization.
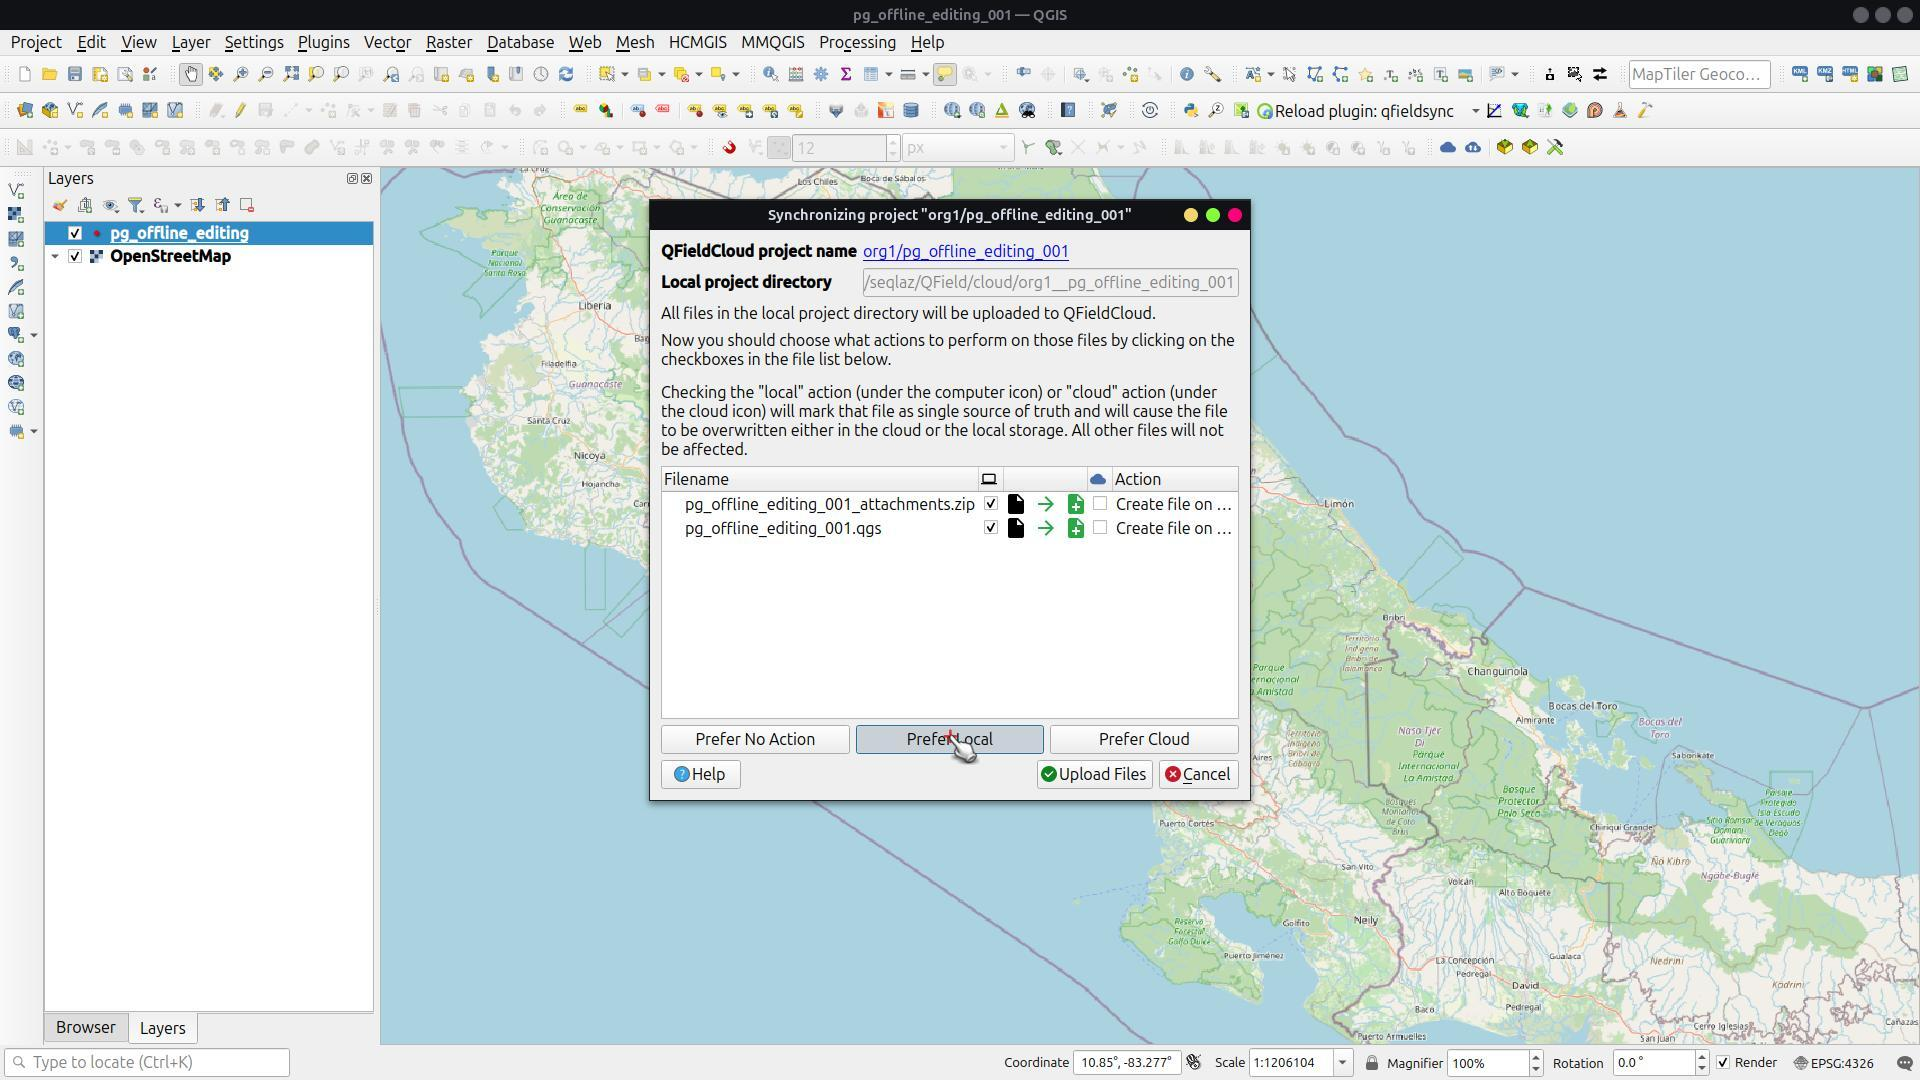
-
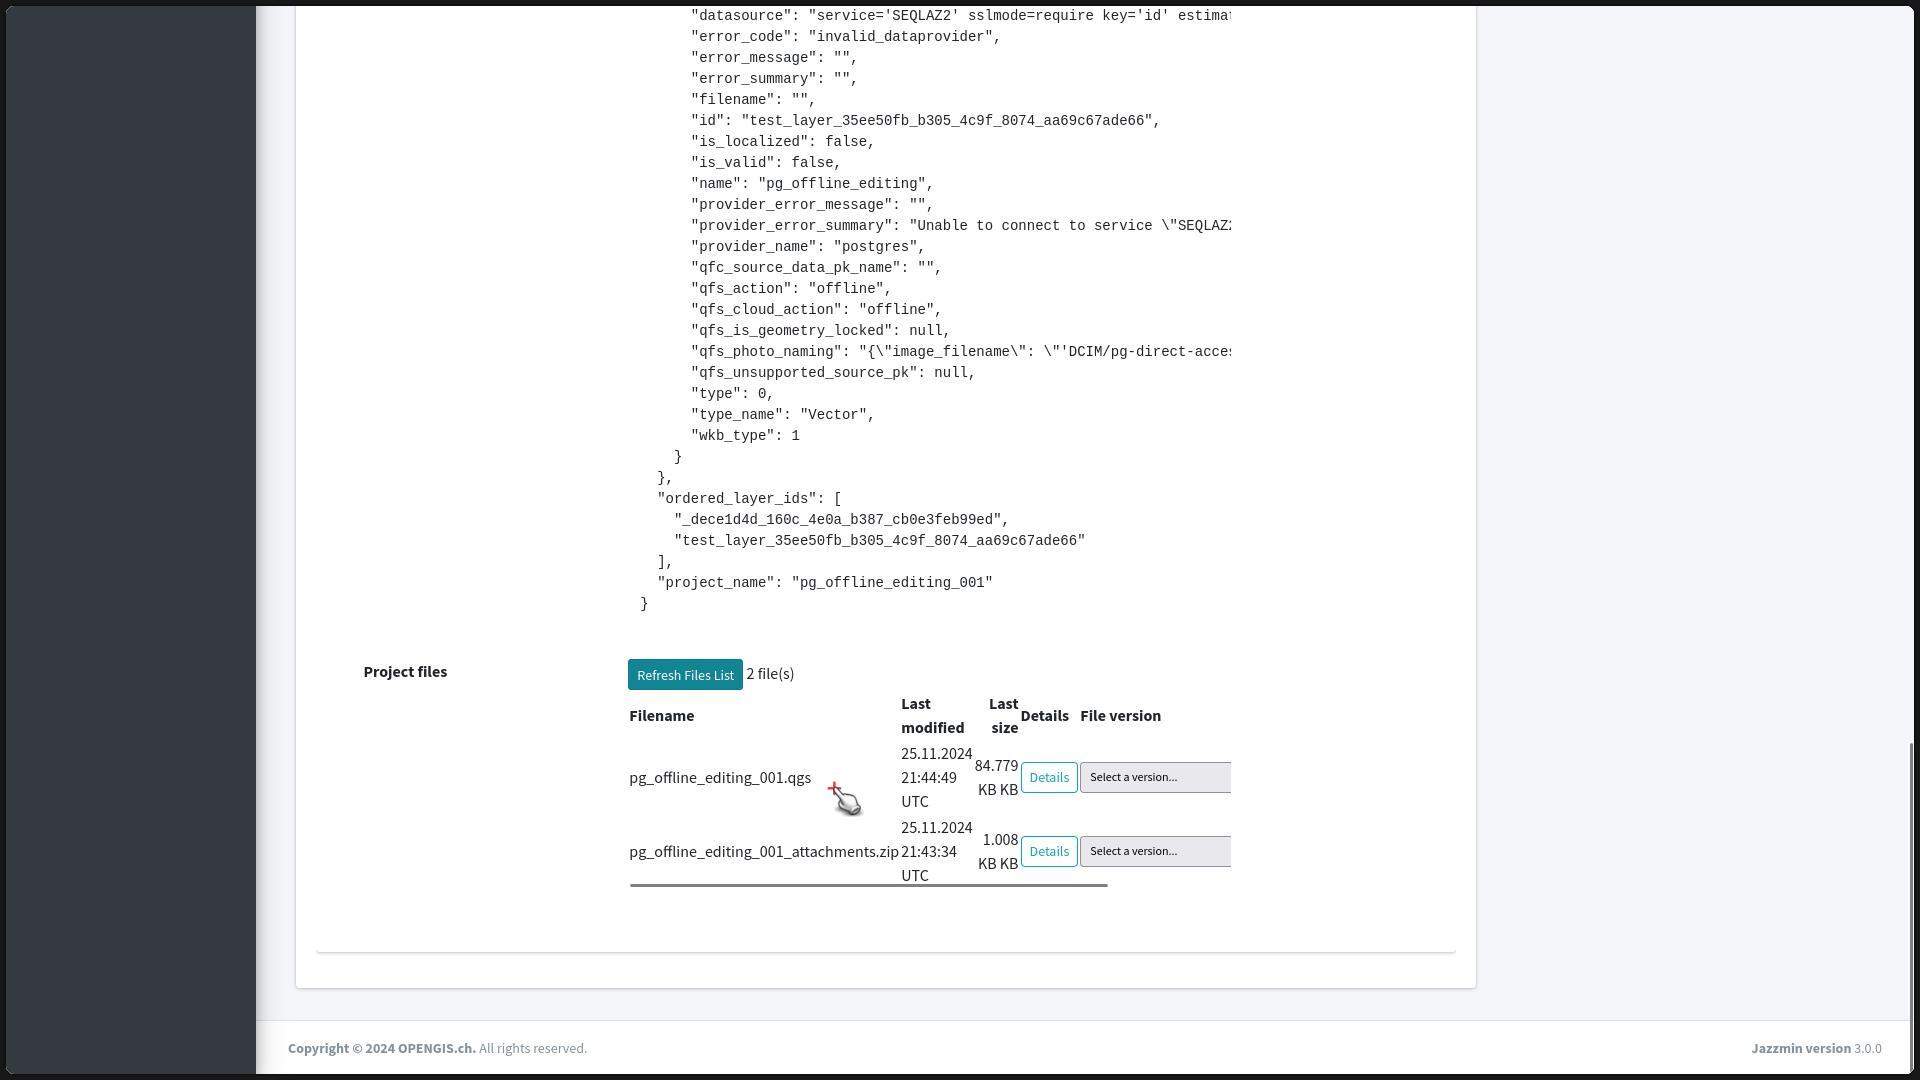
Once finished, inspect the files in the project.
2.2. Creating an empty project QFieldSync Method
Workflow
- In QGIS and the QFieldSync plugin, go to the "QFieldCloud Projects Overview."
-
Click the "Create New Project" button.
-
Select "Create a new empty QFieldCloud project" and click "Next".
-
Fill in the project name and select the organization as the project owner.
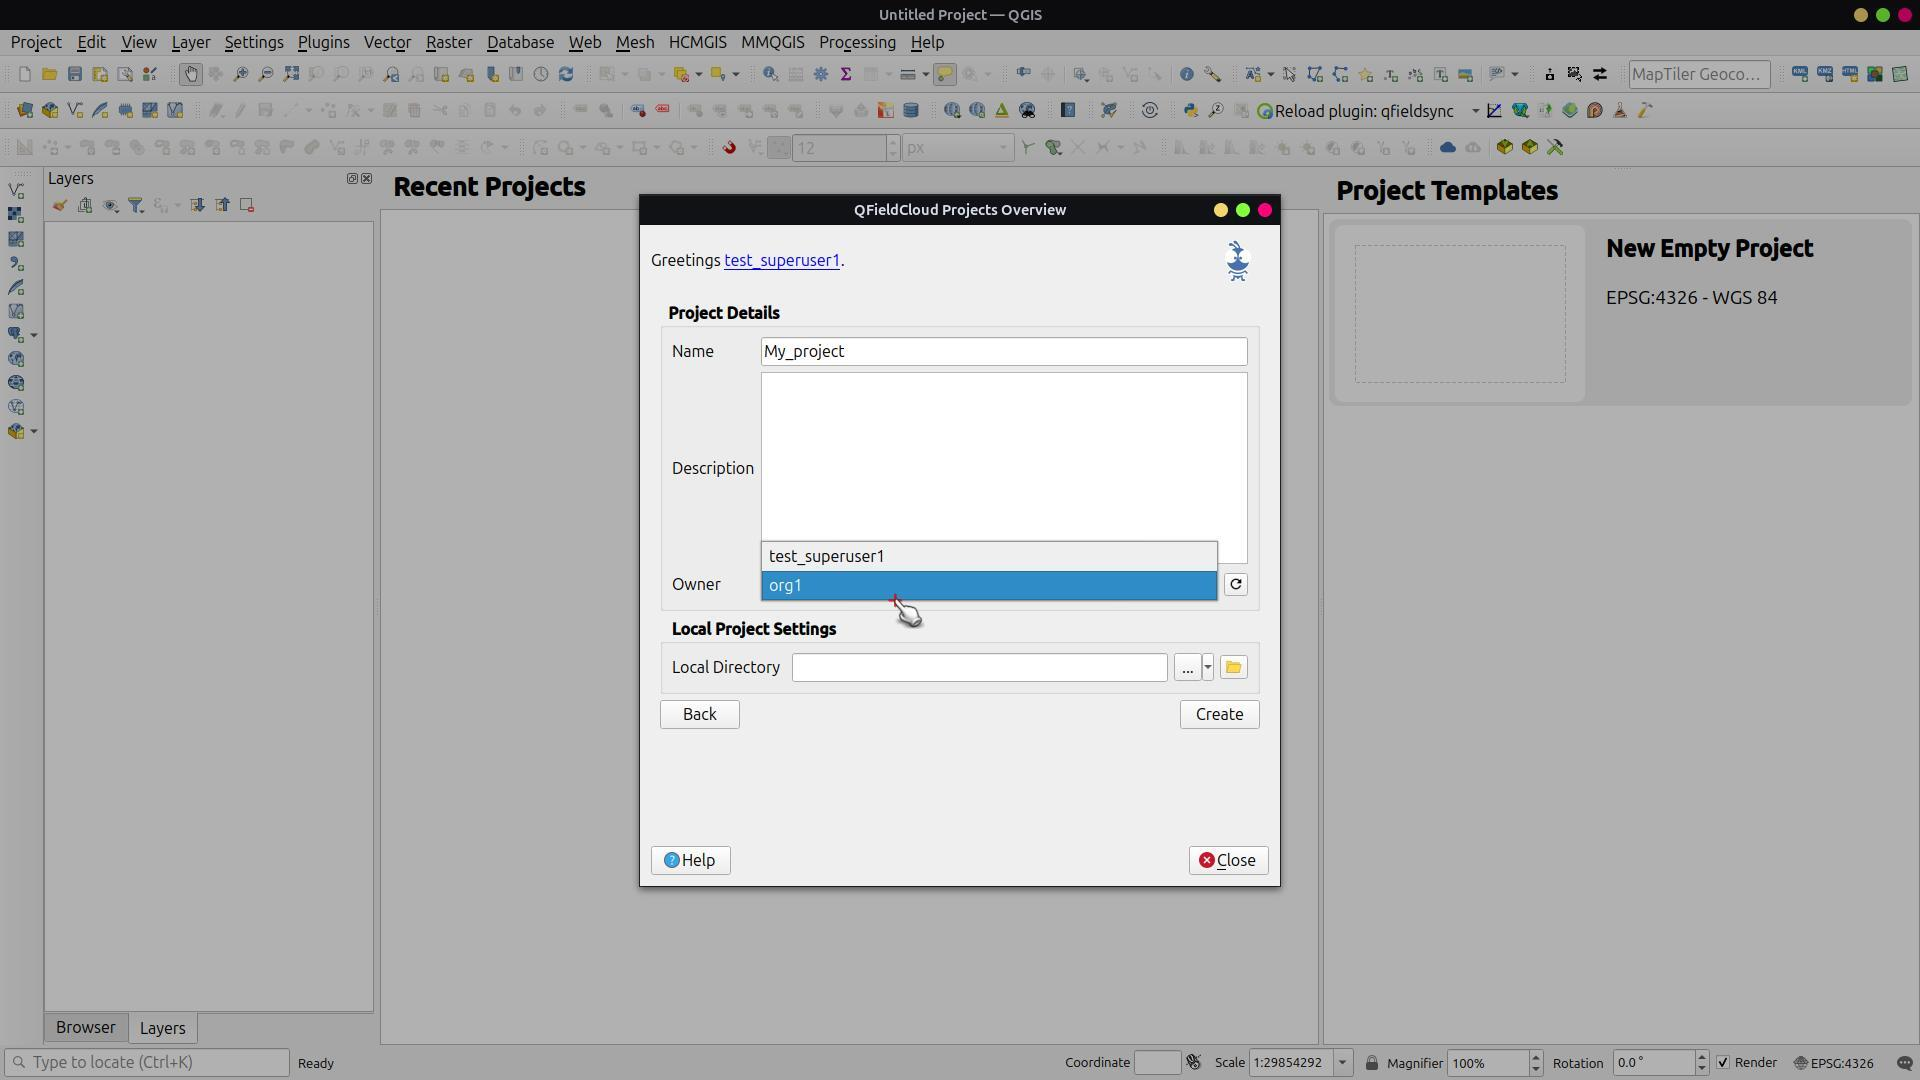
-
For the "Local Directory," you can select an existing project or an empty folder, then click the "Create" button.
- If you choose an empty folder, copy the project files into it.
- Go back to QFieldSync and finish the synchronization.

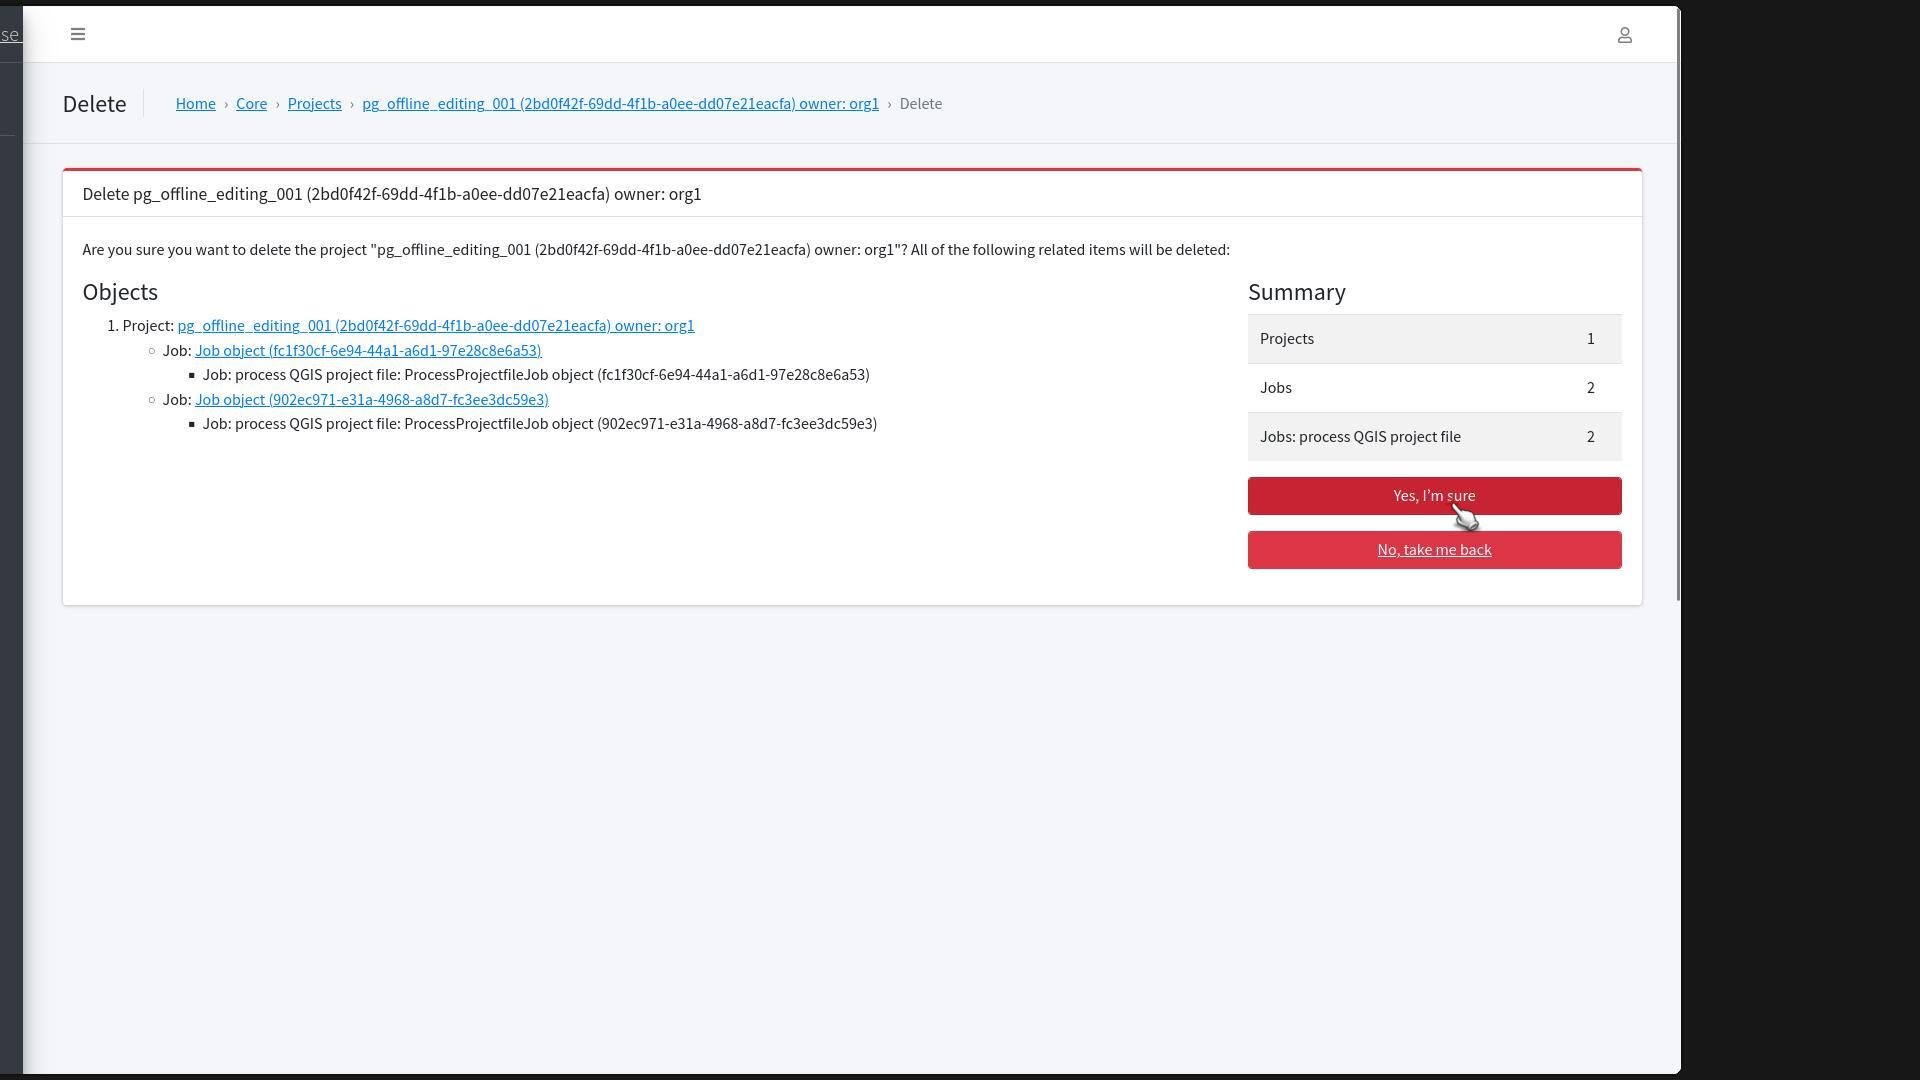
Deleting Projects
Workflow
- Enter to the "Projects" Section in QFieldCloud Admin.
-
Select the project you want to delete and click "Delete".
-
The screen will show you all the related objects that will be deleted. Once you are sure that you wish to complete the deletion click "Yes, I'm sure"
Adding Project Collaborators
Workflow
- Enter the project and access the "Project collaborators" section, click "Add another Project collaborator".
- Search for the user or team you wish to add.
-
Assign the corresponding permissions roles to the different users.

-
Click "Save".
- You will be redirected to the "Collaborator" section and a message should appear at the top of the page indicating the successful addition of the selected prject collaborators
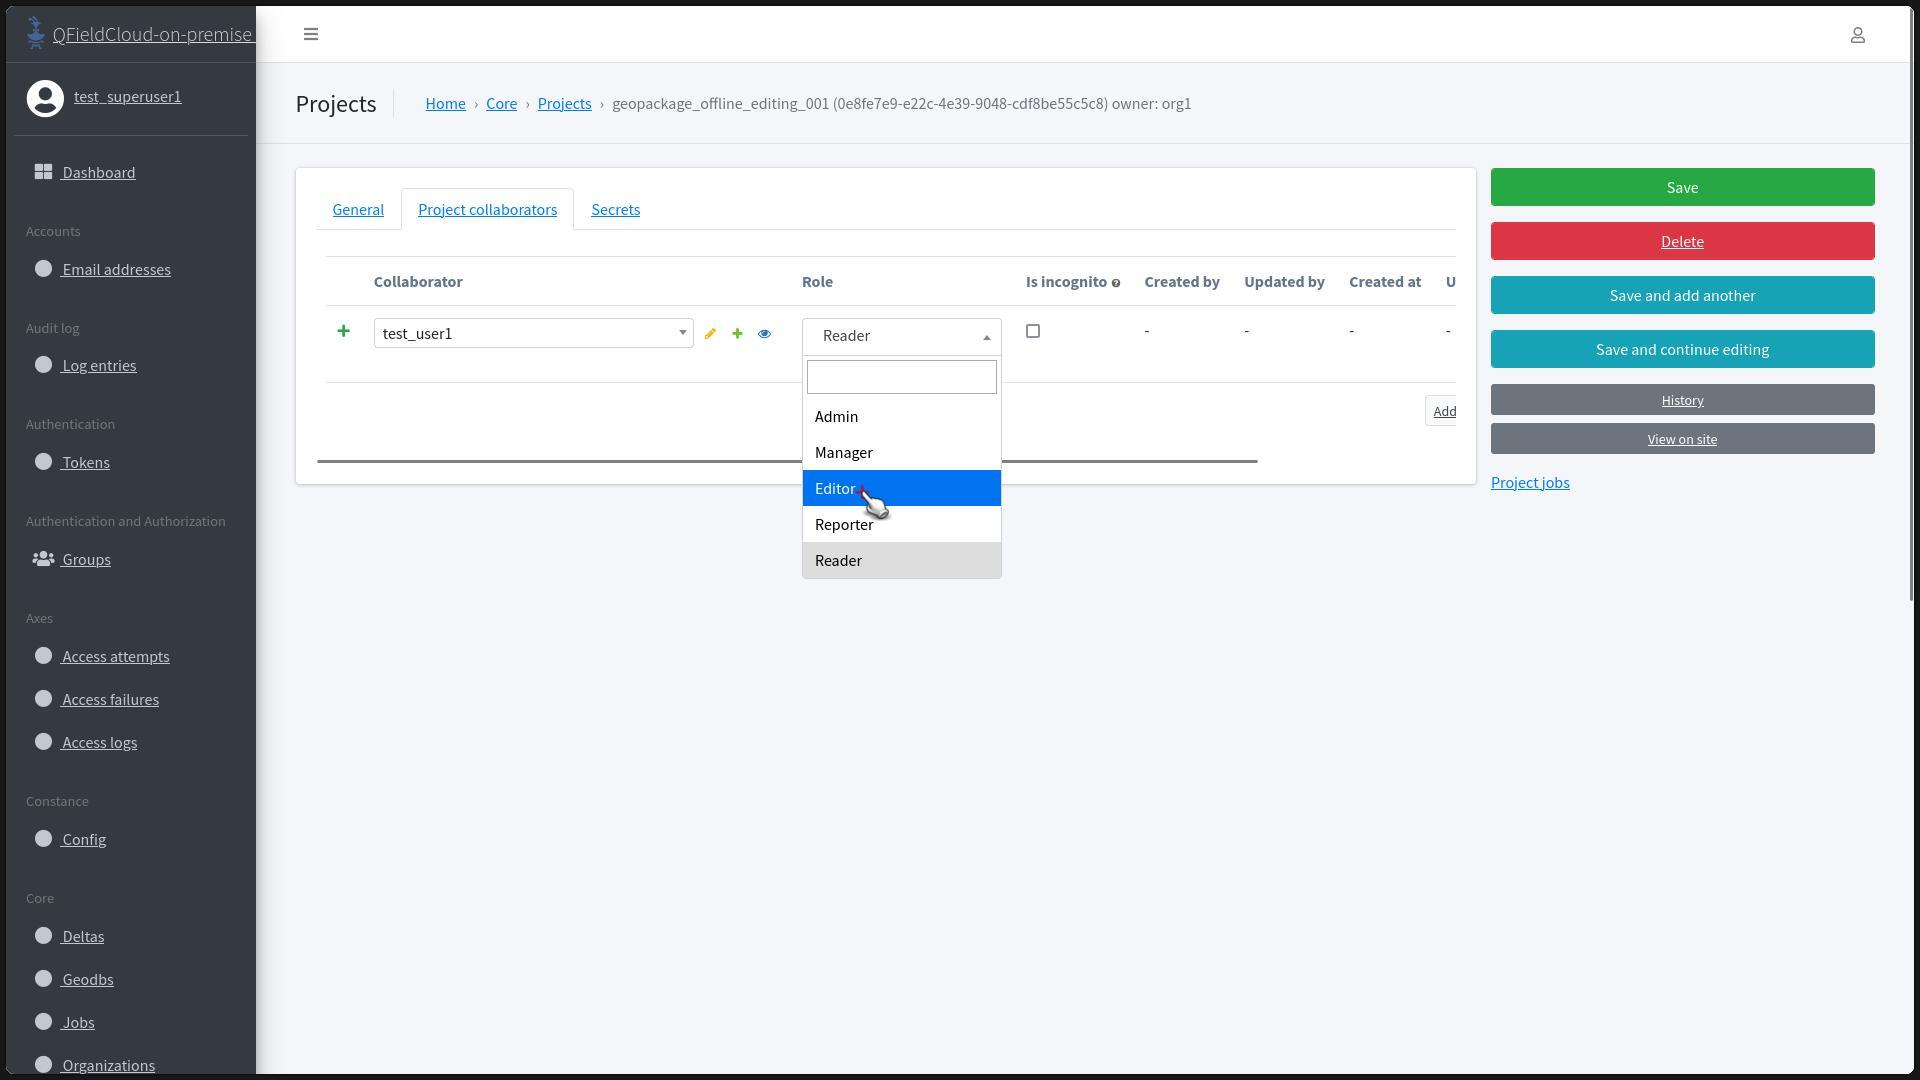
Changing Roles of Collaborators
Workflow
- Enter the project and access the "Project collaborators" section.
-
Change the roles of collaborators by selecting the desired role from the dropdown.
-
Click "Save".
- You will be redirected to the "Project" section and a message should appear at the top of the page indicating the successful Role change of the selected members
Making and Reviewing Changes
Workflow
-
Enter to "Deltas" section in the "Core" pages.
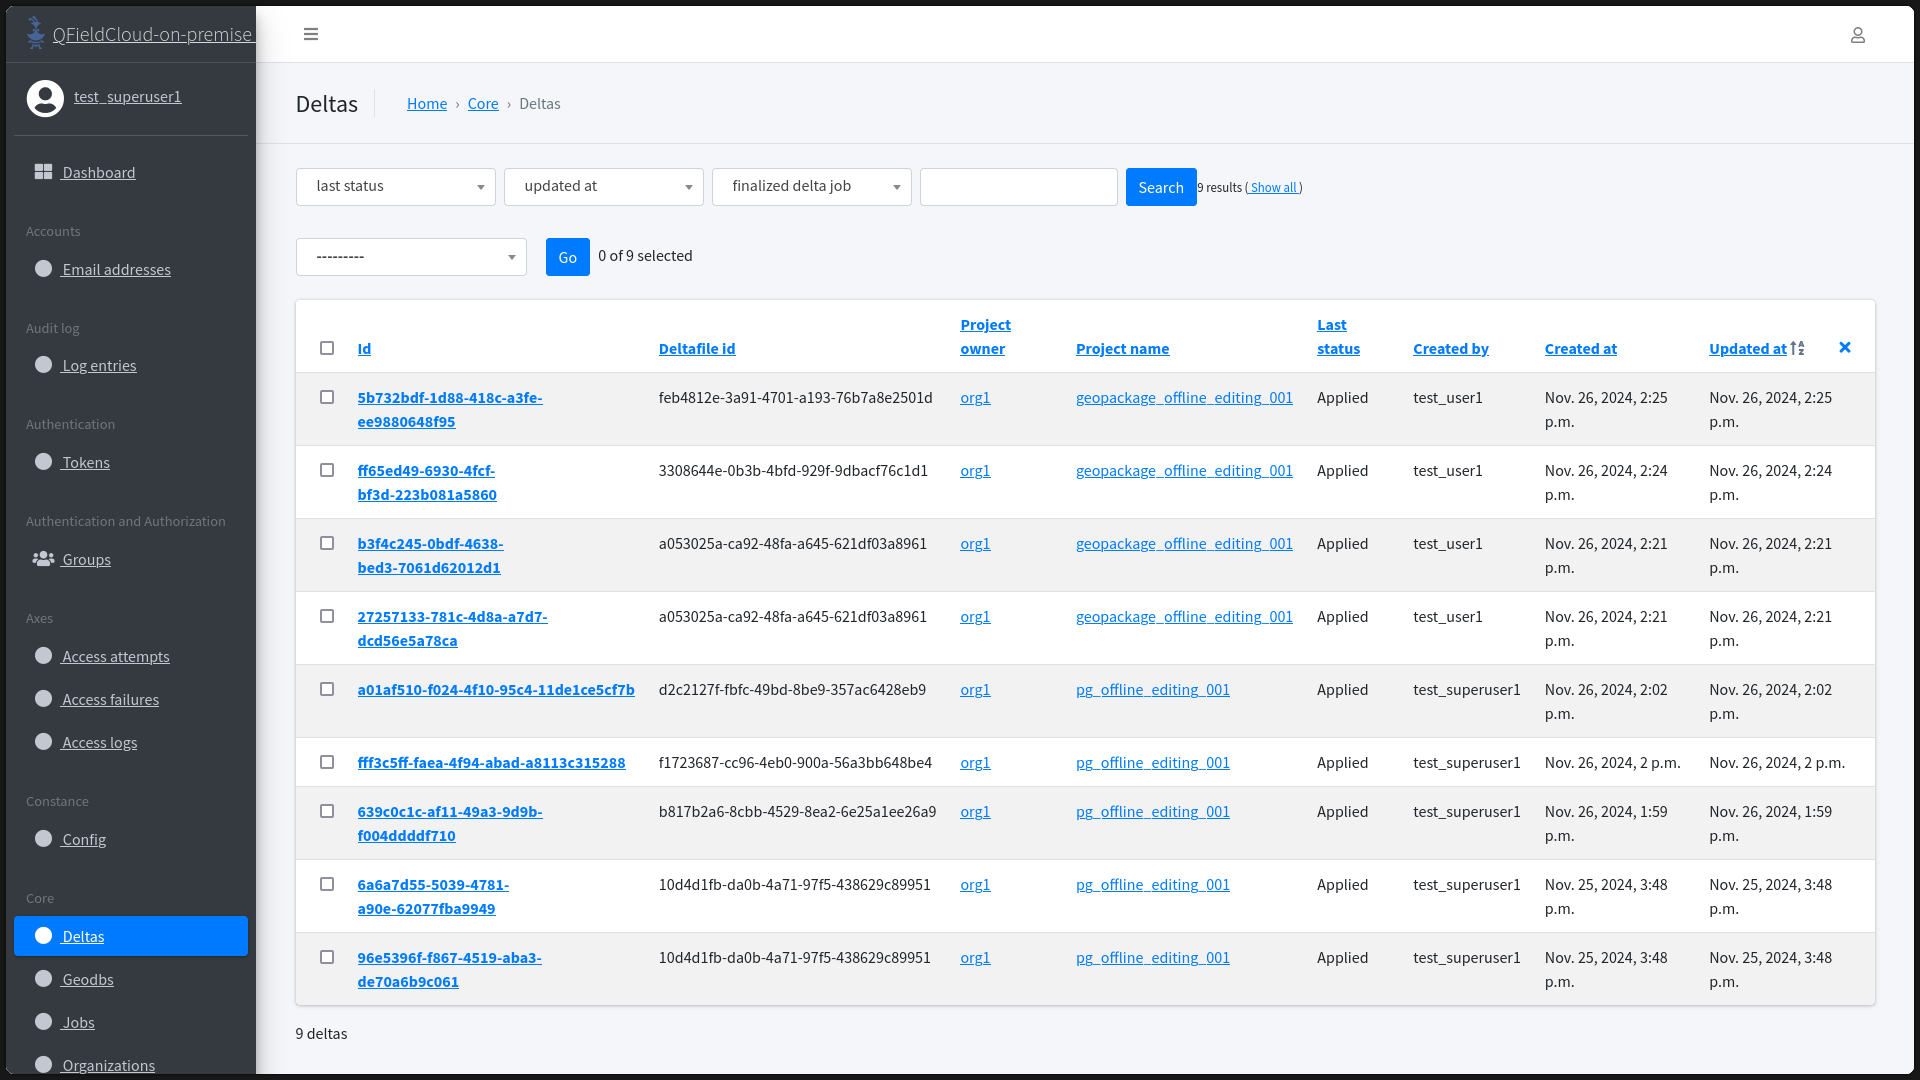
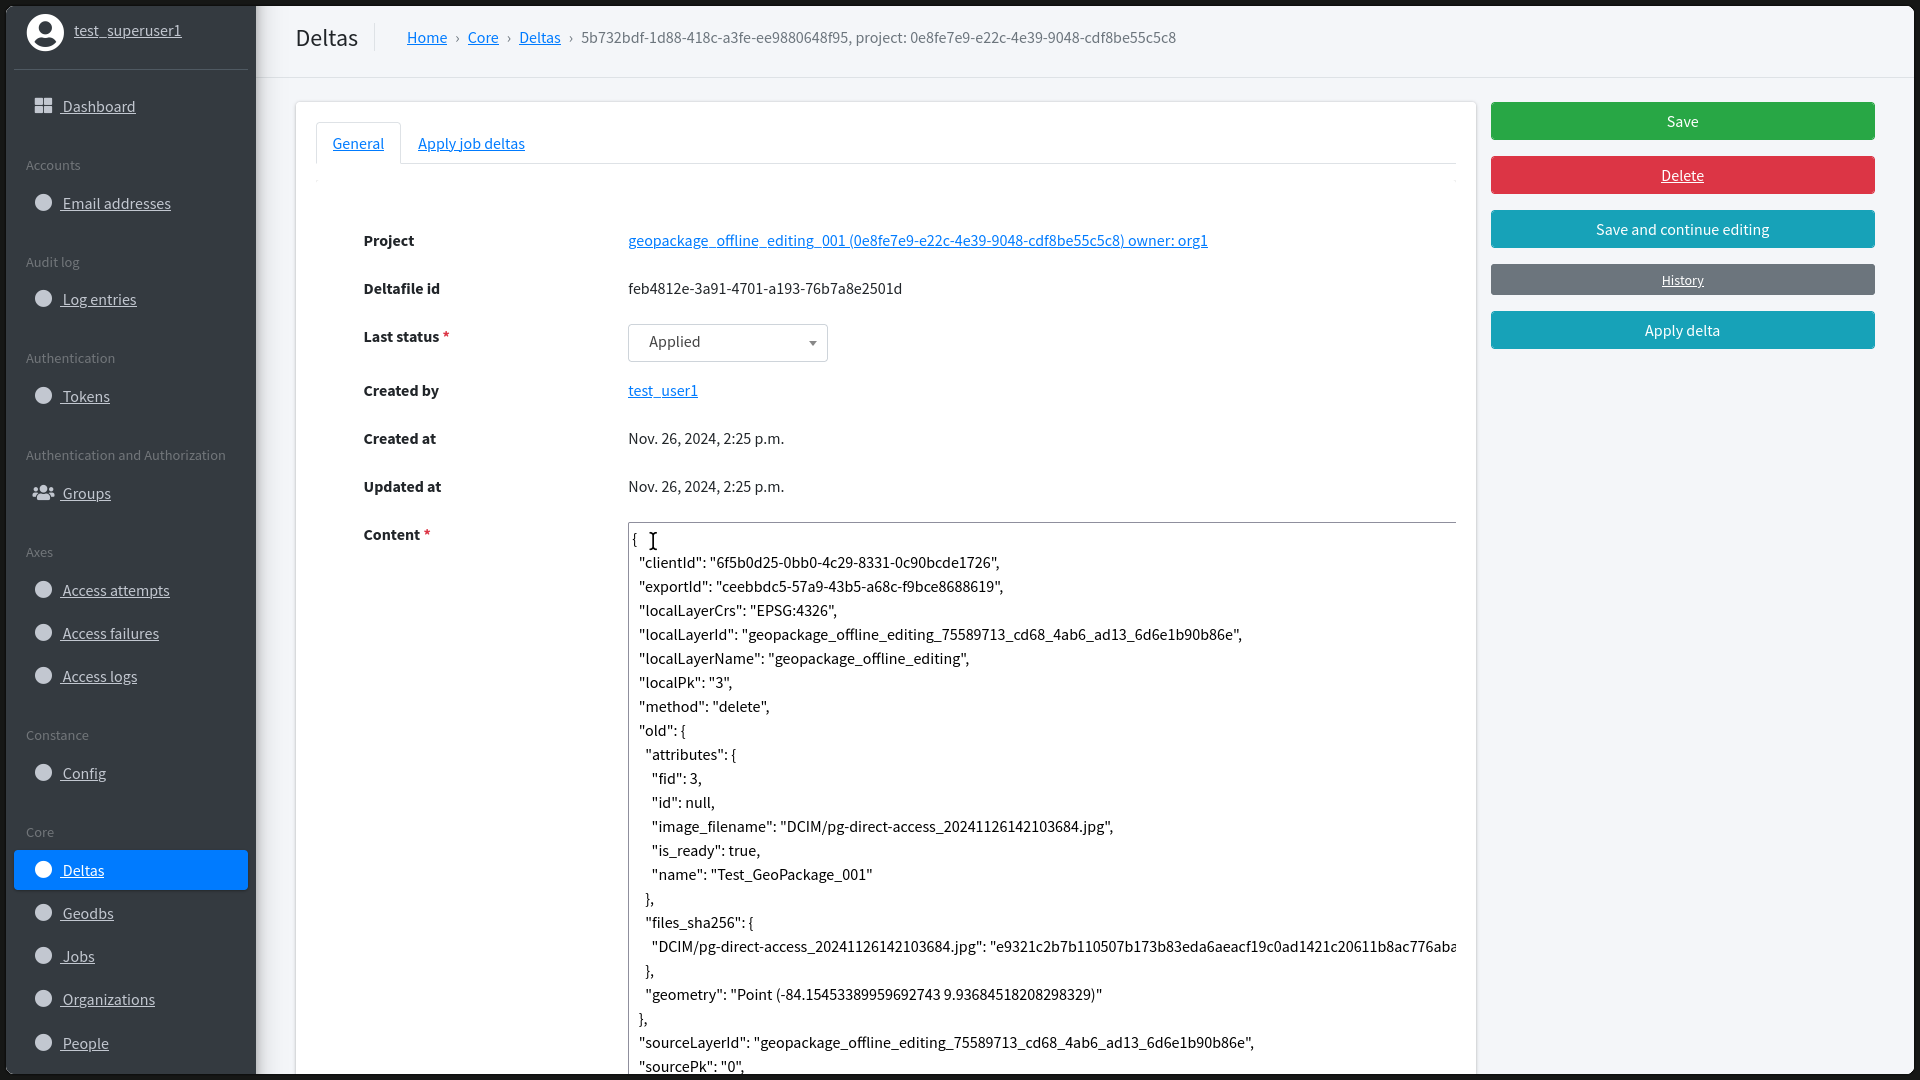
-
Click on the delta you want to inspect. You will see the content in JSON format, showing the corresponding changes.
-
In QGIS and the QFieldSync plugin, synchronize the current cloud project changes.
- Once the synchronization is complete, check the changes downloaded from QFieldCloud in the "Attribute table" of the layers and attachments folders.
Managing PostGIS secrets
Workflow
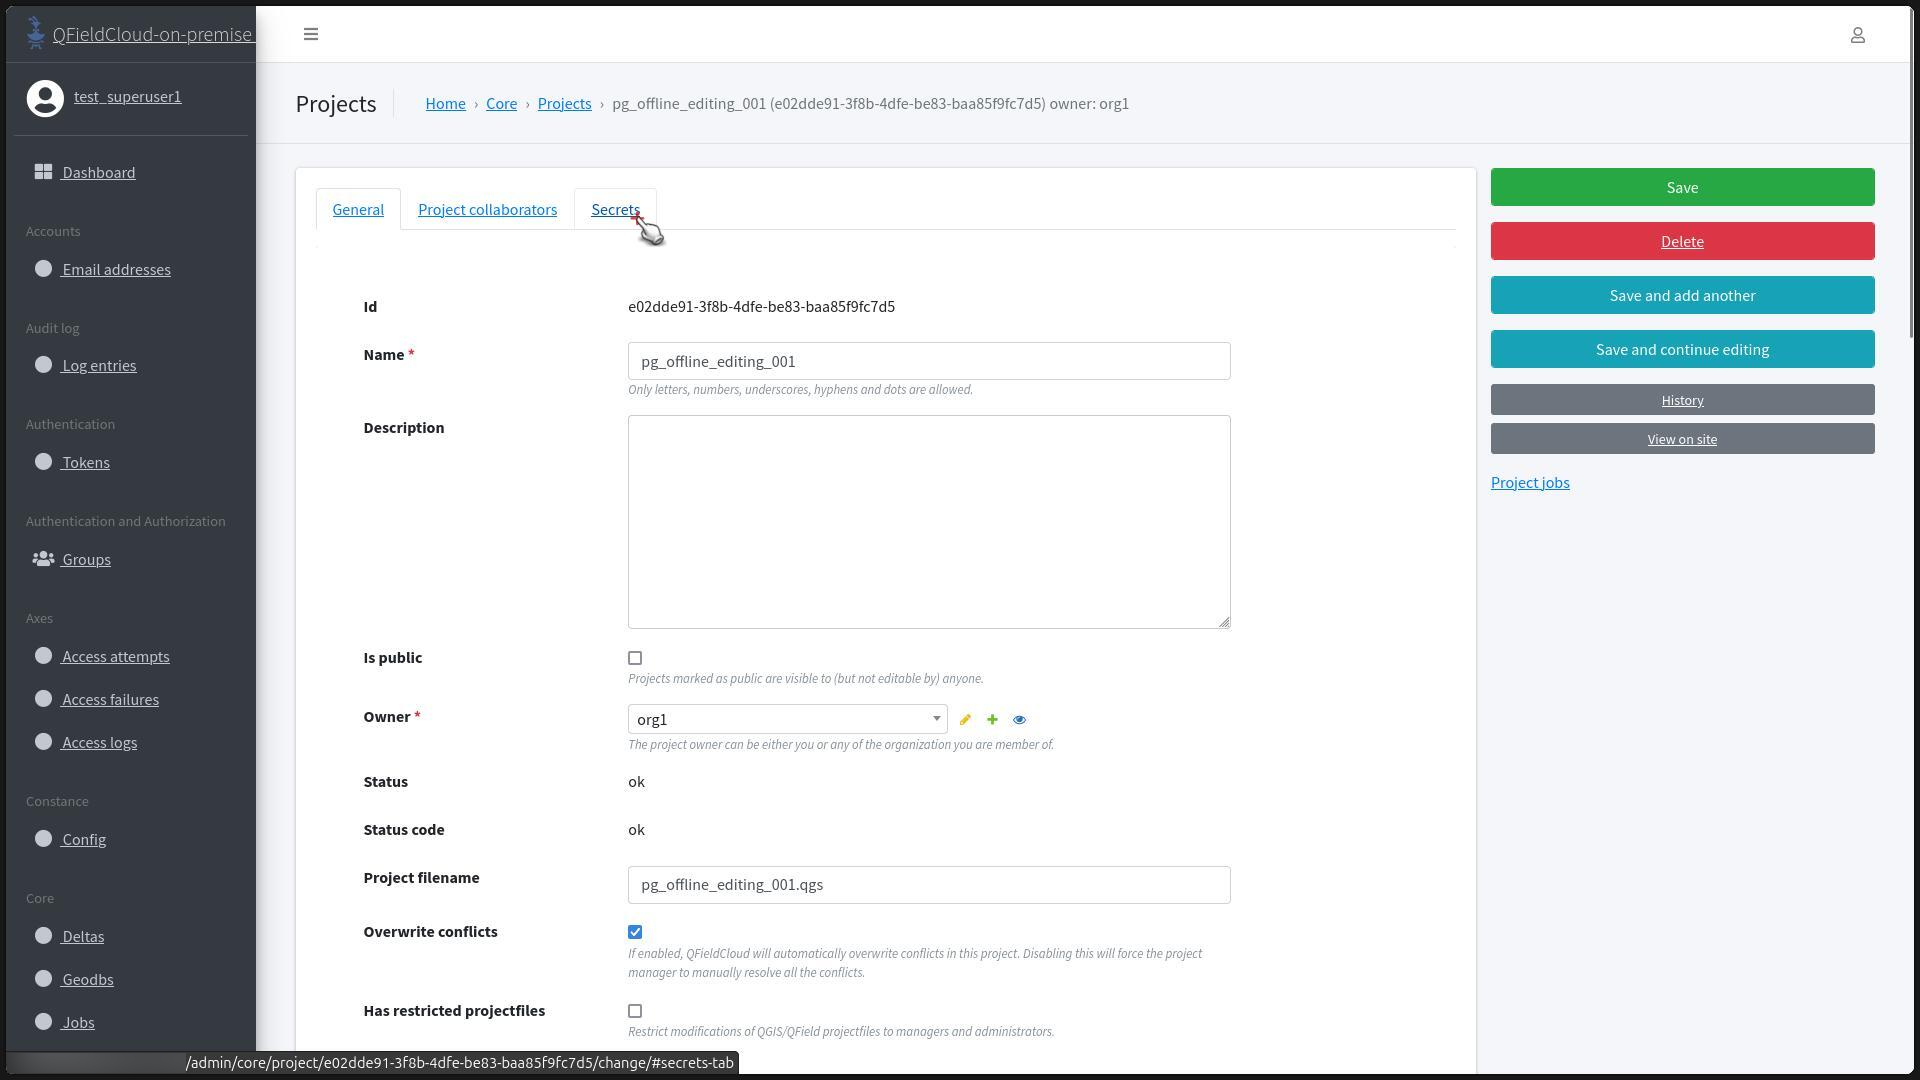
- In "Projects", select the project.
-
Open the "Secrets" tab.
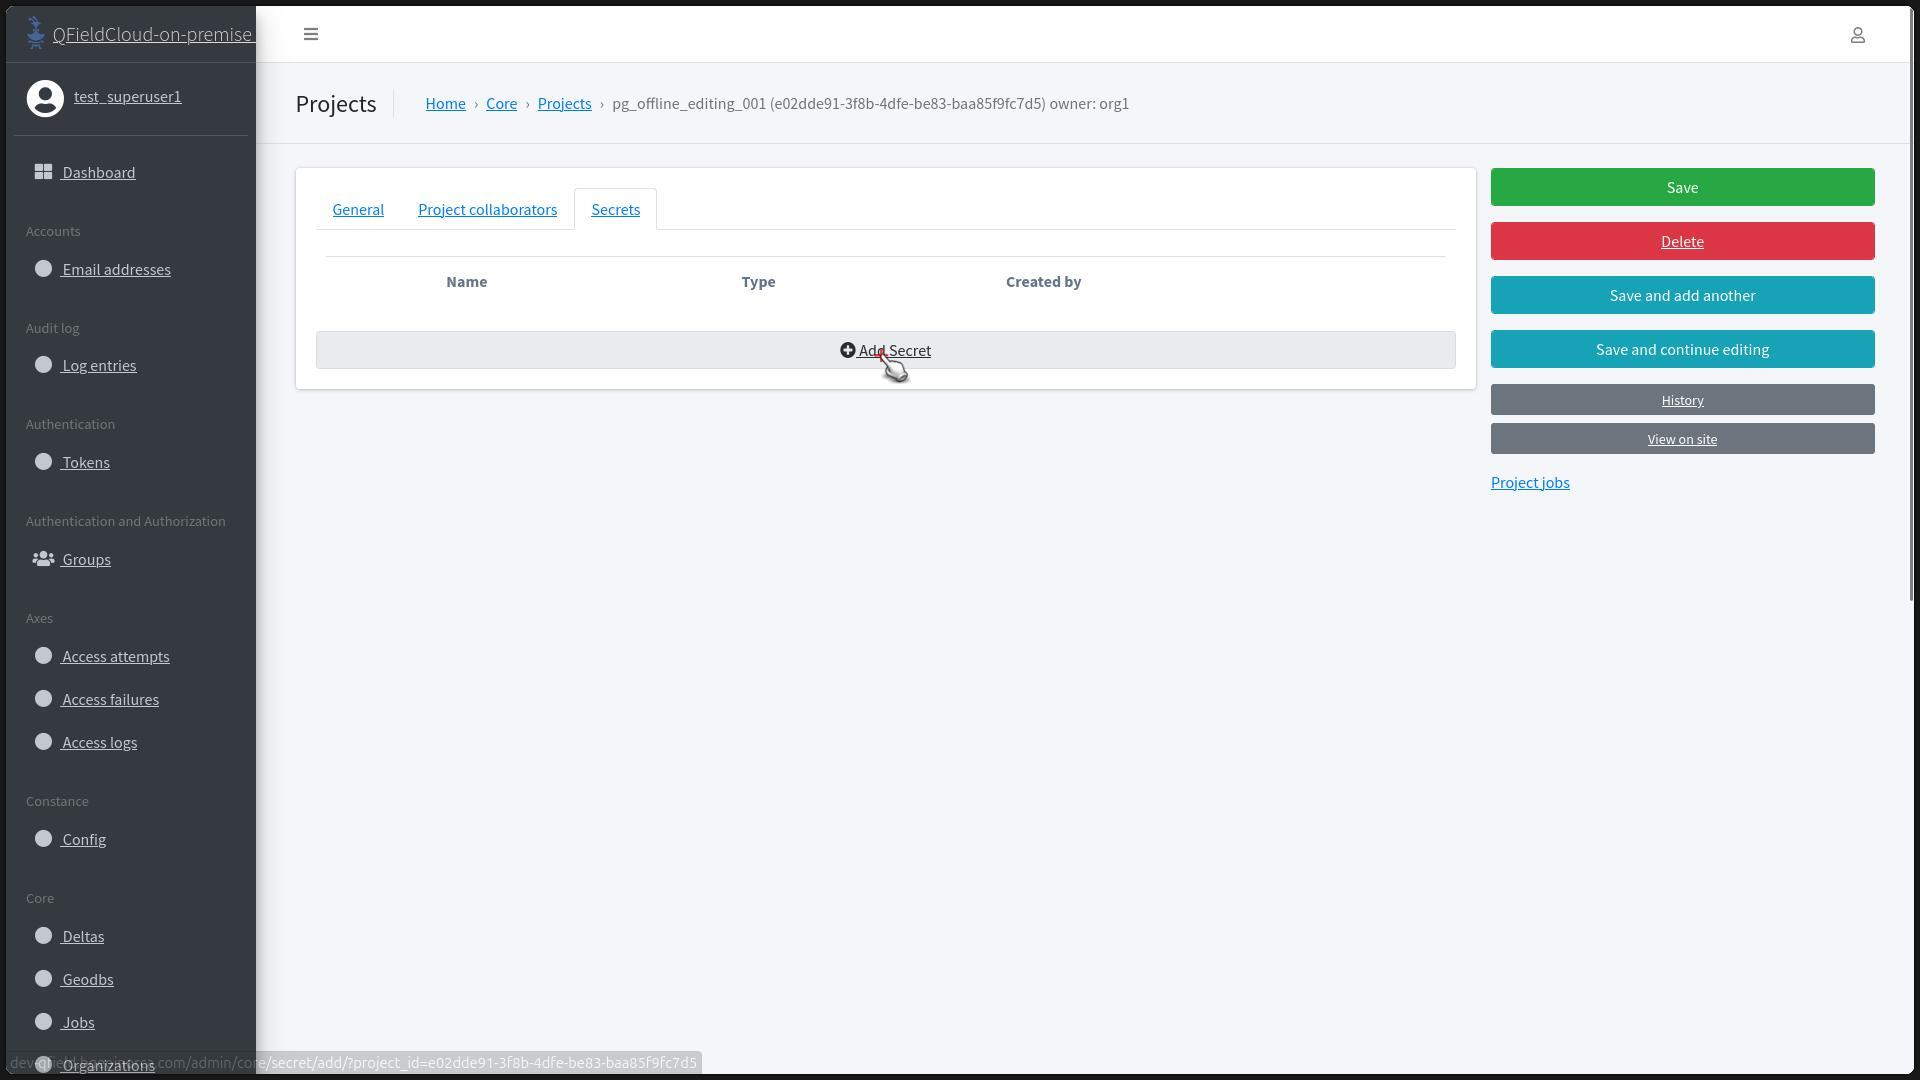
-
Click on "Add Secret".
-
Fill in the "Name" of the secret (this should be in all uppercase). In the "Type" field, choose "pg_service" from the dropdown list.
-
Fill the "Value" field with the credentials of the
pg_serviceconnection established on the layers.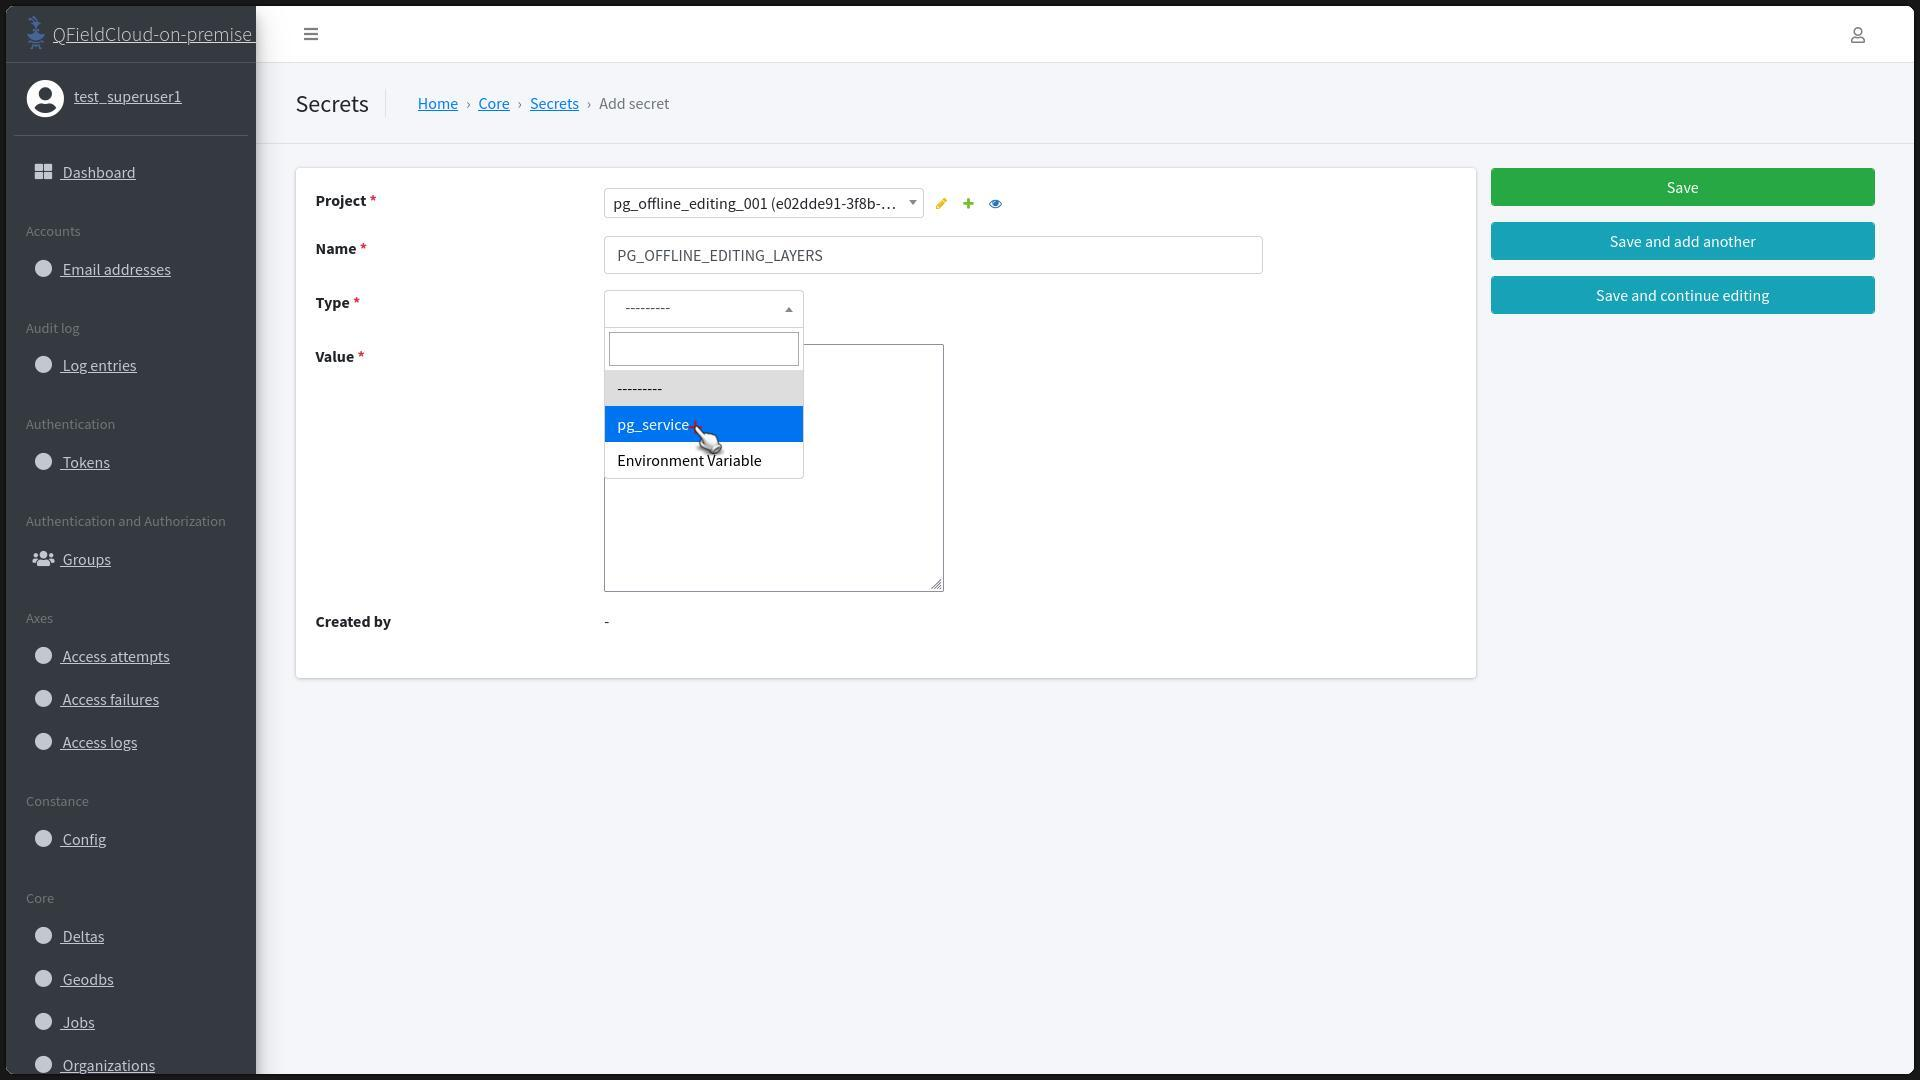
-
Click to "Save" the updated data for the project.
- You will be redirected to the "Secrets" page with a success message.