QField general settings
フィールドマーク
The general settings screen allows you to control the basic appearance and behavior of QField. You can access the general settings in two ways.
Workflow
Access settings from the Welcome Screen:
- Open QField and tap the settings button on the top-left corner of the screen.
Access settings inside an active project:
- Open the Side Dashboard.
- Tap the three-dotted menu (⋮) and select Settings.
In the following sections, the different setting options will be described
Map canvas
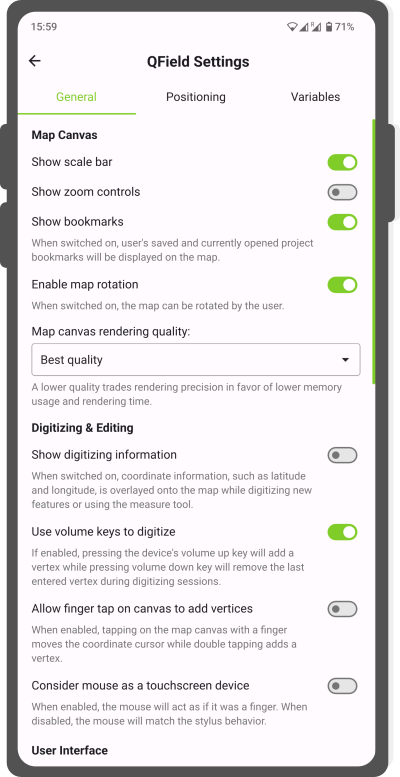
- Show scale bar: By enabling the Show scale bar it will show the scale bar on the map.
- Show zoom controls: By enabling this option, the zoom buttons (+/-) will appear on the map.
- Show bookmarks: By enabling this option, your personal locally created bookmarks and currently opened project bookmarks will be displayed on the map.
- Enable map rotation: When enabled, you can rotate the map.
- Map canvas rendering quality: If high memory use is an issue, you can reduce the rendering quality which lowers the memory usage and the rendering time. This comes with the cost of rendering precision.
Digitizing & editing
- Show digitizing information: When enabling this option, coordinate information, such as latitude and longitude, are shown underneath your crosshair while digitizing new features or using the measuring tool.
- Fast editing mode: If enabled, QField will immediately and automatically save any changes made during an edit operation.
- Use volume keys to digitize: If enabled, pressing the device's volume up key will add a vertex while pressing volume down key will remove the last entered vertex during digitizing sessions.
-
Allow finger tap on canvas to add vertices: If enabled, tapping the map canvas with a finger will redirect the coordinate cursor to the required location. This option is useful, when mapping features on a larger scale.
-
Consider mouse as a touchscreen device: If enabled, the mouse allows you to add new vertices anywhere on the map. If disabled the cross-hair is fixed to the center and the mouse is used to relocate the cross-hair.
User interface
-
Customize search bar: When pressing the 3-dotted menu (⋮) under the general settings section, a new window will open from which you can personalize your search options.
- Features from active layer: By enabling this option, you will automatically query the layer that is currently active (it is highlighted in the legend). You can refine your search even further by adding an "@" sign when starting your search to only query one attribute. When disabled, you can still access this locator filter typing the prefix f in the search bar.
- Features in all layers: When enabling this option, you can search all features across all layers. If the "Features from active layer" option is enabled you can still search through all layers by adding the prefix af in the beginning of your search.
-
Go to coordinate: By enabling this option, you can simply copy and paste longitude and latitude values to direct to specific locations that are not part of your feature layers. If disabled, you can still access this option by typing go at the start of your query.
Tip
When long-pressing on a point of interest anywhere in your map, you can copy the point location to your clipboard and directly place it in the search bar. Remember to type Go in advance if the Go to coordinate setting has not been enabled and remove the information about the coordinate reference system.
-
Spatial bookmarks: By enabling this option you automatically when using the search bar, the list of pre-configured bookmarks (if any) will be queried. If disabled, you can still access this option by typing b at the front of your query.
- Calculator: By enabling this option, you can do simple calculations and copy the results directly to the clipboard, if necessary. If disabled, the calculator can still be accessed by typing = in the front of the query.
- QField Documentation: If enabled it will return the corresponding documentation pages matching terms. When disabled the documentation can still be queried by putting a "?" in the beginning of the query.
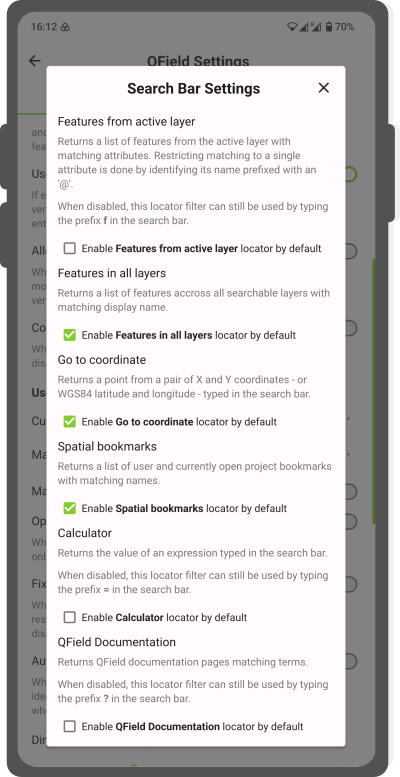
Search Bar Settings -
Manage plugins: By pressing the 3-dotted menu (⋮) a new window will open from which you can enable and disable customised plugins. To add a new plugin see the Plugins Page
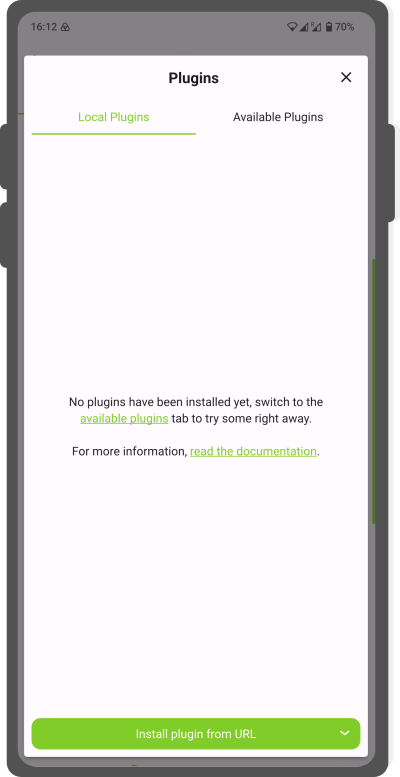
Plugin dialog -
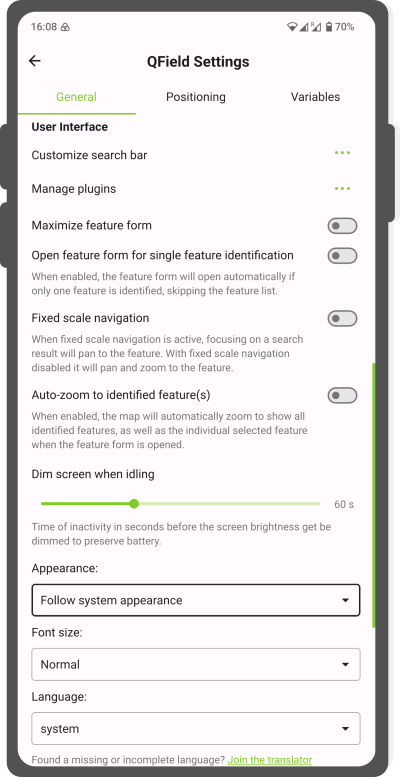
Maximized attribute form: when enabling this option you can maximize the attribute form to cover the whole screen.
- Fixed scale navigation:
- Active fixed scale navigation: Focusing on a search result will highlight and pan to the feature.
- Disabled fixed scale navigation: it will pan, highlight and zoom to the feature.
- Automatically open form for single feature identification: If enabled, when tapping on an individual feature while being in the browse mode, the attribute form will directly be opened.
- Dim screen when idling: To preserve battery, you can change the time when you want your phone to dim the screen when being inactive on QField. When setting it to 0 the dimming will be disabled completely.
- Appearance: Depending on your preference, you can change the QField interface to Light or Dark Mode.
-
User interface font size: You can choose from the following options:
- Tiny
- Normal
- Large
- Extra-large
-
User interface language: QField will by default utilize the language present on your device, if a translation is available. You are cordially invited to enhance the translation in your native language.
高度な使い方
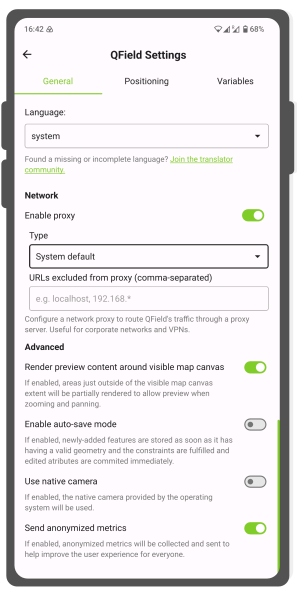
Net proxy
If some of your data are located in a closed environment you can access them through a proxy network. This should be configured in QGIS beforehand.
QField also can access the data once the network information is provided:
- Type: Choose the type of proxy you wish to add (eg. HTTP or SOCKS5)
- URLS excluded from proxy: You can add selected URLs that can route QField's traffic through a proxy.
Use native camera
QField has an own internal camera, which provides quite a few options if desirable:
- Geotagging and EXIF variables
- Details stamping
- Size and ratio adjustment
- Camera selection - front and back
Background
If enabled, QField will use the system specific internal camera of the device. Unless errors occur when using the QField specific camera, it is recommended to use the one from QField.
Send anonymized metrics
If enabled, anonymized metrics will be collected and sent to help improve QField for everyone. No personal account data will be sent to the QField development team.