Navigointi
QField tarjoaa navigointitoimintoja, jotka auttavat suunnistamaan maastossa ja saavuttamaan tarkasti annetun määränpään.
Navigoinnin käynnistäminen
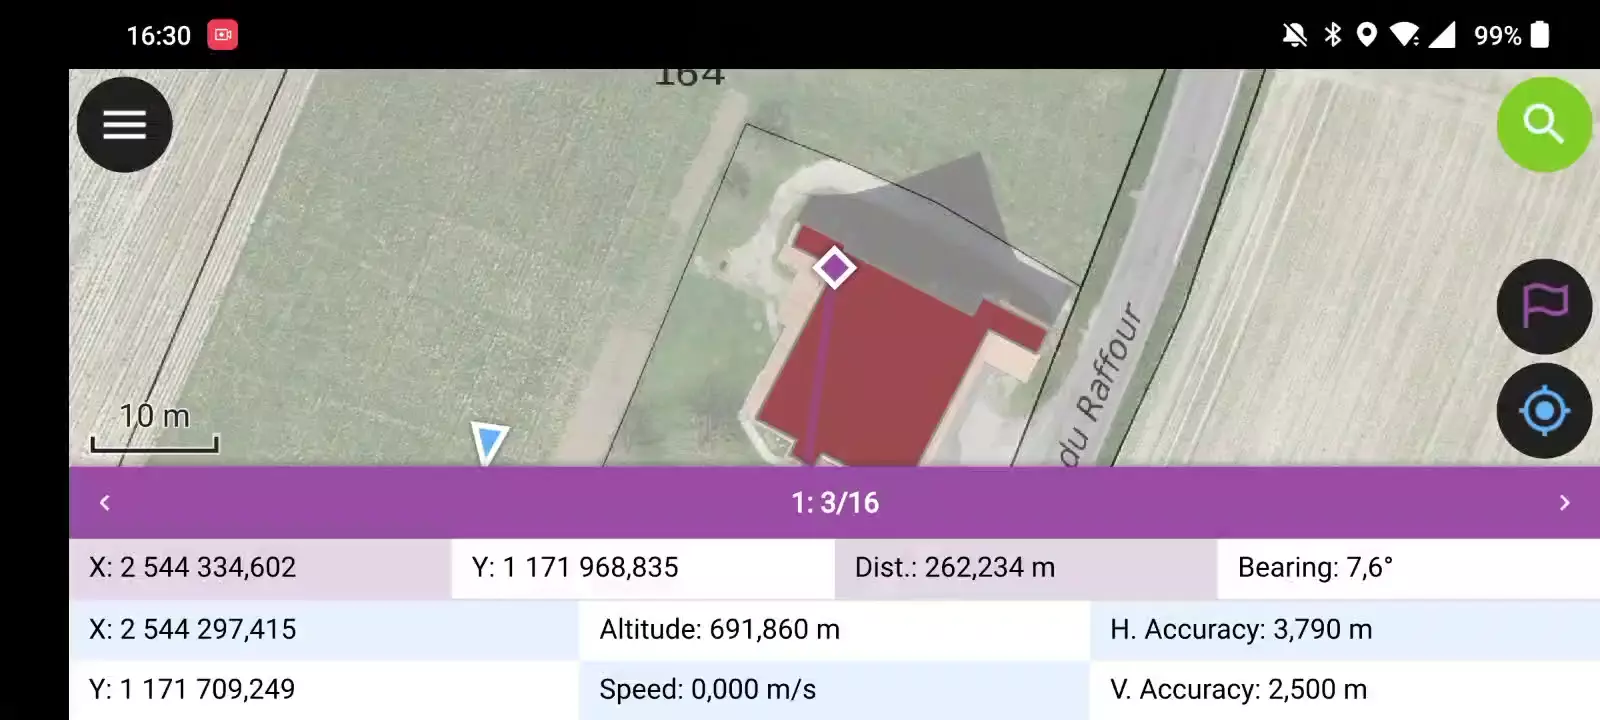
Navigation is enabled when a destination point has been set and positioning is active. When turned on, a set of navigation overlays - a destination marker, a navigation panel, and a navigation control button - appear on the screen.
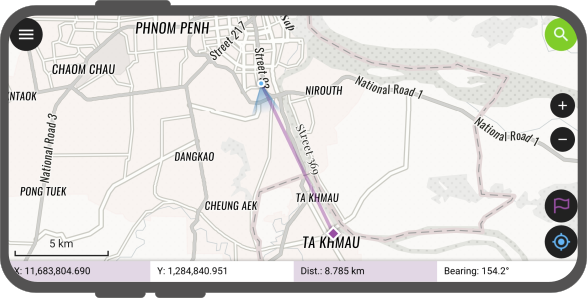
The navigation panel displays useful information such as the destination point coordinates as well as the current distance and bearing to it.
To disable navigation, clear the destination point by pressing long on the navigation control button located at the bottom right corner.
Kohdepisteen asettaminen
Maastotyö
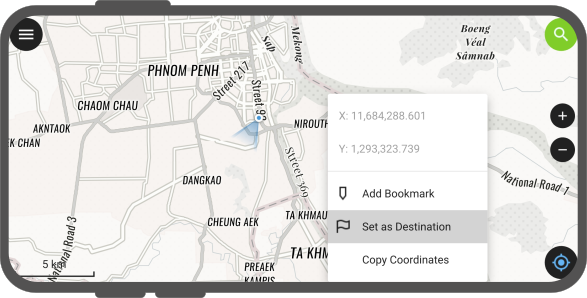
There is several options to set a navigation destination point. A quick way is to simply tap and hold on any part of the map and select the Set as Destination action within the popped up menu.
You can also set the destination point by typing in specific coordinates in the search bar and tapping on the resulting flag navigation icon. You can also search for a specific feature and tap on the flag navigation icon which will also be present in the resulting list of features.

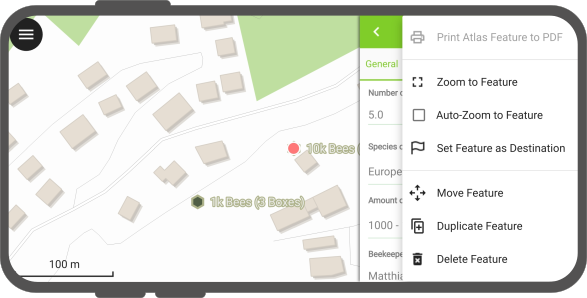
You can also set a destination point by opening the feature form menu and selecting the Set Feature as Destination action.
Finally, you can also set a destination selecting a specific feature, a purple feature bar title appears as part of the navigation information panel. For single points, a destination name is displayed (matching a given vector layer's display name field / expression).
For multipoint or {multi,single}{line,polygon}, new navigation buttons are located on the left and right of the destination name. Those buttons allow users to cycle through vertices of the feature picked as navigation destination. Tapping and holding onto these buttons will cycle through vertices (comes in handy when you have a feature with a large vertex count).
Nykyisen sijainnin ja määränpään automaattinen jäljitys
Maastotyö
QField mahdollistaa sen, että sen kartta voi seurata automaattisesti laitteen nykyistä sijaintia ja määränpäätä ja keskittää kartan laajuuden uudelleen näiden kahden pisteen ympärille.
To activate this auto tracking feature, you can simply tap on the positioning button and the navigation control button. Both buttons should show their auto tracking mode active by having their background color turn to blue and purple.
![]()
Tätä voidaan kuvata yksinkertaiseksi merkintatilan toiminnallisuudeksi.
"Merkkaa" tarkka näyttö
Maastotyö
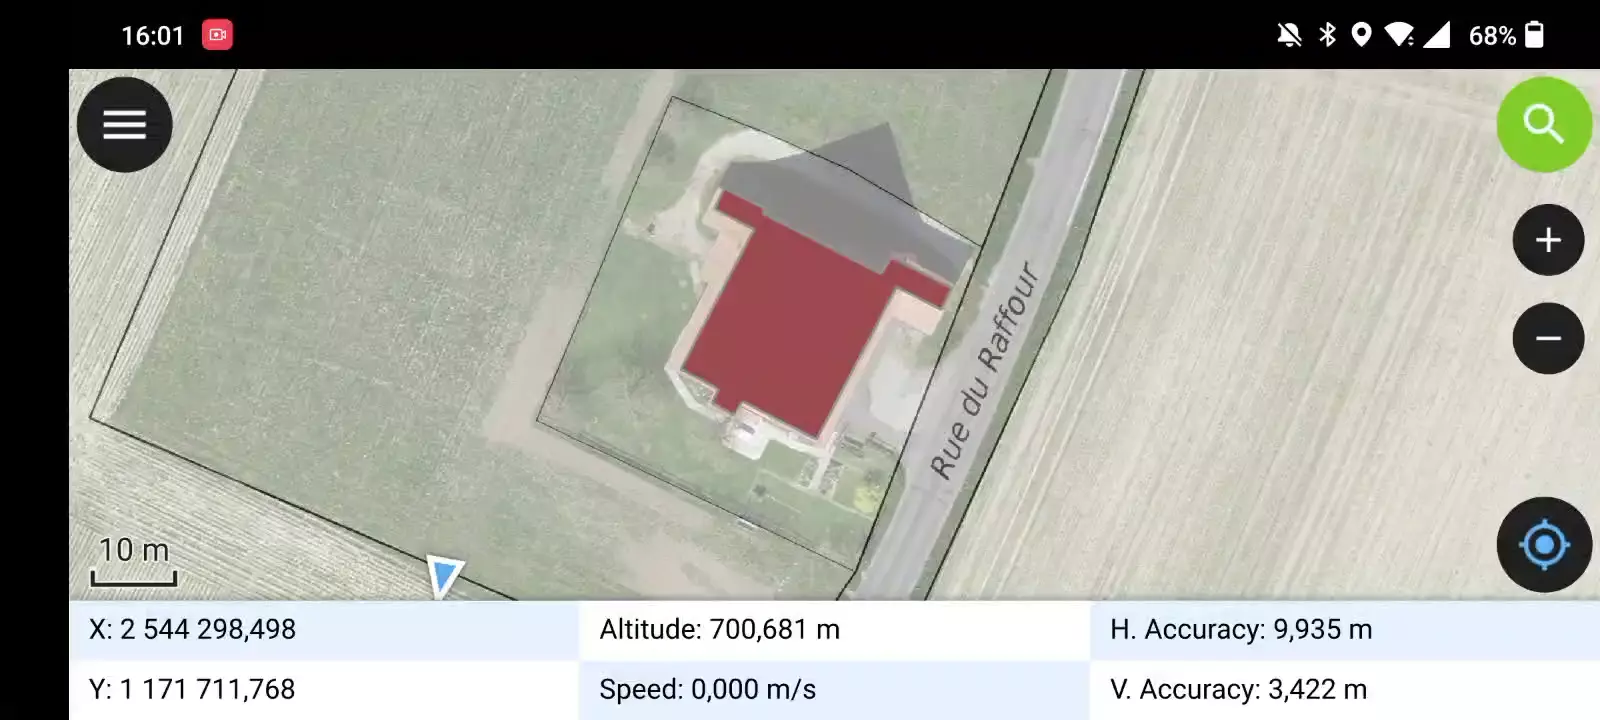
QField's "stakeout" precise view panel appears when the distance between the current location and the destination is less than a pre-defined threshold (by default 5 meters) and the positioning device has an accuracy that is less than half of that threshold. The precise view visibility threshold value can be modified by pressing long on the bottom-right navigation button and selecting the Precise View Settings menu item.
The precise view will turn green when the current location is considered to have hit the target. This state considers both the positioning device accuracy as well as the precise view threshold value, whereas QField will consider having hit the target when the distance between the current location and the destination minus the positioning device's accuracy is less than 1/10th of the precise view threshold. E.g.: if your precise view threshold is set to 1 meter and your positioning device accuracy is 0.05 meter, the view would turn green when the position is less than 15cm from the destination.
Kun etäisyys määränpäähän putoaa tarkan katselukynnyksen sisälle, QField lähettää äänipalautteen pingin muodossa lyhentävin väliajoin, kun nykyinen sijainti lähestyy kohdetta. Äänipalaute voidaan poistaa käytöstä painamalla pitkään oikeassa alakulmassa olevaa navigointipainiketta, valitsemalla valikkokohdan Tarkat näkymäasetukset ja poistamalla valinta Ota äänen läheisyyspalaute käyttöön.
On myös mahdollista, että tarkka näkymä on aina näkyvissä painamalla pitkään oikeassa alakulmassa olevaa navigointipainiketta, valitsemalla Tarkan näkymän asetukset -valikkokohdan ja valitsemalla Näytä aina tarkka näkymä. Kun tämä on käytössä, tarkka näkymä tulee näkyviin aina, kun navigointikohde on asetettu, ja se toimii visuaalisena kompassina tarjoten nuolen tarkkuuskohteen reunassa.