Navigation
QField bietet Navigationsfunktionen, die Ihnen helfen, sich im Feld zu orientieren und ein bestimmtes Ziel genau zu erreichen.
Navigation aktivieren
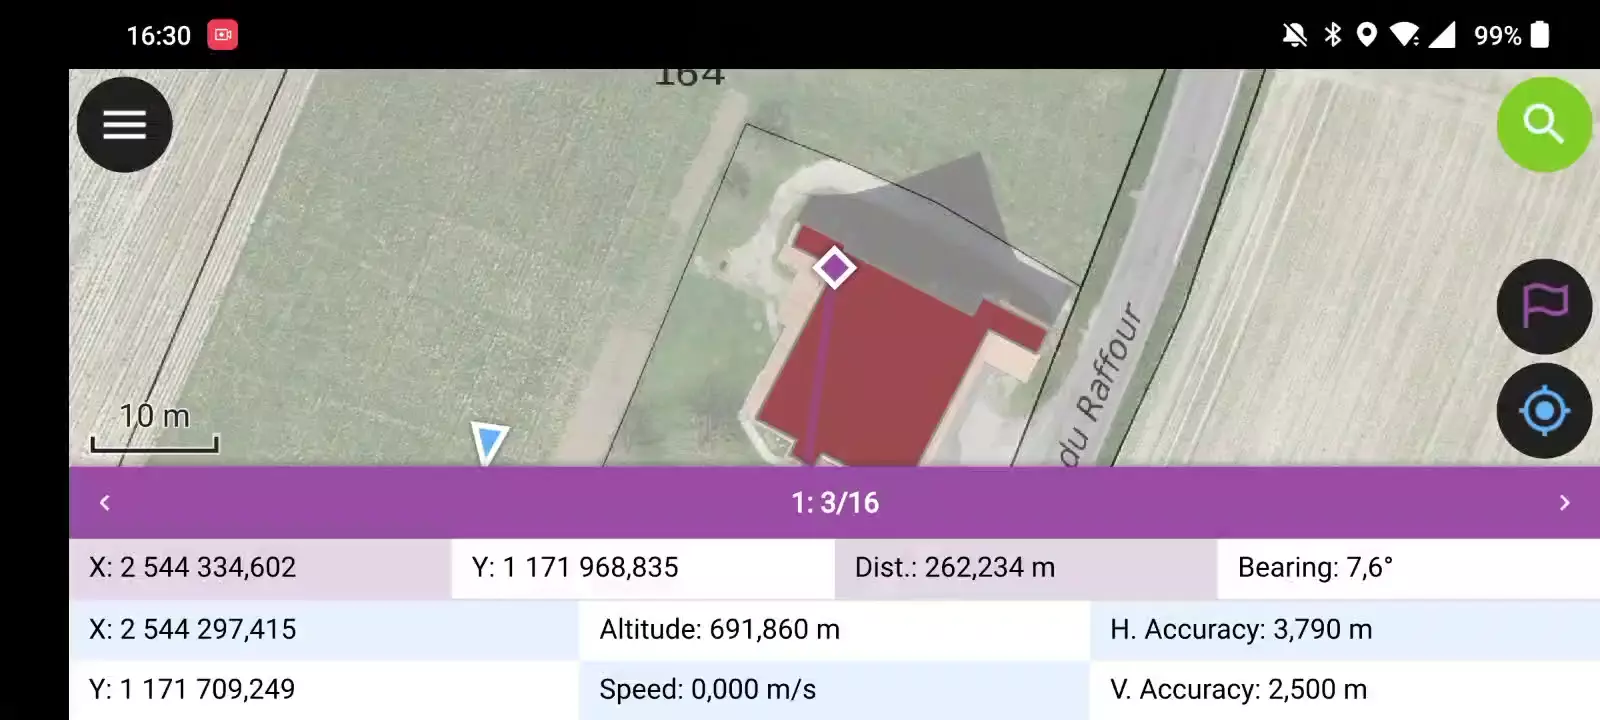
Navigation is enabled when a destination point has been set and positioning is active. When turned on, a set of navigation overlays - a destination marker, a navigation panel, and a navigation control button - appear on the screen.
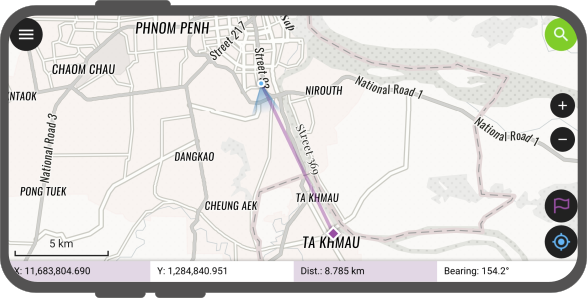
The navigation panel displays useful information such as the destination point coordinates as well as the current distance and bearing to it.
To disable navigation, clear the destination point by pressing long on the navigation control button located at the bottom right corner.
Zielpunkt einstellen
Feldarbeit
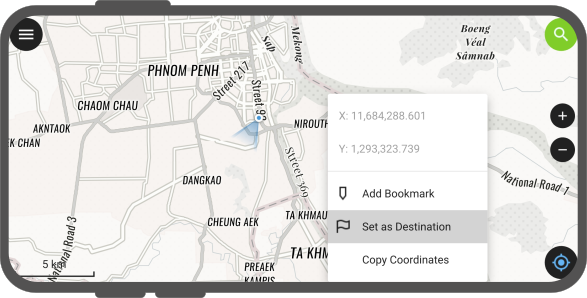
There is several options to set a navigation destination point. A quick way is to simply tap and hold on any part of the map and select the Set as Destination action within the popped up menu.
You can also set the destination point by typing in specific coordinates in the search bar and tapping on the resulting flag navigation icon. You can also search for a specific feature and tap on the flag navigation icon which will also be present in the resulting list of features.

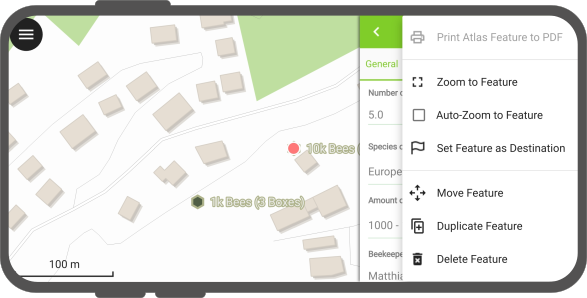
You can also set a destination point by opening the feature form menu and selecting the Set Feature as Destination action.
Finally, you can also set a destination selecting a specific feature, a purple feature bar title appears as part of the navigation information panel. For single points, a destination name is displayed (matching a given vector layer's display name field / expression).
For multipoint or {multi,single}{line,polygon}, new navigation buttons are located on the left and right of the destination name. Those buttons allow users to cycle through vertices of the feature picked as navigation destination. Tapping and holding onto these buttons will cycle through vertices (comes in handy when you have a feature with a large vertex count).
Automatische Verfolgung des aktuellen Standorts und Ziels¶¶
Feldarbeit
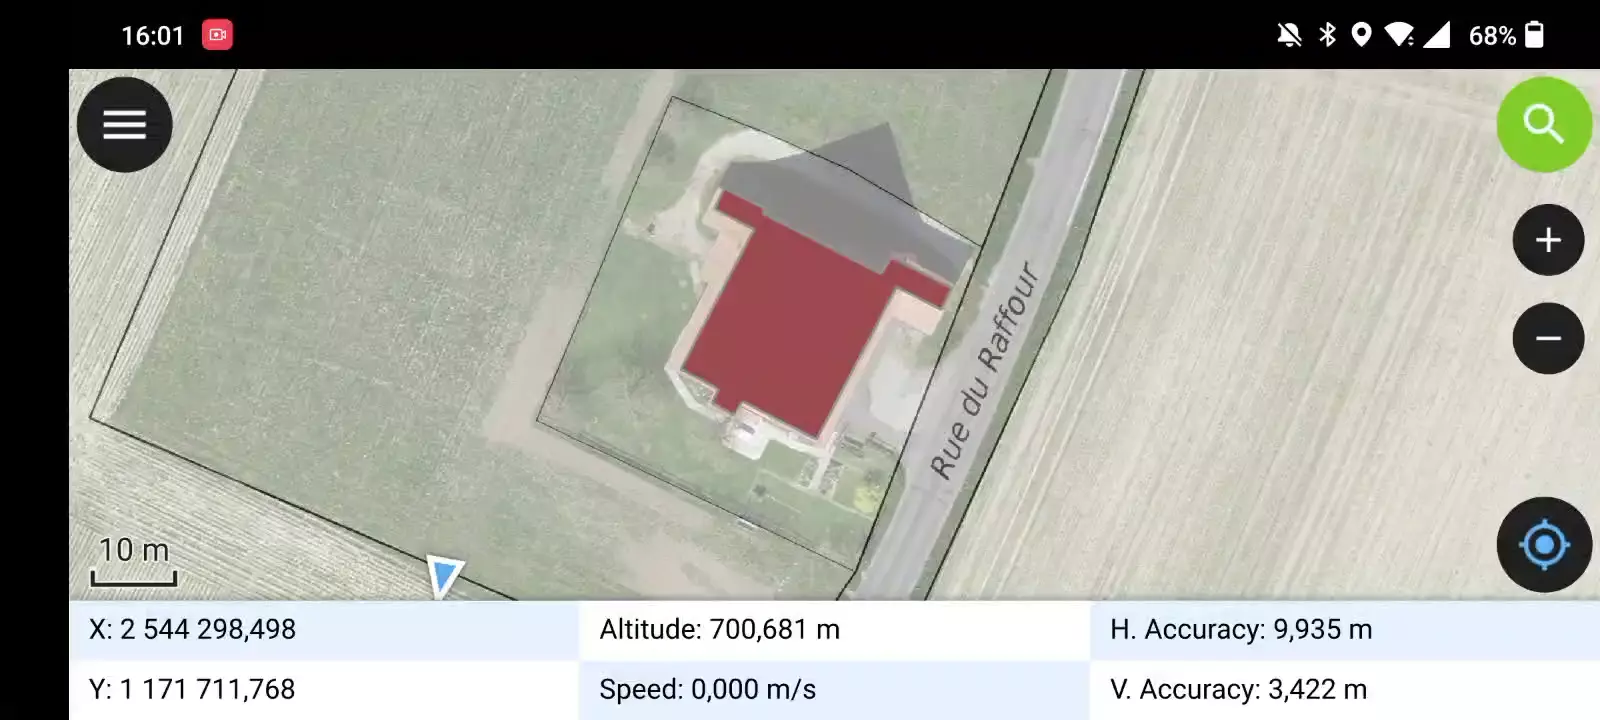
QField ermöglicht es seiner Karte, automatisch den aktuellen Standort des Geräts und das Ziel zu verfolgen und die Kartenausdehnung um diese beiden Punkte herum neu zu zentrieren.
To activate this auto tracking feature, you can simply tap on the positioning button and the navigation control button. Both buttons should show their auto tracking mode active by having their background color turn to blue and purple.
![]()
Dies kann als eine einfache Staking-Modus Funktionalität beschrieben werden.
"Abstecken" - präzise Ansicht
Feldarbeit
QField's "stakeout" precise view panel appears when the distance between the current location and the destination is less than a pre-defined threshold (by default 5 meters) and the positioning device has an accuracy that is less than half of that threshold. The precise view visibility threshold value can be modified by pressing long on the bottom-right navigation button and selecting the Precise View Settings menu item.
The precise view will turn green when the current location is considered to have hit the target. This state considers both the positioning device accuracy as well as the precise view threshold value, whereas QField will consider having hit the target when the distance between the current location and the destination minus the positioning device's accuracy is less than 1/10th of the precise view threshold. E.g.: if your precise view threshold is set to 1 meter and your positioning device accuracy is 0.05 meter, the view would turn green when the position is less than 15cm from the destination.
Wenn die Entfernung zum Ziel innerhalb des Schwellenwerts für die präzise Ansicht liegt, gibt QField ein Audio-Feedback in Form eines Ping aus, dessen Intervalle mit zunehmender Annäherung an das Ziel abnehmen. Das Audio-Feedback kann deaktiviert werden, indem Sie lange auf die Navigationstaste unten rechts drücken, den Menüpunkt Präzisionsansicht-Einstellungen auswählen und das Häkchen bei Audio-Annäherungsalarm aktivieren entfernen.
Es ist auch möglich, die präzise Ansicht immer sichtbar zu machen, indem Sie lange auf die Navigationstaste unten rechts drücken, den Menüpunkt Präzisionsansicht-Einstellungen auswählen und Präzisionsansicht immer anzeigen aktivieren. Wenn diese Option aktiviert ist, wird die präzise Ansicht immer dann angezeigt, wenn ein Navigationsziel festgelegt wurde und dient als visueller Kompass, der einen Pfeil am Rand des Präzisionsziels anzeigt.