Advanced setup guide
Supported vector providers
Currently, QFieldCloud supports GeoPackage and PostGIS layers for collaborative editing. Other formats supported by QGIS should also work but are not officially supported.
Working with GeoPackages
Using GeoPackages is usually the best choice for a simple setup to centralize data collected by your QField users to one single file.
If you would like to set up a relation, it is recommended to add a UUID field and to use that as the primary or foreign key.
Note
Do not use the default 'fid' field for relations (as primary or foreign key). It will lead to errors over time.
Example workflow (GeoPackage)
Desktop preparation
- Create a new project.
- Create GeoPackage layers, save it in the same folder than the QGIS project.
- Set the GeoPackage to "Offline editing" in the QFieldSync plugin.
- Upload the project to QFieldCloud.
Fieldwork
- Sign in to QFieldCloud and download the project to your device.
- Collect and edit some data and upload the changes.
Desktop
- Using QFieldSync, download the updated files (the GeoPackage file should have changed).
Warning
This workflow does not support changing the GeoPackage on the desktop, as being file-based, the whole GeoPackage will be replaced. This means that data can only be digitized using QFieldCloud.
PostGIS
Using PostGIS layers is a good choice if your data should directly be editable for multiple users through QFieldCloud when they sync their work without any further steps.
It requires your database to be publicly accessible, and credentials must be saved unencrypted in the QGIS project. Please be aware of the security implications of such requirements, and remember to have backups.
Example workflow (PostGIS)
Desktop preparation
- Create a new project.
- Create add a PostGIS layer, making sure to store the credentials in the project.
- Make sure the PostGIS database connection is publicly accessible (public IP or domain name, it will not work with 127.0.0.1 or localhost).
- In the QFieldSync project settings, set the GeoPackage to
Offline editingif your QField users will not have a reliable internet connection in the field orDirect database access. - Upload the project to QField cloud.
Fieldwork
- Signin to QFieldCloud and download the project.
- Collect some data (and upload the changes once back at the office if you were using
Offline editing).
Desktop
- All changes should be directly visible inside the PostGIS database.
Note
When using direct database access, QFieldCloud will directly edit data in the PostGIS database.
This will only work with a reliable internet connection in the field, but has the advantage that all data is directly visible to all users and allows to use any PostGIS specific setup (triggers, generated fields, etc).
Note
When using offline editing, QField will work on a local copy of the database in a GeoPackage, which will be synced by QFieldCloud to the original database once synchronized by the user.
This is the best choice if the connection in the field is not reliable
Changes will only be visible to users once the synchronization via QFieldCloud has been applied on the different devices.
As a local copy is created, advanced PostGIS operations (like triggers) will not be available on QField.
Just like for regular GeoPackages, if relationships are defined, it is recommended to use a UUID field instead of the fid as the primary key to avoid conflicts if multiple users create data at the same time.
You can find more information on QFieldCloud technical reference.
Enabling automatic pushing of changes to QFieldCloud
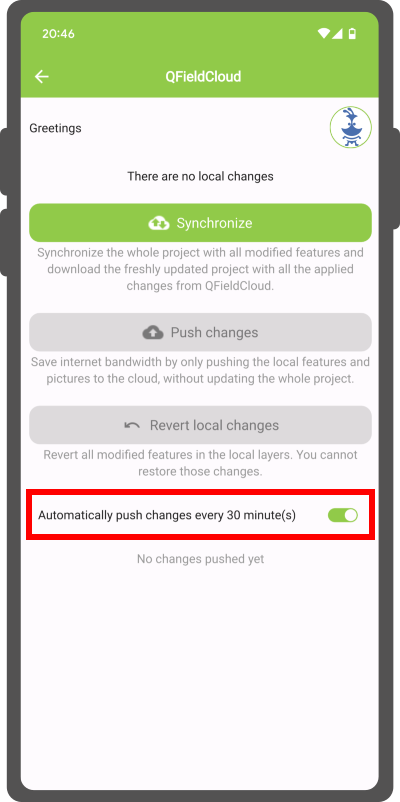
With this functionality, users and managers of QFieldCloud projects can enforce automatic pushing of pending changes to QField devices in the field, as well as specify the interval in between automated pushes. The functionality is activated through a project setting, allowing remote activation.
Desktop preparation
-
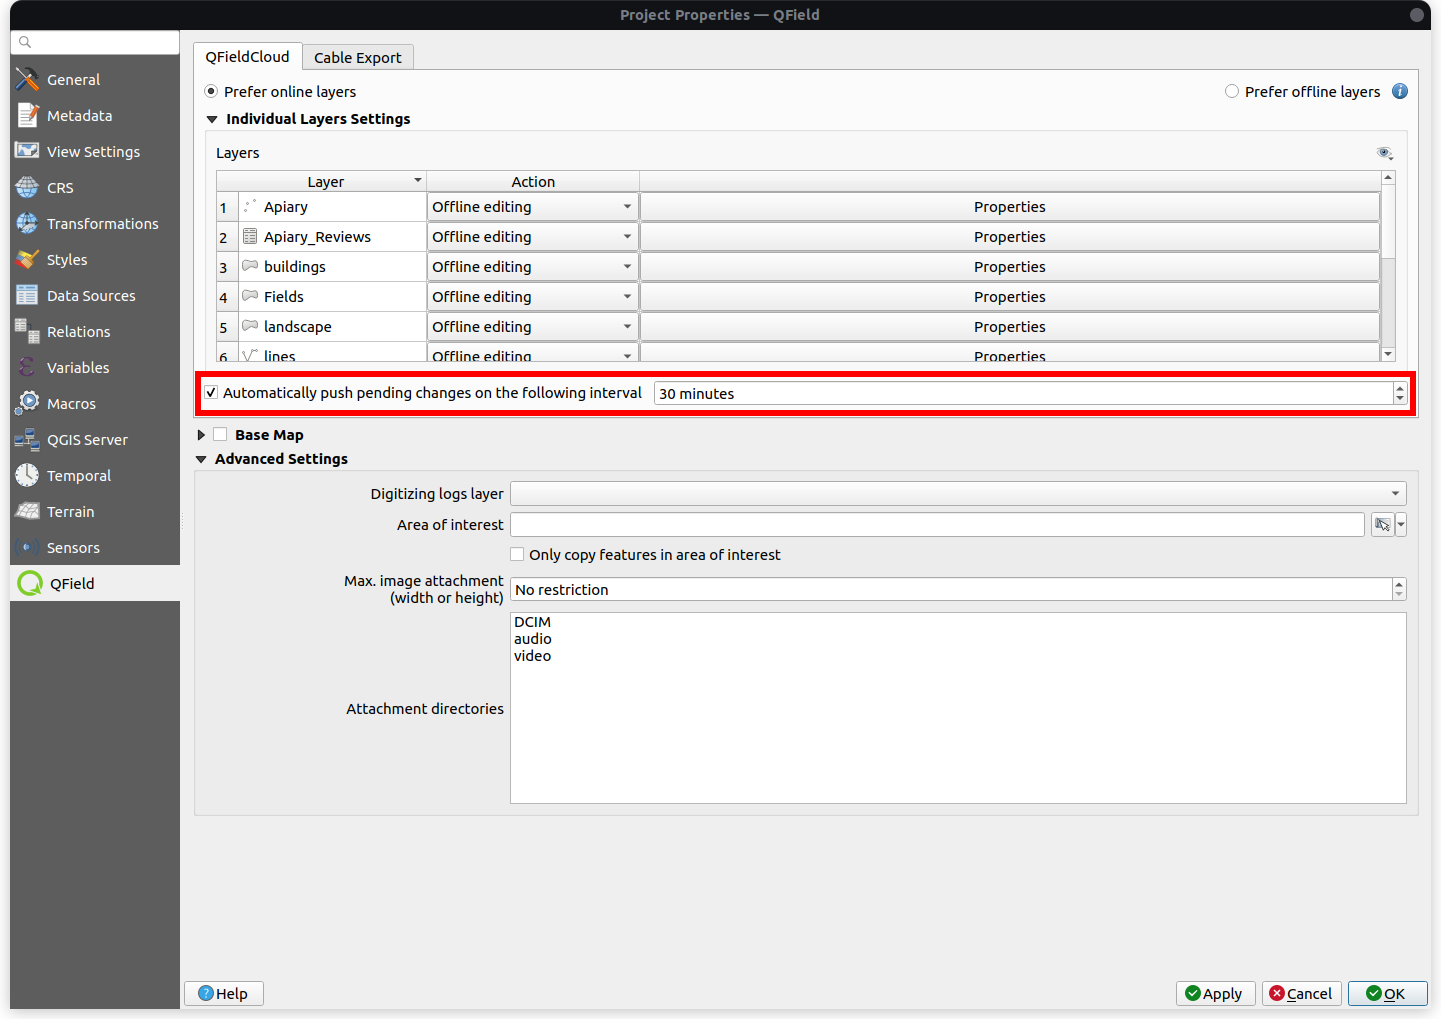
Access Project Settings: Navigate to the QField panel in the Project Settings dialog provided by the QFieldSync plugin.
-
Enable Auto-Push: Toggle the "Automatically push pending changes on the following interval" option and establish your preferred interval.
Note
Benefits:
- Real-Time Updates: Ensures prompt synchronization of field data with the QFieldCloud project.
- Streamlined Workflow: Minimizes manual intervention and ensures surveyors do not need to worry about synchronization, helping them focus on data quality.
Considerations:
- Network Stability: Ensure stable internet connectivity for auto-push functionality.
- Battery Optimization: Implement strategies to mitigate battery consumption on QField devices during prolonged fieldwork.
Create a project in an organization
How to create a project in an organization:
Option 1: Directly convert your local project to an Organization QFieldCloud project:
-
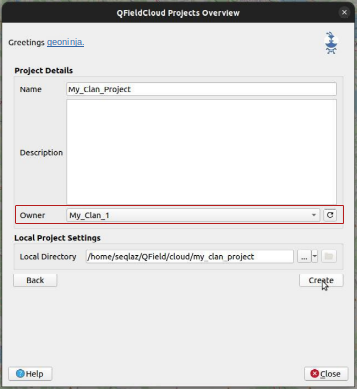
Follow the steps configure your cloud project, until you get to the "Project details".
-
Change the owner of the project to your Organization.
-
Click on "Create" to start the conversion and synchronization. When finish you will see the project is in your Organization in QFieldCloud.
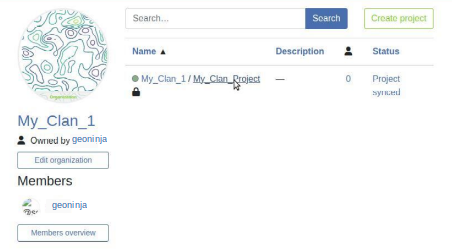
Note
QField Sync 4.6 or newer is required for this functionality
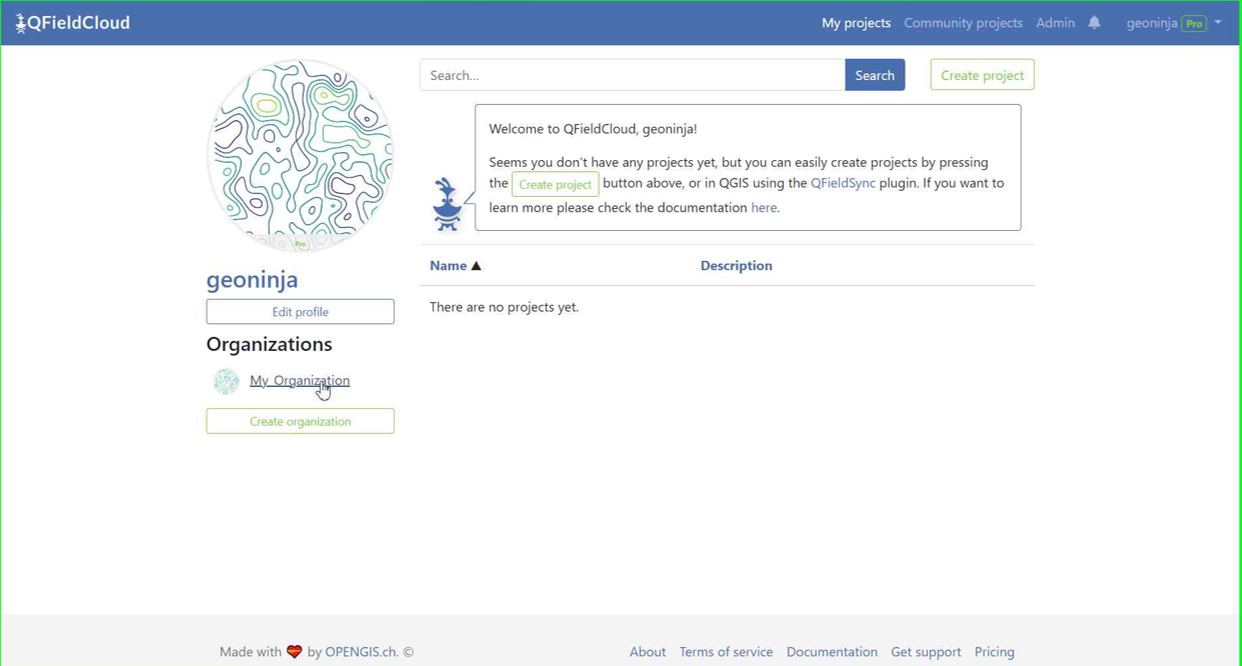
Option 2: Uploading directly to the organization:
-
Select your organization.
-
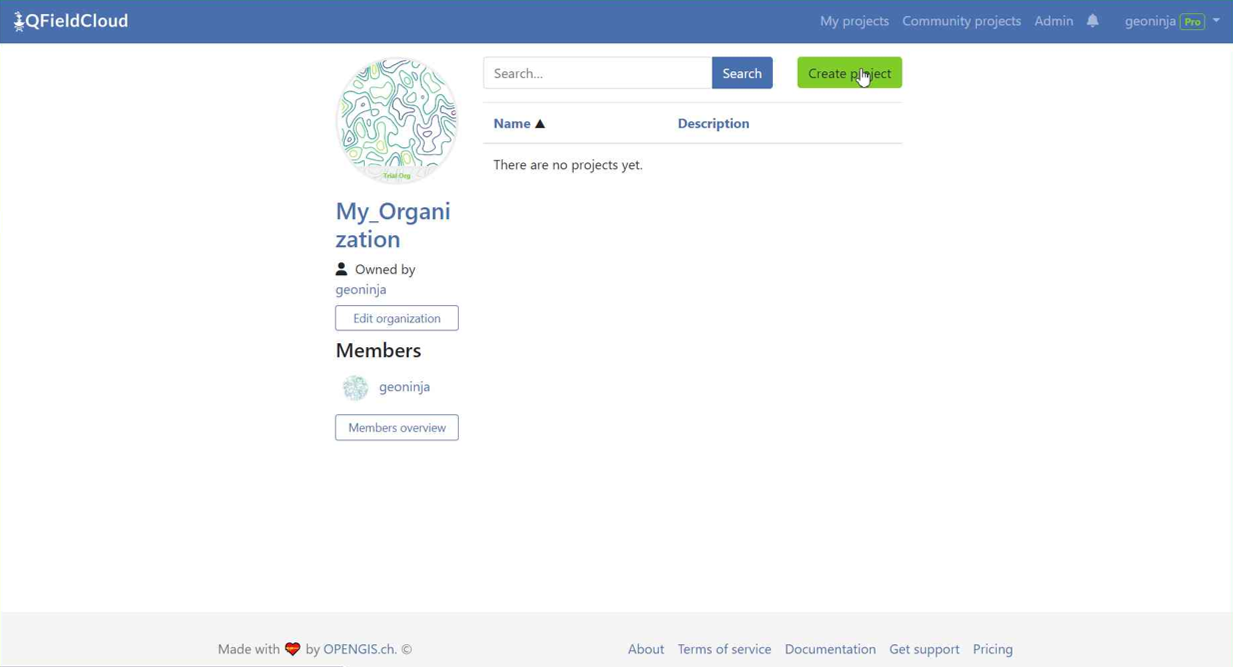
Once you get into the organization, click on "Create a project".
-
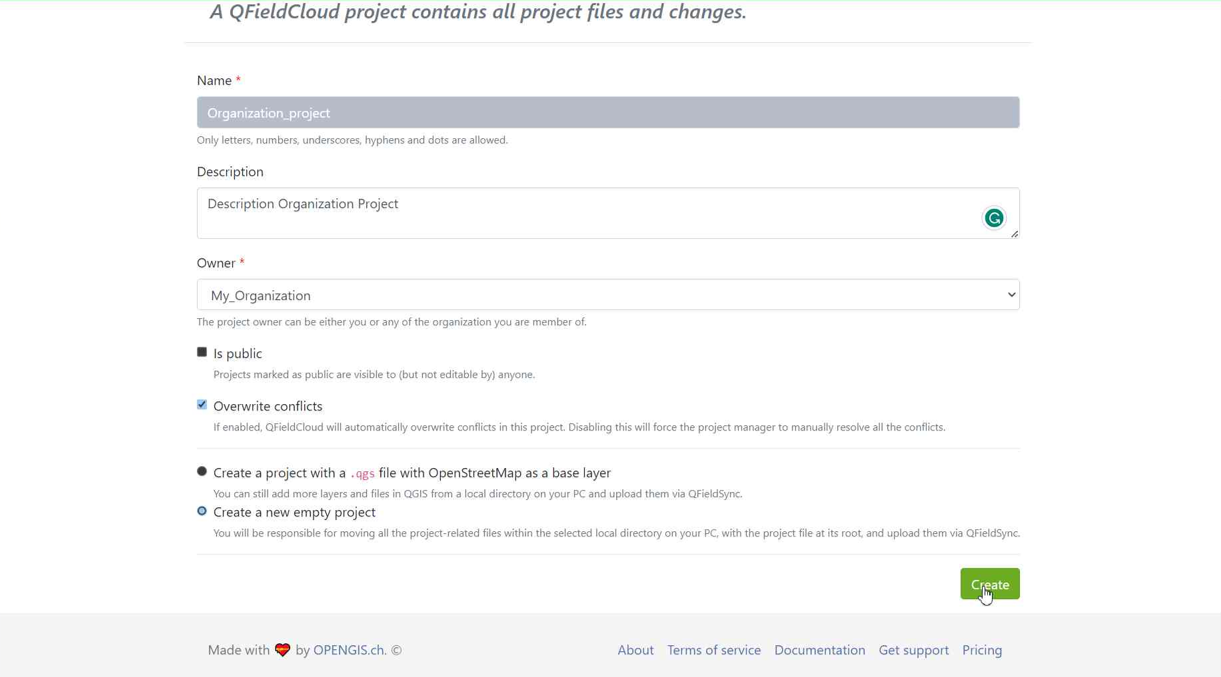
Select "Create a new empty project".
-
You can see the new project in the overview.
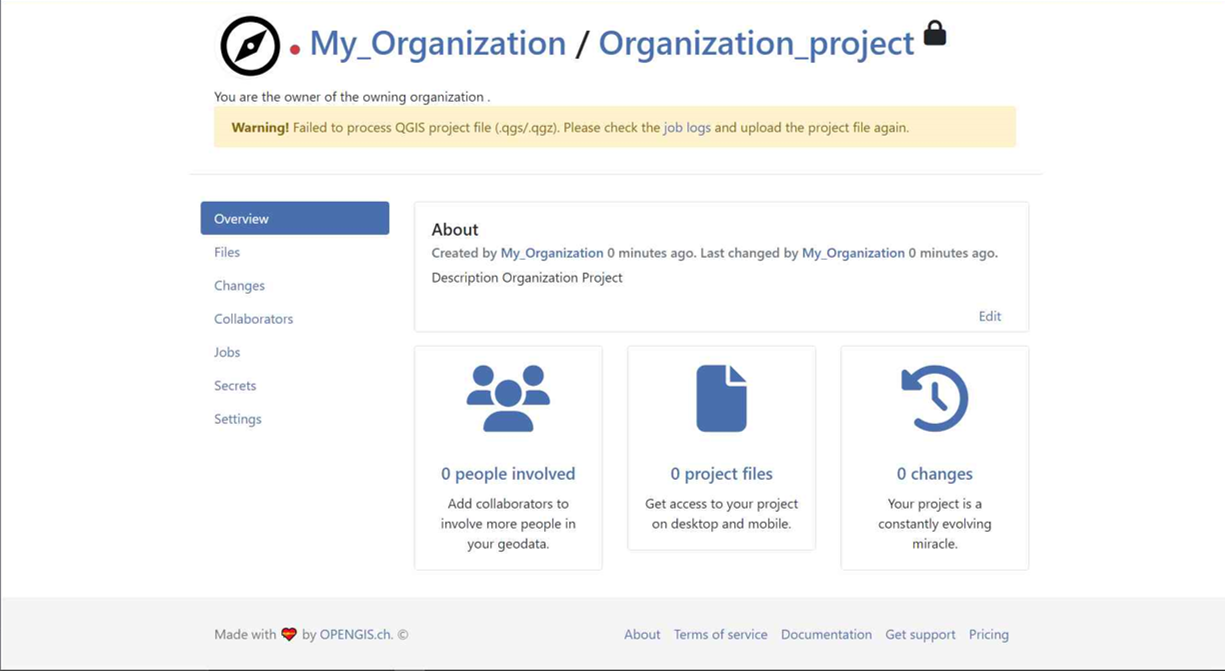
-
On QGIS in QFieldSync, you will see the new project listed, click on "Edit Selected Cloud Project".
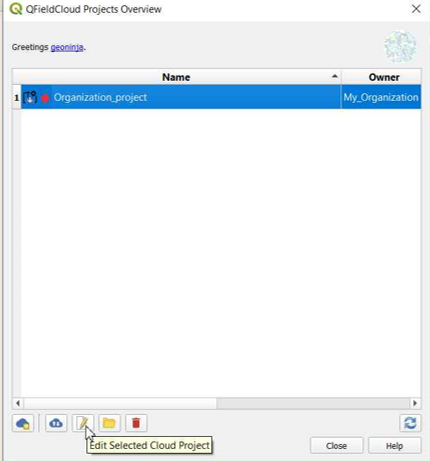
-
Choose the folder where you want to save the project.
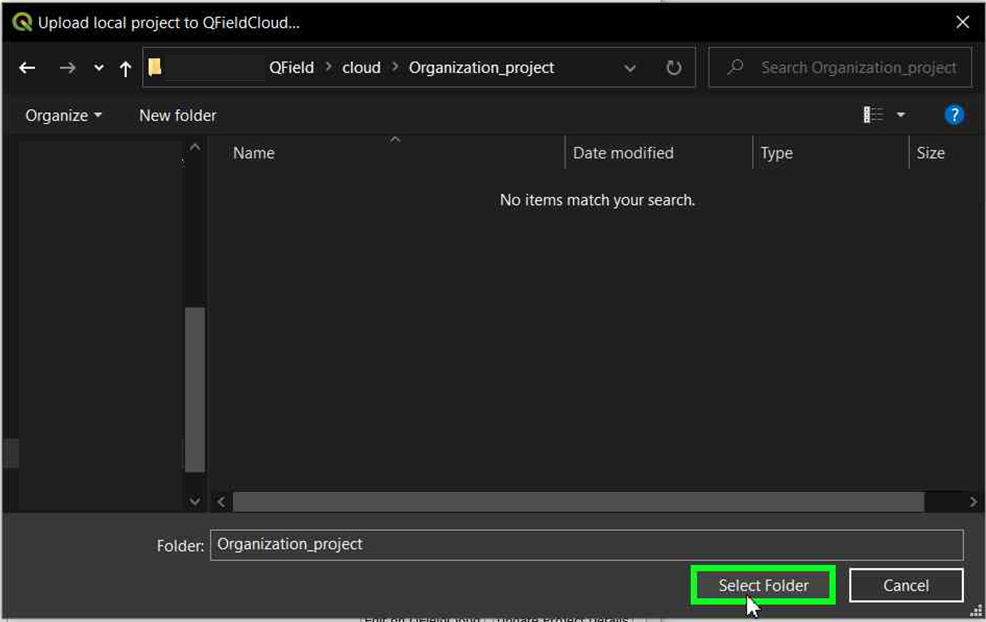
-
In the selected folder, you can either paste an already worked-on project or save a new one.
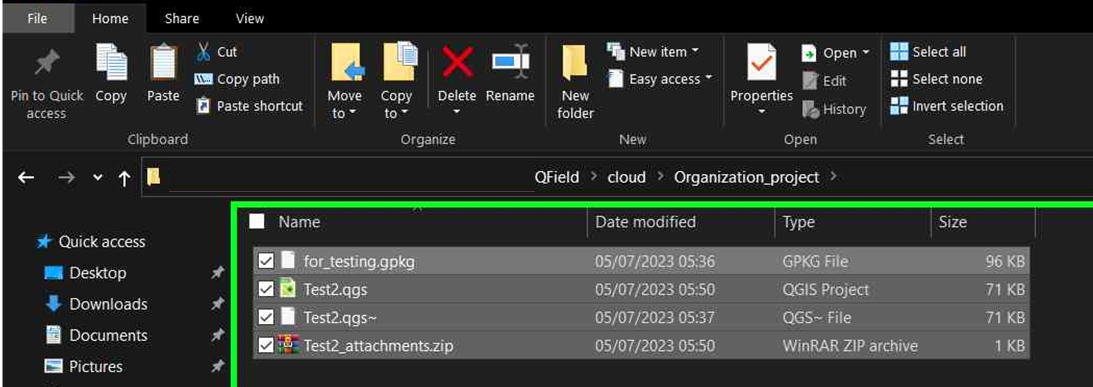
-
Once the folder contains the project, you can synchronize it.
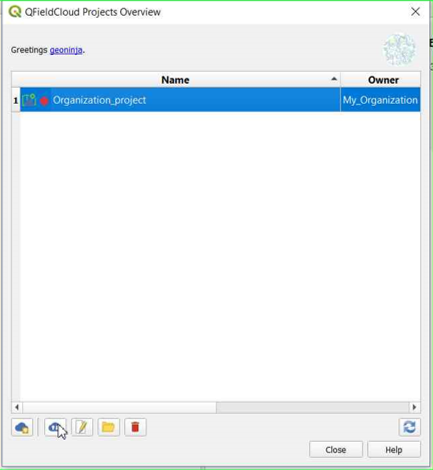
-
Finally, push the changes to the cloud.
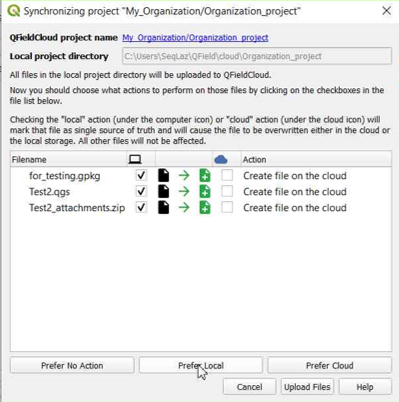
-
You can verify that the files are present in the Organization project.
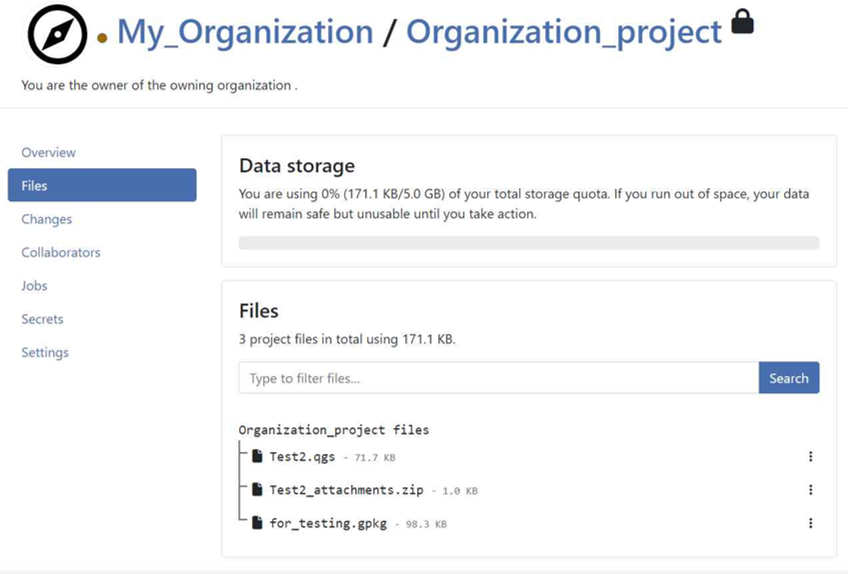
Option 3: Moving the project from your own account to the Organizations:
-
If you already have a project in QFieldCloud (refer to configure your cloud project). In the project, click on "Settings" and select "Transfer ownership of this project" to choose the desired Organization for the transfer.
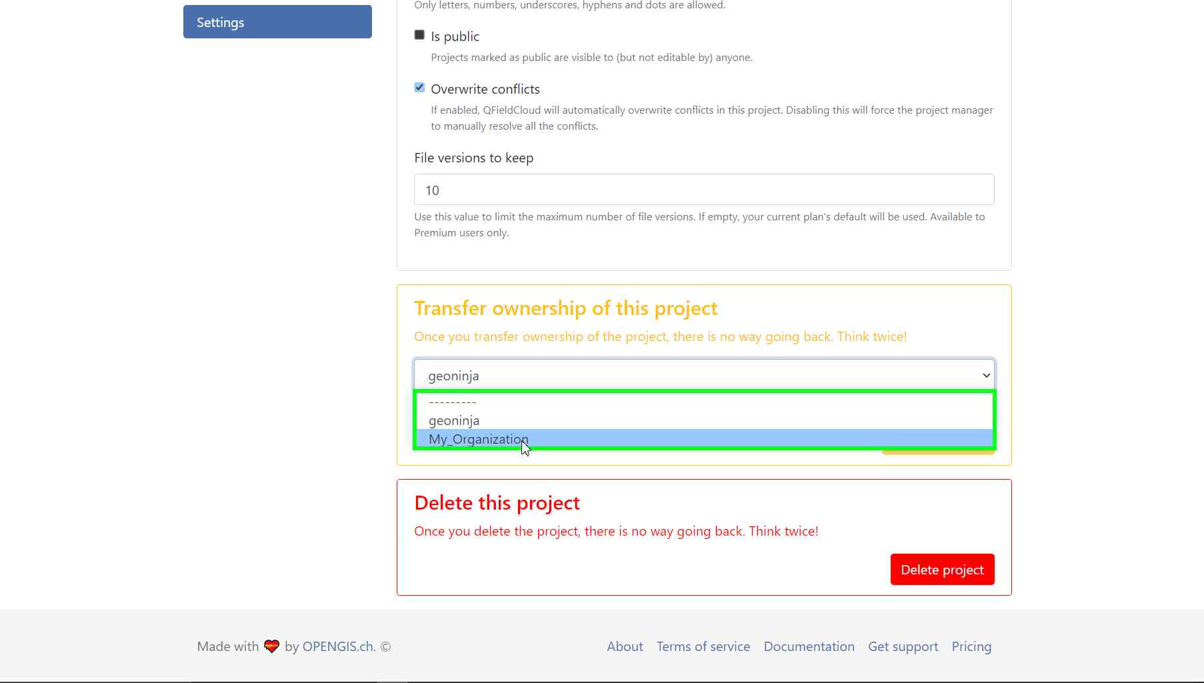
-
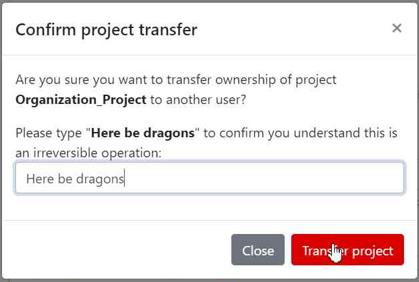
A pop-up window will appear to confirm the transfer. To proceed, you will need to type the requested text and click "Transfer project".
Activate email notifications for QFieldCloud changes
- Access the Settings of your account.
-
Navigate to the Notifications section. Here, you can customize the frequency of notifications you wish to receive at the email address registered with your account.
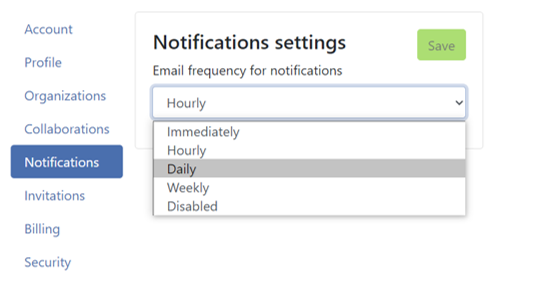
The events you get notified about are: - User created - Organization created - Organization deleted - Organization membership created - Organization membership deleted - Team created - Team deleted - Team membership created - Team membership deleted - Project created - Project deleted - Project membership created - Project membership deleted
You will receive notifications for events in which you are not the actor. These notifications are specifically for events that are initiated by other members of your organization or collaborators on your projects.
Enhance your project with the "Optimized Packager"
We recommend using the new "Optimized Packager" over the deprecated "QGIS Core Offline Editing" for all your projects. Set the packager under "Packaging Offliner" in the "Settings" tab of your project.
The "Optimized Packager" supports consolidating filtered layers of same datasource into a single offline layer, respecting distinct symbology but also using less storage. Here is an example to illustrate this feature:
Example Configuration:
- Layer 1.1:
- Data Source:
layers.gpkg - Table:
layer1 -
Filter:
id % 2 = 1 -
Layer 1.2:
- Data Source:
layers.gpkg - Table:
layer1 - Filter:
id % 2 = 0
Result:
For the new offliner:
- A single layer is generated in the offline geopackage, combining data from layer1 with the specified filters.
For the old (QGIS) offliner:
- Two separate layers are created, each representing the filtered datasets:
- Layer 1: Filtered with id % 2 = 1
- Layer 2: Filtered with id % 2 = 0
Note
This configuration must be set in the Settings page of each project in QFieldCloud.
Connect to a custom QFieldCloud server in QField and QFieldSync
QField and QFieldSync connect to the QFieldCloud service on app.qfield.cloud by default.
You can modify the default QFieldCloud server QField and QFieldSync connect to:
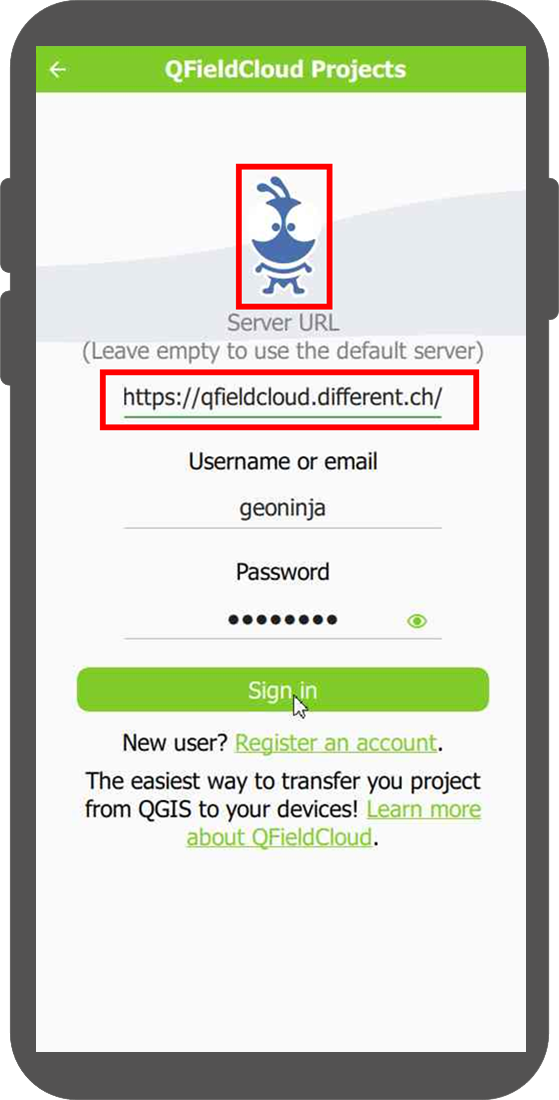
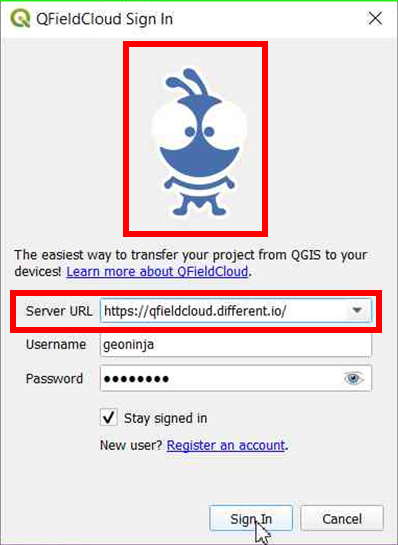
- Open the login screen in QField or QFieldSync.
- Double-tap on the Nyuki icon (the blue bee QFieldCloud logo).
- This action will reveal a field where you can enter the preferred QFieldCloud server address.
- Enter the details of the desired server in the provided field. (Leaving the field empty will connect to the default QFieldCloud server at app.qfield.cloud.)
Note
It's important to note that QFieldSync does not support the same cloud project in multiple QGIS profiles. As a recommendation use a single QGIS profile for your QFieldCloud projects to avoid synchronization issues.
